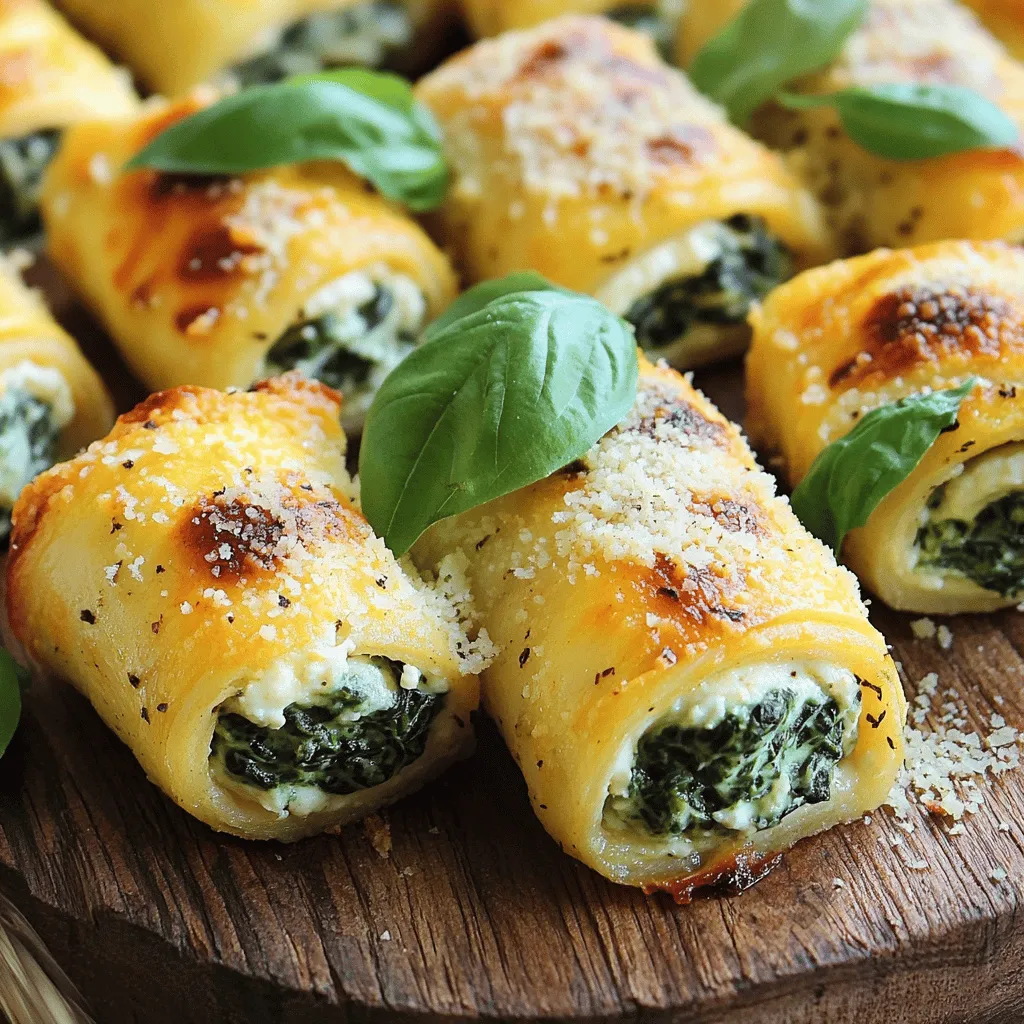
Looking for a delicious way to elevate your chicken dinner? Try these Savory Spinach Stuffed Chicken Roll-Ups! With tender chicken filled with rich spinach and cheese, this dish is both easy to make and packed with flavor. Whether you’re cooking for family or entertaining guests, this recipe will impress everyone. Let’s dive into the ingredients and see how you can whip up this tasty meal in no time!You need simple ingredients that create rich and tasty flavors. The blend of spinach and cheese makes this dish stand out. Plus, it is healthy and filling!
List of Ingredients
– 4 boneless, skinless chicken breasts
– 2 cups fresh spinach, chopped
– 1 cup ricotta cheese
– ½ cup grated Parmesan cheese
– ½ cup shredded mozzarella cheese
– 2 cloves garlic, minced
– 1 teaspoon Italian seasoning
– Salt and pepper to taste
– 1 tablespoon olive oil
– Toothpicks or kitchen twine for securing
Suggested Ingredient Substitutions
You can switch some ingredients based on what you have. If you need a dairy-free option, try using cashew cheese instead of ricotta. For a bolder flavor, add feta cheese. You could also use kale or Swiss chard instead of spinach. If you prefer chicken thighs, they work well too. Just remember to adjust cooking time for thicker pieces. This way, you can make it your own!
Step-by-Step Instructions
Preparing the Spinach Filling
To make the spinach filling, first heat a skillet over medium heat. Add one tablespoon of olive oil. When the oil is hot, add two minced garlic cloves. Cook the garlic for about one minute until you smell its great aroma. Next, add two cups of chopped fresh spinach. Cook the spinach for about two to three minutes until it wilts down. Once wilted, take it off the heat. In a mixing bowl, combine the spinach mixture with one cup of ricotta cheese, half a cup of grated Parmesan cheese, and half a cup of shredded mozzarella cheese. Add one teaspoon of Italian seasoning, salt, and pepper to taste. Mix everything well until it’s smooth and creamy.
Rolling the Chicken Breasts
Now, take four boneless, skinless chicken breasts. Place each breast between two pieces of plastic wrap. Using a meat mallet, gently pound each breast to about half an inch thick. This step helps the chicken roll easily and cooks evenly. Lay a generous spoonful of your spinach filling on each chicken breast. Spread the filling evenly but leave a small border around the edges. Start rolling the chicken from one side, tucking in the filling as you go. Secure each roll with toothpicks or kitchen twine to keep it together while cooking.
Baking the Chicken Roll-Ups
Preheat your oven to 375°F (190°C). Place the chicken roll-ups seam-side down in a greased baking dish. If you love cheese, sprinkle some extra mozzarella on top now. Cover the dish with aluminum foil and bake for 25 minutes. After that, take off the foil and bake for another 10 to 15 minutes. You want the chicken to be cooked through and golden on top. Let the roll-ups cool for a few minutes before you remove the toothpicks or twine. For a fun presentation, slice the roll-ups into bite-sized pieces and add fresh basil and extra Parmesan on top for a lovely look. Enjoy your savory spinach stuffed chicken roll-ups!
Tips & Tricks
Best Practices for Stuffing Chicken
To make great spinach stuffed chicken roll-ups, you need to prepare well. First, flatten the chicken breasts. Use plastic wrap and a meat mallet. Pound them to about 1/2 inch thick. This step helps the chicken roll up nicely.
Next, don’t overfill them. A generous spoonful of filling works best. Leave some space at the edges. This way, the filling won’t leak out when cooking. Secure each roll tightly with toothpicks or kitchen twine. This keeps the filling inside while it cooks.
Cooking Technique for Tender Chicken
To keep your chicken tender, bake it at 375°F (190°C). Cover the dish with foil for the first part of baking. This traps moisture and helps cook the chicken evenly. After 25 minutes, remove the foil to let it brown. This gives you a nice golden color on top.
Let the chicken rest for a few minutes after baking. This helps the juices settle, making each bite juicy and flavorful.
Serving Suggestions and Pairings
These chicken roll-ups are great on their own. To make a complete meal, serve them with a fresh salad or steamed veggies. A light lemon dressing adds brightness.
You can also pair them with pasta or rice for a heartier meal. Drizzle with a simple marinara sauce for added flavor.
For an elegant touch, slice the roll-ups into bite-sized pieces. Arrange them on a platter and garnish with fresh basil or extra Parmesan. This makes for a beautiful presentation.

Variations
Adding Different Cheeses
You can switch up the cheese to create new flavors. Consider using feta or goat cheese. These cheeses add a tangy taste that pairs well with spinach. You can also mix in some cream cheese for a richer filling. If you love a cheesy bite, add more mozzarella. This gives you a gooey, melted texture.
Using Alternative Greens
Spinach is great, but other greens work well too. Try kale for a heartier option. Arugula adds a peppery kick, making the dish more exciting. Swiss chard is another tasty choice, bringing a mild sweetness. Feel free to mix different greens for a unique filling.
Flavored Sauces for Serving
A good sauce makes the dish shine. You can use a marinara sauce for a classic touch. Pesto adds fresh, herby notes that brighten the meal. Consider a creamy Alfredo sauce for richness. You can also drizzle balsamic glaze for a sweet touch. Each sauce gives a different twist to the Spinach Stuffed Chicken Roll-Ups.
Storage Info
How to Store Leftovers
After you make the spinach stuffed chicken roll-ups, let them cool first. Place any leftovers in an airtight container. This keeps the chicken moist and fresh. Store them in the fridge for up to three days. If you want to keep them longer, freezing is a great option.
Reheating Tips
To reheat the chicken roll-ups, preheat your oven to 350°F (175°C). Place the roll-ups in a baking dish. Add a splash of broth or water to keep them moist. Cover with foil to trap steam. Heat for about 15-20 minutes, or until warmed through. You can also use a microwave. Just heat them in short bursts to avoid drying them out.
Freezing the Chicken Roll-Ups
If you want to freeze your chicken roll-ups, do it before baking. Wrap each roll tightly in plastic wrap. Then place them in a freezer bag. They can last up to three months in the freezer. When ready to eat, thaw them in the fridge overnight.
FAQs
Can I make Spinach Stuffed Chicken Roll-Ups ahead of time?
Yes, you can prepare Spinach Stuffed Chicken Roll-Ups ahead of time. Make the roll-ups and place them in a baking dish. Cover them and store in the fridge for up to 24 hours. When ready to cook, just bake them as directed. This saves time on busy days and makes meal prep easy.
What can I serve with Spinach Stuffed Chicken Roll-Ups?
You have many choices for sides. Here are some great options:
– A fresh garden salad with vinaigrette
– Garlic bread for a tasty crunch
– Roasted vegetables like carrots or zucchini
– Creamy mashed potatoes for comfort
– Quinoa or rice for a healthy grain
These sides balance the flavors of the chicken and fill out your meal.
Can I use frozen spinach instead of fresh?
Yes, you can use frozen spinach. Just thaw and drain it well before use. Frozen spinach can be a great time-saver. It often has the same nutrients as fresh spinach. Just remember that frozen spinach may have more moisture, so drain it to avoid a soggy filling.
In this blog post, we explored how to make delicious spinach stuffed chicken roll-ups.I shared tips for preparing, rolling, and baking the roll-ups to ensure they turn out tender and tasty.
You can also try different cheeses or greens for fun variations. Plus, I detailed the best ways to store and reheat your leftovers. Now, with these ideas and tricks, you’re ready to cook and impress at your next meal. Enjoy your cooking adventure!


