Introduction
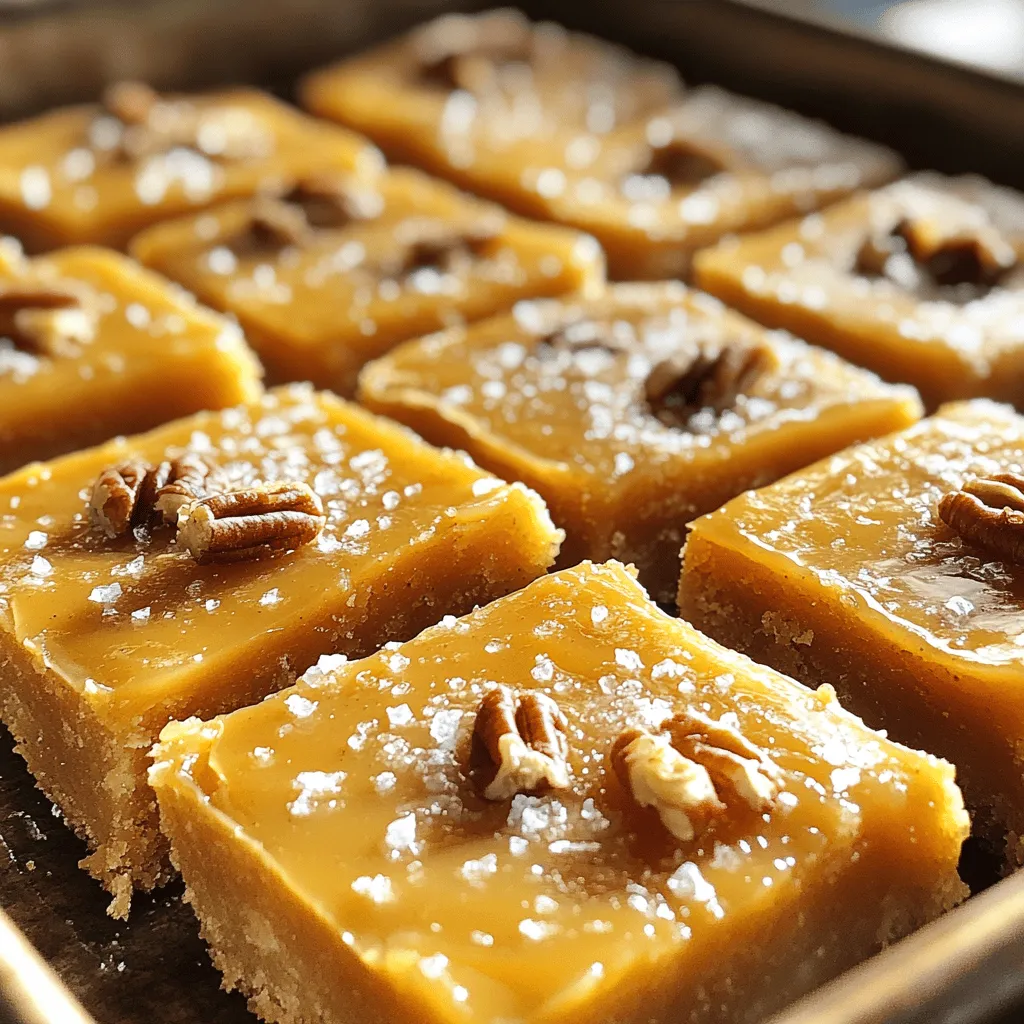
There’s something undeniably enchanting about a dessert that marries sweet and salty flavors, and Salted Caramel Butter Bars do just that. With their rich buttery crust, luscious caramel filling, and a hint of sea salt, these bars are the perfect indulgence for any occasion. Whether you’re hosting a gathering, celebrating a special milestone, or simply treating yourself to something delightful, these bars are sure to impress.
The beauty of Salted Caramel Butter Bars lies not only in their incredible taste but also in their simplicity. Many might shy away from making desserts from scratch, but this recipe demystifies the process. With just a handful of ingredients and straightforward steps, you can create a decadent treat that rivals any bakery offering. Imagine the satisfaction of serving friends and family a dessert crafted with your own hands, filled with layers of flavor that will leave them reaching for seconds.
In this article, we will take a closer look at the components that make these bars irresistible, breaking down the recipe to ensure you can achieve the perfect results every time. From the buttery crust to the rich caramel layer, let’s explore the elements that come together to create these mouthwatering Salted Caramel Butter Bars.
Understanding the Components of Salted Caramel Butter Bars
To truly appreciate Salted Caramel Butter Bars, it’s essential to understand the key elements that contribute to their irresistible charm. The recipe consists of three main components: a buttery crust, a rich caramel layer, and optional toppings that enhance both texture and flavor. Each part plays a crucial role in delivering the perfect balance of flavors and textures that make these bars so special.
The Crust: A Buttery Foundation
The crust serves as the foundation for these decadent bars, providing a rich, buttery flavor and a delightful crunch that complements the smooth caramel layer above. A well-made crust is essential for achieving the right texture, making it both sturdy enough to hold the caramel and melt-in-your-mouth indulgent.
Ingredients of the Crust:
– Unsalted Butter: The star ingredient that gives the crust its rich flavor and tender texture, unsalted butter ensures that you can control the amount of salt in the recipe.
– Granulated Sugar: This adds sweetness and helps create a tender crumb for the crust.
– All-Purpose Flour: The main structure of the crust, all-purpose flour provides the necessary bulk and stability.
– Powdered Sugar: Adding powdered sugar gives the crust a finer, melt-in-your-mouth quality, enhancing the overall texture.
– Salt: A pinch of salt elevates the flavors and balances the sweetness of the sugar.
– Vanilla Extract: For a deeper flavor profile, high-quality vanilla extract enhances the buttery notes in the crust.
Using softened butter is crucial for achieving the right consistency. It allows for easier mixing and ensures that the crust comes together smoothly. Make sure to take your butter out of the refrigerator ahead of time to reach room temperature, which will help it blend seamlessly with the sugars.
Investing in high-quality vanilla extract is another key tip for success. While imitation vanilla can be convenient, pure vanilla extract offers a depth of flavor that will elevate your dessert to gourmet status.
The Caramel Layer: Sweetness Meets Savory
Once the crust is baked to golden perfection, it’s time to create the show-stopping caramel layer that truly makes these bars shine. The caramel adds a luxurious sweetness that perfectly contrasts with the buttery base, while the addition of sea salt creates a delightful interplay of flavors.
Ingredients of the Caramel Layer:
– Brown Sugar: This provides the base sweetness and imparts a rich, molasses-like flavor that is characteristic of traditional caramel.
– Unsalted Butter: Just like in the crust, unsalted butter adds richness and smoothness to the caramel.
– Heavy Cream: Essential for achieving the creamy texture of the caramel, heavy cream helps to create a luscious and indulgent filling.
– Sea Salt: To achieve that coveted salted caramel flavor, a sprinkle of sea salt is added, enhancing the sweetness and adding a savory note.
– Vanilla Extract: Just as in the crust, vanilla extract plays a crucial role in rounding out the flavor profile of the caramel.
Making caramel might seem intimidating, but with a few tips, you can master this sweet layer. Start by melting the brown sugar and butter together in a saucepan over medium heat. Stir continuously until they are fully combined and bubbly. Then, carefully add the heavy cream while stirring, as the mixture will bubble up significantly. Continue to cook until the caramel thickens and reaches a smooth consistency, about 5 to 7 minutes.
The most important aspect of making caramel is to keep an eye on the texture. You want it to be thick enough to spread but still pourable. Once you achieve the desired consistency, remove the caramel from the heat, add the sea salt and vanilla extract, and allow it to cool slightly before pouring it over the baked crust.
The addition of sea salt is what sets salted caramel apart from regular caramel. It not only brings out the sweetness but also adds a sophisticated touch that elevates the entire dessert.
The Optional Toppings: Adding Texture and Flavor
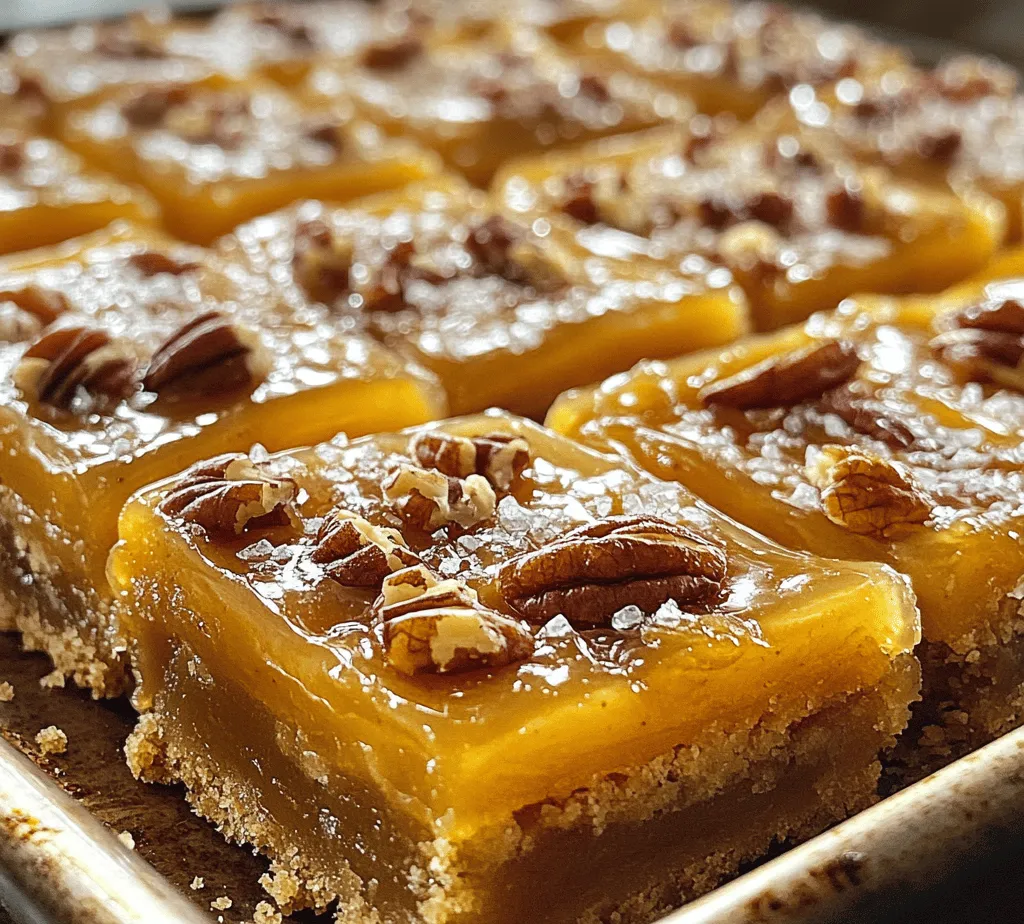
While the crust and caramel layers are already delicious on their own, optional toppings can take your Salted Caramel Butter Bars to the next level. Adding a layer of chopped nuts, such as pecans or walnuts, introduces a delightful crunch that contrasts with the smooth caramel and buttery crust.
Using chopped nuts not only enhances the flavor but also adds nutritional value, giving your dessert a slight boost. If you prefer a nut-free option, consider sprinkling some flaky sea salt or drizzling melted chocolate over the top for an extra touch of indulgence.
In the next section, we will walk through detailed instructions to guide you in crafting these delightful treats, ensuring you achieve the perfect balance of flavors and textures with each bite. Stay tuned as we dive into the step-by-step process, helping you create your very own Salted Caramel Butter Bars that will surely impress everyone who tries them.
Aesthetic Appeal and Textural Contrast of Toppings
One of the most delightful aspects of Salted Caramel Butter Bars is their aesthetic appeal, enhanced by thoughtful toppings. The glossy sheen of salted caramel drizzled over the golden-brown buttery base creates a mouthwatering visual that invites you to take a bite. Adding toppings such as chopped nuts or a sprinkle of sea salt not only elevates the bar’s appearance but also introduces a satisfying textural contrast. The crunch of nuts paired with the creamy caramel and soft cookie base provides an incredibly indulgent experience. For those who are looking for a nut-free alternative, consider substituting with seeds, such as pumpkin or sunflower seeds, which can provide a similar crunch without the allergens.
Step-by-Step Instructions for Perfecting Your Bars
To ensure a successful baking experience with your Salted Caramel Butter Bars, follow these detailed steps carefully. Precision in measuring ingredients is crucial; even slight variations can alter the texture and flavor of your bars.
Step 1: Preheat the Oven and Prepare the Baking Pan
Begin by preheating your oven to 350°F (175°C). This step is vital as it ensures your bars bake evenly and attain the perfect golden color. While the oven is heating up, prepare a 9×13-inch baking pan. Line it with parchment paper, allowing some overhang on the sides—this will make it easier to lift the bars out once they are baked. Lightly grease the parchment paper with butter or cooking spray to prevent sticking.
Step 2: Make the Butter Base
In a large bowl, cream together 1 cup of softened unsalted butter with 1 cup of granulated sugar. Using an electric mixer, beat the mixture on medium speed until it becomes light and fluffy, about 3-4 minutes. Incorporate 1 teaspoon of vanilla extract and mix until fully combined. Next, gradually add 2 cups of all-purpose flour and ½ teaspoon of salt to the mixture. Mix until just combined, being cautious not to overwork the dough.
Step 3: Bake the Base
Spread the butter base evenly into the prepared baking pan, smoothing it with a spatula. Bake in the preheated oven for 20-25 minutes, or until the edges are lightly golden and a toothpick inserted in the center comes out clean. Once baked, remove the pan from the oven and allow it to cool slightly while you prepare the caramel layer.
Step 4: Prepare the Salted Caramel Sauce
In a medium saucepan over medium heat, combine 1 cup of granulated sugar and ¼ cup of water. Stir gently to dissolve the sugar while allowing it to come to a boil. Do not stir once boiling; instead, gently swirl the pan if needed. Cook the mixture until it transforms into a deep amber color, which should take about 8-10 minutes. Remove the saucepan from the heat and carefully whisk in ½ cup of heavy cream. Be cautious, as the mixture will bubble vigorously. Once combined, add ½ teaspoon of sea salt and stir until smooth.
Step 5: Assemble the Bars
Pour the warm salted caramel sauce over the cooled butter base, spreading it evenly. Allow the caramel to set for about 15 minutes at room temperature. While it’s cooling, prepare the topping by melting ½ cup of chocolate chips (semi-sweet or dark, depending on your preference) in a microwave-safe bowl. Heat in 30-second intervals, stirring in between, until fully melted and smooth. Drizzle the melted chocolate over the set caramel layer, creating a beautiful marbled effect.
Step 6: Cool and Slice
Once the bars are fully assembled, let them cool at room temperature for at least 2 hours. For best results, refrigerate the bars for an additional hour to allow the caramel to firm up. This cooling time is crucial for achieving the right texture, making it easier to slice the bars into neat squares. Use the parchment overhang to lift the bars from the pan, and then slice them with a sharp knife for clean edges.
Serving Suggestions and Presentation Ideas
When it comes to serving your Salted Caramel Butter Bars, there are several creative ways to enhance their presentation and enjoyment.
– Pairing with Ice Cream or Whipped Cream: These bars are delicious on their own, but consider serving them warm alongside a scoop of vanilla or caramel ice cream. The contrast of warm and cold creates an unforgettable treat. Alternatively, a dollop of freshly whipped cream can add a light, airy element that complements the richness of the bars.
– Warm vs. Chilled Bars: Serving your bars warm provides a gooey caramel experience that many find irresistible. However, chilled bars offer a firmer texture, making them easier to handle and slice. Depending on your preference, you can also try serving half warm and half chilled to see which version you enjoy best.
– Garnishing for an Elegant Touch: To elevate the visual appeal, consider garnishing your bars with a drizzle of melted chocolate or caramel sauce. Adding additional chopped nuts or a sprinkle of sea salt on top can also enhance the flavor and provide a gourmet touch.
Nutritional Information
Understanding the nutritional profile of your Salted Caramel Butter Bars is important, especially if you are mindful of dietary considerations. Each bar, depending on portion size, typically contains approximately 200-250 calories. Here’s a brief overview of the nutritional content per serving:
– Calories: ~220
– Total Fat: 12g
– Saturated Fat: 7g
– Cholesterol: 30mg
– Sodium: 150mg
– Total Carbohydrates: 28g
– Dietary Fiber: 1g
– Sugars: 18g
– Protein: 2g
For those with dietary restrictions, you can modify the recipe to suit your needs. For instance, using gluten-free flour can make these bars suitable for gluten-sensitive individuals. Additionally, consider substituting coconut cream for heavy cream in the caramel for a dairy-free option.
Conclusion
Making Salted Caramel Butter Bars is not just about baking; it’s about creating an experience that delights the senses and brings joy to those who share in it. The combination of buttery richness, sweet caramel, and a hint of salt makes these bars an irresistible treat for any occasion. Whether enjoyed warm with ice cream or chilled with a cup of coffee, these bars are sure to impress family and friends alike.
As you embark on this baking journey, remember that the process of creating something delicious is as rewarding as the final product itself. Embrace the joy of baking at home, and don’t hesitate to share your creations with loved ones. These Salted Caramel Butter Bars are more than just a dessert; they are a testament to the love and happiness that comes from baking and enjoying food together. So gather your ingredients, follow the steps with confidence, and savor the sweet memories you will create along the way.


