Ready to shake up your dessert game? My Not Yo Mama’s Banana Pudding recipe puts a fresh twist on a classic treat. With ripe bananas, creamy pudding, and fun toppings, this is not your typical version. I’ll guide you through easy steps and clever tips to create a delightful dessert that impresses everyone. Let’s dive into this scrumptious journey together and elevate your banana pudding experience!
Ingredients
Key Ingredients for Not Yo Mama’s Banana Pudding
To make Not Yo Mama’s Banana Pudding, you need a few key ingredients:
– 3 ripe bananas, sliced
– 1 box of vanilla pudding mix (3.4 oz)
– 2 cups milk
– 1 cup heavy cream, chilled
– 1/2 cup powdered sugar
– 1 teaspoon vanilla extract
– 1 box of Nilla wafers (around 11 oz)
These ingredients create a creamy and rich dessert. The ripe bananas add natural sweetness, while the vanilla pudding mix gives a smooth base. The heavy cream and powdered sugar work together to make a light and fluffy topping.
Optional Garnishes
For a special touch, you can add some optional garnishes:
– 1/2 cup toasted coconut flakes
– Fresh mint leaves
– Alternative toppings (e.g., chocolate shavings)
Toasted coconut flakes add a nice crunch and tropical flavor. Fresh mint leaves not only look pretty but also add a refreshing taste. You can even experiment with chocolate shavings for a decadent twist.
Step-by-Step Instructions
Preparing the Pudding Mixture
To start, gather your ingredients. You need vanilla pudding mix and milk. In a large bowl, whisk them together. Keep whisking until the mix thickens, which takes about two minutes. Next, set this bowl aside.
Now, take another bowl. Combine chilled heavy cream, powdered sugar, and vanilla extract. Use an electric mixer and whip until stiff peaks form. This step takes about three to four minutes. Gently fold this whipped cream into the pudding mixture. This makes your pudding light and fluffy, which is key for Not Yo Mama’s Banana Pudding.
Assembling the Layers
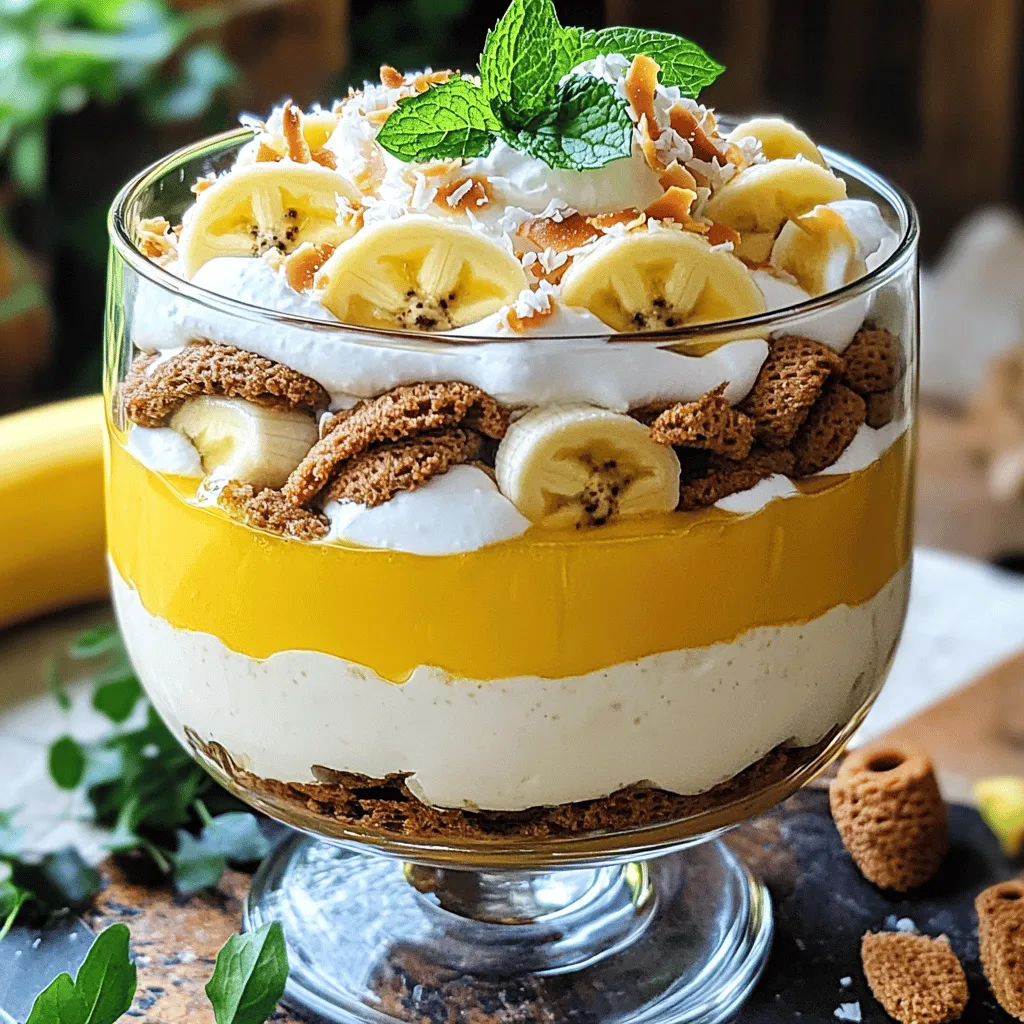
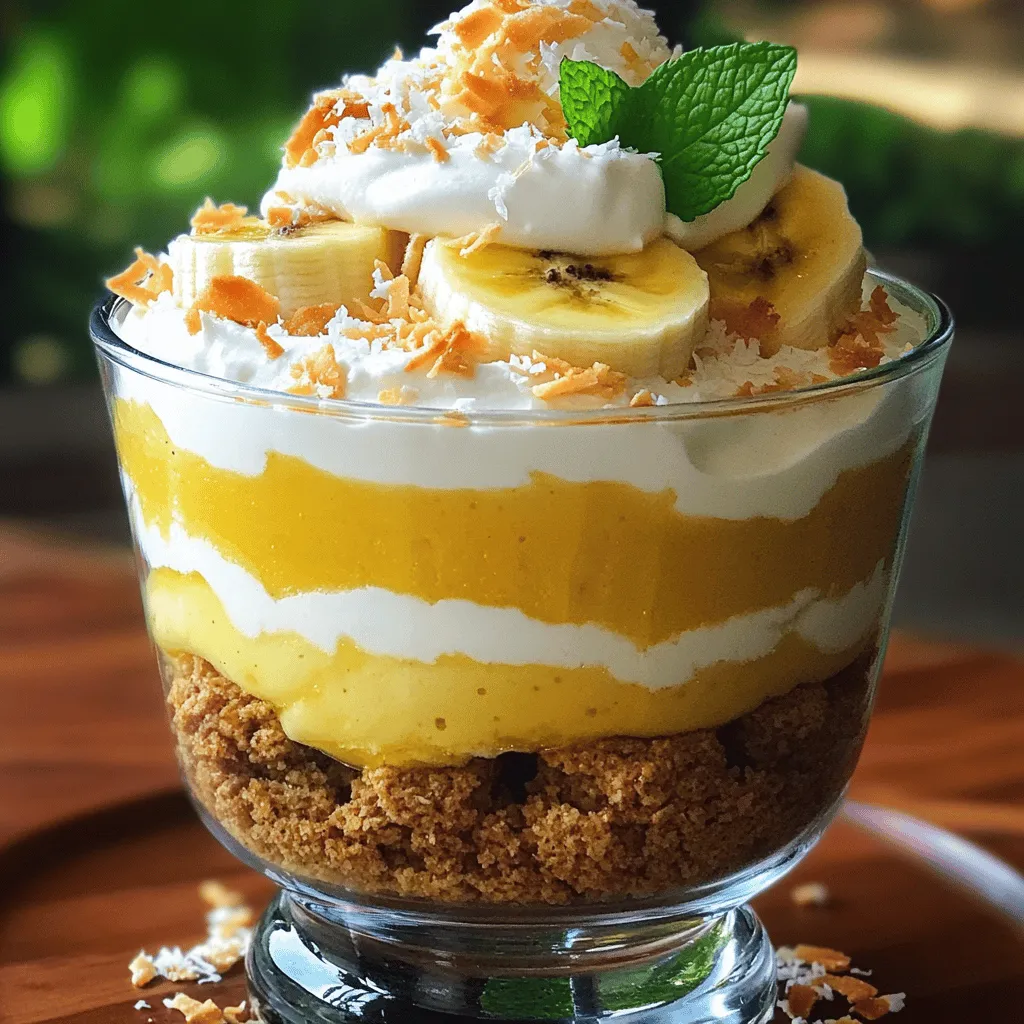
Grab a glass dish or serving cups to build your dessert. Start with a layer of Nilla wafers at the bottom. Next, add a layer of banana slices. Follow with a layer of your pudding mixture. Repeat this process until you use all ingredients. Make sure to finish with a layer of pudding on top. This creates a beautiful look.
For even layering, press down gently on each layer. This helps the layers stick together and look neat. You want the final product to be as pleasing to the eye as it is to the palate.
Chilling the Dessert
Chilling is very important for this dessert. It allows all the flavors to blend nicely. Plus, it helps the wafers soften to perfection. Cover your dish with plastic wrap and place it in the fridge. I suggest chilling it for at least four hours, but overnight is better. This extra time enhances the taste.
When you are ready to serve, sprinkle toasted coconut flakes on top. Add fresh mint leaves for a touch of color. This final step makes the dessert even more special. Enjoy your delicious creation!
Tips & Tricks
Achieving the Best Texture
To get the best texture for Not Yo Mama’s Banana Pudding, whip the cream to stiff peaks. This means that the cream should hold its shape well and not droop. Use a clean bowl and beaters for the best results.
– Common Pitfall: Don’t overwhip the cream. If you whip it too long, it will turn into butter. Stop once it looks thick and holds its shape.
Making Ahead of Time
This dessert tastes better when made ahead. It stays fresh in the fridge for about three days.
– Layer Separation: To help the flavors meld, layer the ingredients right before serving. This keeps the wafers crunchy and the bananas fresh.
Serving Suggestions
For a fun presentation, serve in individual cups or bowls. This adds a personal touch and makes it easy for guests to enjoy.
– Pairing with Beverages: Try pairing it with sweet tea or a light sparkling drink. These drinks will enhance the sweet, creamy taste of the pudding.
Variations
Alternative Ingredients
You can switch up the flavors in Not Yo Mama’s Banana Pudding. Try using chocolate or butterscotch pudding instead of vanilla. This change adds a new twist to the classic taste. If you want a different texture, replace Nilla wafers with chocolate wafers or graham crackers. These options can enhance the dessert’s flavor and make it more exciting.
Create a Healthier Version
To make a lighter version, reduce the sugar in the pudding. You can also use sugar alternatives like honey or agave syrup. Adding fruits like strawberries or blueberries can boost the nutrition and flavor. You can toss in nuts like walnuts or pecans for a crunchy texture. These changes keep the treat delicious while making it a bit healthier.
Seasonal Versions
Seasonal fruits can change your banana pudding game. In the summer, add fresh berries or peaches to bring brightness. For winter holidays, think about adding spices like cinnamon or nutmeg. You can even use festive decorations like candy canes or holiday-themed sprinkles. These seasonal touches make your dessert special for any occasion.
Storage Info
Best Practices for Storing
To keep your Not Yo Mama’s Banana Pudding fresh, store it in an airtight container. This will keep air and moisture out, which helps maintain its texture and taste. If you plan to eat it within a few days, refrigerate it. For longer storage, you can freeze it. Just remember, freezing may change the texture of the bananas.
How Long It Lasts
In the fridge, your banana pudding lasts about 3 to 4 days. After this time, the bananas may start to brown and become mushy. Look for signs of spoilage, like a sour smell or a watery texture. If you notice these signs, it’s best to toss it out for safety.
Re-serving After Storage
To revive the texture after refrigeration, gently stir the pudding before serving. If you find it too thick, add a splash of milk and mix well. When you’re ready to serve, layer it into bowls again for a fresh look. Top with extra coconut flakes and mint for a beautiful presentation. Enjoy your delightful treat!
FAQs
What is the difference between homemade and store-bought banana pudding?
Homemade banana pudding tastes fresh and rich. You control the quality of ingredients. Store-bought often has preservatives and artificial flavors. Making it from scratch gives you a creamy texture and a taste that shines. You can adjust flavors to your liking. The joy of creating your own dessert is hard to beat.
Can I use dairy-free alternatives?
Yes! You can use dairy-free milk like almond, coconut, or oat milk. Almond milk adds a nutty flavor. Coconut milk brings a tropical twist. Oat milk is creamy and mild. Just use the same amount as regular milk. This makes the recipe friendly for those with dietary needs.
How do I prevent bananas from browning in the pudding?
To keep bananas fresh, slice them just before using. You can also dip the slices in lemon juice. This helps slow browning. Layer the bananas between the pudding and wafers. This keeps the fruit protected and looking nice. A little care goes a long way in presentation.
Is it okay to make banana pudding a day in advance?
Yes, making banana pudding a day ahead is great! It gives flavors time to blend. Just layer as normal and cover tightly. Keep it in the fridge until serving. The wafers will soften nicely, creating a delightful texture. Make sure to add garnishes right before serving for the best look.
Not Yo Mama’s Banana Pudding is fun to make and full of flavor. I shared key ingredients, easy steps, and helpful tips to ensure success. You can customize this dessert with different flavors or toppings. Remember to chill it for the best taste and texture. With these pointers, you can impress your family and friends. Enjoy your delicious, homemade banana pudding fresh or after a day in the fridge. I hope you feel inspired to create your own version!


