Introduction
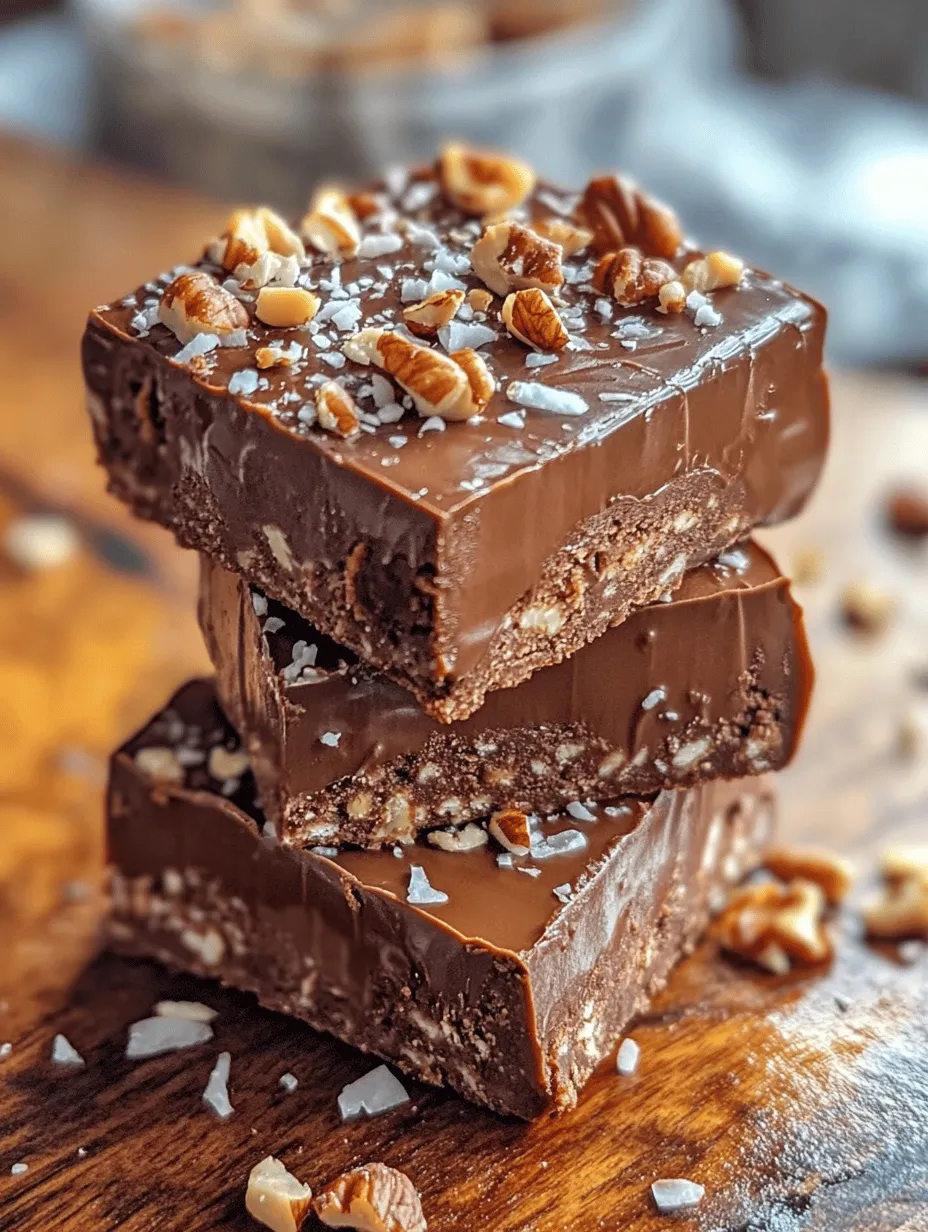
In the realm of desserts, no-bake options have surged in popularity, captivating the hearts (and stomachs) of dessert lovers everywhere. Whether you’re a busy parent looking for a quick treat, a health-conscious individual craving something sweet, or someone who simply enjoys whipping up easy recipes, no-bake desserts offer a delightful solution. One such treat that stands out is the no-bake chocolate peanut butter bar. This indulgent yet straightforward dessert melds the rich, creamy essence of peanut butter with the lusciousness of chocolate, creating a heavenly combination that satisfies cravings without the need for an oven.
The appeal of chocolate and peanut butter is timeless. The duo has been a beloved pairing for generations, and it’s easy to see why. Chocolate brings a deep, bittersweet flavor, while peanut butter contributes a nutty, savory richness. Together, they create a balance that is both comforting and decadent. The best part? These no-bake chocolate peanut butter bars are not just delicious; they also come with health benefits. Using wholesome ingredients allows you to enjoy a sweet treat that can fit into various dietary preferences, from vegetarian to gluten-free options.
The simplicity of this recipe is another significant draw. With only a few ingredients and minimal preparation time, you can create bars that are perfect for snacks, dessert, or even a quick breakfast on the go. These bars can also be customized to suit your taste or dietary needs, making them a versatile choice for any occasion. Whether you want to add some seeds, nuts, or even shredded coconut, the options are endless.
In this article, we will delve into the ingredients that make these no-bake chocolate peanut butter bars not only delectable but also nutritious. Following that, we will provide a detailed step-by-step preparation guide to ensure your bars turn out perfectly every time.
Understanding the Ingredients
Before we dive into the preparation process, let’s take a closer look at the key ingredients that make these no-bake chocolate peanut butter bars a standout dessert.
Creamy Peanut Butter
Peanut butter is the star ingredient in this recipe, and using a natural, unsweetened variety enhances both flavor and health benefits. Natural peanut butter is made from just peanuts and salt, meaning it is free from added sugars, oils, or preservatives that can be found in conventional brands. This purity not only elevates the taste of your bars but also provides healthy fats, protein, and fiber, making them a satisfying snack option.
Honey vs. Maple Syrup
For sweetening our bars, both honey and maple syrup are excellent choices. Honey, with its thick consistency and distinct sweetness, pairs beautifully with peanut butter. It is also known for its potential health benefits, including antioxidant properties. On the other hand, maple syrup offers a unique flavor profile with a hint of caramel that can add depth to your bars. When selecting a sweetener, consider your dietary needs; honey is not vegan, while pure maple syrup is.
Rolled Oats
Rolled oats serve as the base of our bars, providing a chewy texture and added nutritional benefits. Oats are a fantastic source of whole grains, rich in fiber, vitamins, and minerals. They contribute to heart health, help regulate blood sugar levels, and provide sustained energy. In this recipe, they also play a crucial role in binding the ingredients together, ensuring that your bars hold their shape once chilled.
Chocolate Chips
When it comes to choosing chocolate for your bars, you have options. Semi-sweet chocolate chips are a classic choice, offering a balance of sweetness and richness. Dark chocolate, with its higher cocoa content, imparts a more intense flavor and can be a healthier alternative due to lower sugar content. Consider using dairy-free chocolate chips if you want to make the recipe vegan-friendly.
Cocoa Powder
Cocoa powder is essential for adding depth to the chocolate flavor in your bars. It enhances the overall taste profile, providing a rich, chocolatey experience without additional sweetness. Opt for unsweetened cocoa powder to keep the sugar levels in check while maximizing that delicious cocoa flavor.
Vanilla Extract
A splash of vanilla extract is a simple yet effective way to elevate the flavor of your bars. It adds a warm, sweet aroma that complements the peanut butter and chocolate beautifully. When selecting vanilla extract, look for pure vanilla over imitation varieties for the best taste.
Salt
A pinch of salt may seem like an afterthought, but it plays a crucial role in balancing the sweetness of the bars. Salt enhances the flavors of the other ingredients, ensuring that the chocolate and peanut butter shine through without becoming overly sweet.
Optional Add-ins
To make your no-bake chocolate peanut butter bars uniquely yours, consider adding optional ingredients. Chopped nuts can provide a delightful crunch and additional healthy fats, while shredded coconut adds a tropical twist and chewiness. Feel free to experiment with your favorite mix-ins to create a variety of flavors and textures.
Step-by-Step Preparation Guide
Preparing Your Workspace
Before you start mixing and assembling your chocolate peanut butter bars, it’s essential to prepare your workspace. A clean and organized kitchen will make the cooking process much smoother. Gather all your ingredients and tools, including a mixing bowl, measuring cups and spoons, a spatula, and an 8×8-inch baking pan. Having everything at your fingertips ensures you won’t have to scramble for ingredients mid-recipe.
Importance of Having All Ingredients Ready
Having all your ingredients measured and ready to go, often referred to as “mise en place,” is a crucial step in the cooking process. Not only does it streamline your workflow, but it also helps prevent mistakes and ensures that you don’t miss any components. For this recipe, measure out your peanut butter, honey (or maple syrup), rolled oats, chocolate chips, cocoa powder, vanilla extract, and salt before you begin.
Setting Up the Baking Pan with Parchment Paper
To make removing your bars from the pan easier, line the baking pan with parchment paper. Cut a piece of parchment paper large enough to extend over the edges of the pan, allowing you to lift the bars out once they are set. This step will help you achieve clean cuts and maintain the shape of your bars without sticking to the pan.
Mixing the Base
Now, let’s get to the fun part—mixing! In a large mixing bowl, combine your creamy peanut butter and the sweetener of your choice (honey or maple syrup). Use a spatula to blend them until they are smooth and well incorporated.
Detailed Instructions for Achieving the Right Consistency
Once your peanut butter and sweetener are combined, it’s time to add the dry ingredients. Begin by adding the rolled oats, cocoa powder, and a pinch of salt to the peanut butter mixture. Fold these ingredients in gently, ensuring that everything is evenly coated and mixed. The mixture should be thick and cohesive, but not overly dry. If it feels too dry, you can add a splash of water or additional sweetener to achieve the desired consistency.
Tips for Ensuring Even Distribution of Ingredients
To ensure that all ingredients are evenly distributed throughout your bars, take your time during the mixing process. Use the spatula to scrape the sides of the bowl and incorporate any dry bits that may have stuck to the edges. Mixing thoroughly will help every bite of your bars have the perfect balance of flavors.
Incorporating Dry Ingredients
Finally, fold in the chocolate chips. This is where you can adjust based on your preference—feel free to use as many or as few as you like! Mix until the chocolate chips are distributed evenly throughout the mixture.
With your base ready, you are just a few steps away from enjoying your delicious no-bake chocolate peanut butter bars. In the next section, we will detail how to transfer your mixture into the prepared pan, smooth it out, and chill it to perfection.
Thorough Mixing: The Key to Flavor and Texture
When creating your No Bake Chocolate Peanut Butter Bars, the first step is to ensure thorough mixing of the ingredients. This is crucial for achieving a uniform flavor throughout the bars. When mixing, aim to combine the peanut butter, honey, and oats until they form a cohesive mixture. The goal is to break down any clumps of oats and ensure that every bite is as delicious as the last. Use a sturdy spatula or wooden spoon to fold the ingredients together; this will help you achieve that perfect consistency without overworking the oats.
The Role of Oats in Texture
Oats play a significant role in contributing to the final texture of your bars. They lend a chewy yet sturdy base, providing the necessary structure while also adding a wholesome quality to the recipe. For the best results, opt for rolled oats rather than quick oats. Rolled oats will maintain their integrity during mixing and provide a heartier texture. This chewy texture complements the creamy peanut butter and rich chocolate, creating a satisfying contrast that elevates your dessert to another level.
Pressing the Mixture into the Pan
Once your mixture is adequately combined, it’s time to press it into the pan. Choose a baking dish lined with parchment paper to ensure easy removal once the bars are set. Transfer the mixture into the dish and spread it out evenly.
Techniques for Ensuring a Compact Layer
To ensure a compact layer, use a flat tool, such as a spatula or the back of a measuring cup, to press the mixture firmly into the corners and edges of the pan. The more compact the layer, the better the bars will hold together once set. Consider using a rolling pin or your hands to apply even pressure across the surface. This step is essential because a firm base will provide stability to the bars, preventing them from crumbling when sliced.
Melting and Topping with Chocolate
The topping is what truly brings these bars to life, and melting chocolate for the top layer is a simple yet rewarding task.
Safe Methods for Melting Chocolate in the Microwave
For a hassle-free melting process, you can use your microwave. Start by breaking the chocolate into small pieces and placing them in a microwave-safe bowl. Heat the chocolate in 30-second intervals, stirring in between to ensure even melting. This method helps prevent the chocolate from burning, which can ruin its texture and flavor.
Tips for Achieving a Smooth Consistency for Topping
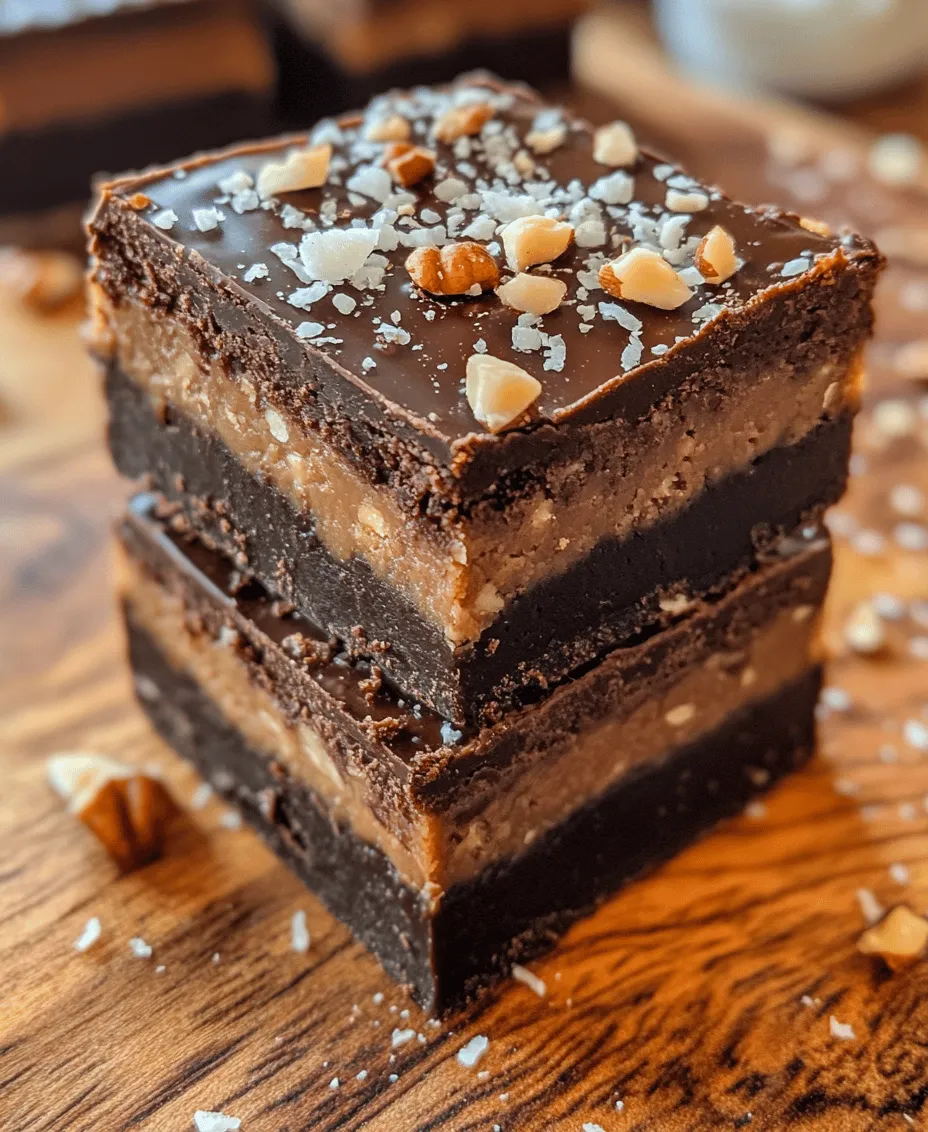
Once melted, stir the chocolate until it reaches a silky smooth consistency. If the chocolate seems too thick, you can add a teaspoon of coconut oil to thin it out, which will also give it a nice sheen once poured over the bars. Pour the melted chocolate over the pressed mixture, using a spatula to spread it evenly across the surface. This glossy layer not only enhances the visual appeal of your bars but also adds a rich chocolatey flavor that complements the peanut butter.
Chilling for Perfection
After topping your bars with melted chocolate, it’s crucial to chill them in the refrigerator.
Importance of Refrigeration in Setting the Bars
Refrigerating allows the chocolate to harden and the bars to set properly. Ideally, let the bars chill for at least 1-2 hours. This time allows the ingredients to meld together, enhancing the overall flavor and texture.
Expected Results After Chilling
Once chilled, you should expect a firm, cohesive bar that holds its shape when cut. The chocolate topping will be set, creating a delightful contrast with the chewy peanut butter base. The result? A delicious and visually appealing treat perfect for any occasion.
Cutting and Serving the Bars
When it’s time to cut the bars, take a moment to prepare your cutting surface.
Techniques for Cleanly Cutting the Bars
Use a sharp knife to slice through the bars, applying gentle pressure to avoid crushing them. For the cleanest cuts, you can warm the knife slightly under hot water, wiping it dry before cutting. This technique helps glide through the chocolate topping without leaving behind jagged edges.
Suggested Serving Sizes and Presentation Ideas
Cut the bars into squares or rectangles, depending on your preference. For serving, consider placing them on a decorative plate or in a lined basket. A light dusting of cocoa powder or a drizzle of additional melted chocolate can elevate the presentation, making them look as good as they taste.
Nutritional Information
Understanding the nutritional profile of your No Bake Chocolate Peanut Butter Bars can help you appreciate their health benefits.
Breakdown of Calories, Macronutrients, and Health Benefits Per Serving
Each bar contains approximately 150-200 calories, depending on the size and specific ingredients used. They are rich in protein and healthy fats, thanks to the peanut butter, while rolled oats provide complex carbohydrates and fiber. Each serving typically has about 6 grams of protein, 10 grams of fat, and 15 grams of carbohydrates, making them a balanced snack option.
Discussion on Potential Dietary Adjustments
For those with dietary restrictions, this recipe is easily customizable. To make it vegan, substitute honey with maple syrup or agave nectar. For gluten-free options, ensure you use certified gluten-free oats. These adjustments allow everyone to enjoy the bars without compromising on taste.
Storage and Shelf Life
Proper storage is key to maintaining the freshness of your No Bake Chocolate Peanut Butter Bars.
Best Practices for Storing the Bars
Store the bars in an airtight container in the refrigerator to keep them fresh. Layer parchment paper between the bars if stacking them to prevent sticking.
Information on How Long They Will Last in the Refrigerator
When stored correctly, these bars will last up to one week in the refrigerator. If you want to extend their shelf life, consider freezing them. Wrap individual bars tightly in plastic wrap and place them in a freezer-safe container. They can be stored in the freezer for up to three months, making them a convenient option for quick snacks.
Conclusion
Making No Bake Chocolate Peanut Butter Bars is a simple and rewarding culinary experience. With just a few ingredients and steps, you can create a delicious, healthy snack that satisfies your sweet tooth without the guilt. The ease of preparation, combined with the rich flavors of chocolate and peanut butter, makes these bars a perfect treat for any time of the day.
We encourage you to try this recipe and enjoy the delightful blend of flavors and textures that homemade treats can offer. Not only do they provide a sense of accomplishment, but they also fit seamlessly into a balanced diet. Embrace the joy of creating your own snacks and savor every bite of these amazing No Bake Chocolate Peanut Butter Bars.


