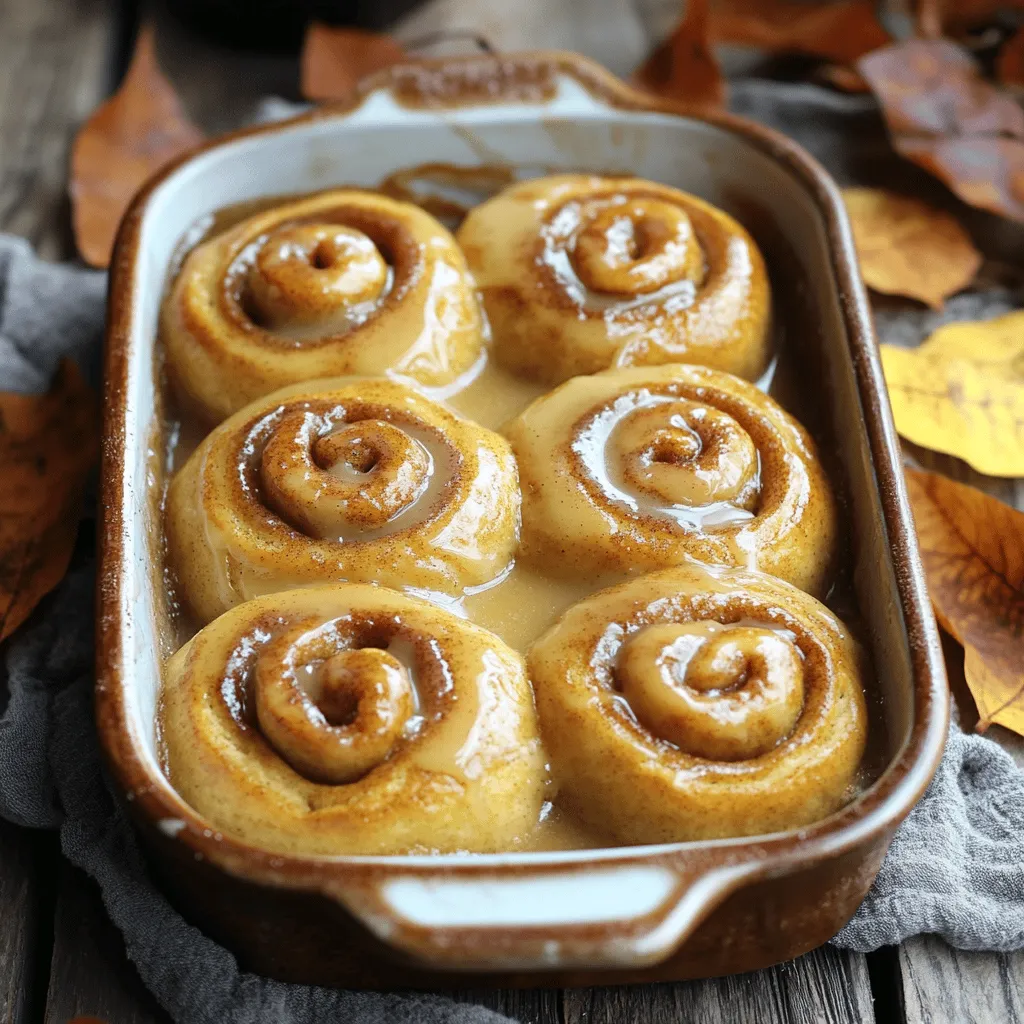
As the days grow shorter and the air turns crisp, there’s something undeniably magical about autumn. This season invites us to cozy up in our kitchens, surrounded by the warm scents of spices and baked goods. One of the most delightful ways to embrace this spirit is through baking, and what better way to do so than with a batch of homemade Maple-Glazed Pumpkin Spice Rolls? These rolls are not just a treat for the taste buds; they evoke the essence of fall with their rich pumpkin flavor, warm spices, and a luscious maple glaze that simply melts in your mouth.
The Maple-Glazed Pumpkin Spice Rolls are a perfect addition to your autumn festivities. Whether enjoyed as a breakfast treat, an afternoon snack, or a dessert for family gatherings, these rolls are sure to impress. Their soft, fluffy texture combined with the sweet, spiced filling creates a comforting experience that captures the heart of the season. With every bite, you’ll savor the harmonious blend of pumpkin, aromatic spices, and the sweet touch of maple syrup, making them a quintessential fall indulgence.
Understanding the Ingredients
To create the perfect Maple-Glazed Pumpkin Spice Rolls, it’s essential to understand the key ingredients that contribute to their delectable flavor and texture.
Pumpkin Puree
At the heart of this recipe lies pumpkin puree, which is not only the star ingredient but also a crucial element in achieving moist and flavorful rolls. The natural sweetness of pumpkin complements the spices beautifully, while its moisture helps keep the rolls tender and soft. When selecting pumpkin puree, you can opt for canned varieties or make your own by roasting fresh pumpkins. Just remember, if you choose to make your own, ensure that the puree is smooth and free of excess water for the best results.
Warm Milk and Yeast
Another vital component of the dough is warm milk, which plays an important role in activating the yeast. Yeast is a living organism that ferments sugars to produce carbon dioxide, causing the dough to rise. For optimal yeast activation, the milk should be warm but not boiling—ideally between 100 to 110 degrees Fahrenheit. This temperature encourages the yeast to thrive, leading to fluffy and airy rolls.
Spices: Cinnamon, Ginger, Nutmeg, and Allspice
The aromatic spices in this recipe—cinnamon, ginger, nutmeg, and allspice—create a warm and inviting flavor profile that is synonymous with fall.
– Cinnamon: This spice adds a sweet and warm flavor, enhancing the overall taste of the rolls.
– Ginger: With its slightly peppery and sweet notes, ginger introduces a zesty kick that complements the other spices beautifully.
– Nutmeg: Known for its rich and warm flavor, nutmeg adds depth and a touch of earthiness to the rolls.
– Allspice: This spice brings a unique blend of flavors reminiscent of cloves, cinnamon, and nutmeg, adding complexity to the filling.
Together, these spices create an aromatic experience that perfectly encapsulates the essence of autumn.
Creating the Pumpkin Spice Dough
Now that we’ve covered the essential ingredients, let’s dive into the dough-making process. Creating the perfect dough is crucial for achieving soft and fluffy rolls.
The Dough-Making Process
1. Proofing the Yeast: Begin by combining warm milk with a little sugar in a bowl. Sprinkle the yeast over the top and let it sit for about 5-10 minutes. You’ll know it’s ready when it becomes frothy and bubbly. This proofing step is essential; it ensures that the yeast is active and capable of leavening the dough, resulting in rolls that are light and airy.
2. Mixing Wet Ingredients: In a separate bowl, combine the pumpkin puree, melted butter, and an egg. Mix well until the ingredients are fully integrated. The butter adds richness, while the egg provides structure to the rolls.
3. Combining Wet and Dry Ingredients: In another bowl, whisk together the flour, sugar, salt, and the aromatic spices. Gradually add the wet mixture to the dry ingredients, stirring until a shaggy dough forms. At this stage, it’s important to not overmix, as this can result in tough rolls.
4. Kneading the Dough: Once the dough comes together, transfer it to a floured surface and knead it gently. Kneading develops gluten, which gives the rolls their desirable texture. Aim for about 5-8 minutes of kneading, until the dough is smooth and elastic. If it feels sticky, sprinkle a bit more flour as needed, but be cautious not to add too much, as this can lead to dry rolls.
Tips for Achieving the Perfect Dough Consistency
– Flour Measurement: To ensure accurate measurements, consider using a kitchen scale. Too much flour can result in dry rolls, while too little can make the dough too sticky.
– Room Temperature Ingredients: Using room temperature ingredients can help the dough come together more easily and rise better during the proofing stage.
– Humidity Considerations: Keep in mind that humidity can affect how much flour you need. On particularly humid days, you may require less flour than usual.
Kneading and Rising the Dough
Once your dough is ready, it’s time to knead and let it rise. This stage is crucial for developing the texture of the rolls.
Importance of Kneading
Kneading is essential for gluten development, which provides structure to the dough. When kneading, you should aim to stretch and fold the dough, allowing the gluten strands to form. This process helps trap the gases produced by the yeast, resulting in a light and fluffy texture.
Techniques for Kneading Dough Effectively
– Push and Fold Method: Start by pushing the dough away from you with the heel of your hand, then fold it back over itself. Rotate the dough a quarter turn and repeat. This method ensures that you’re evenly developing gluten throughout the dough.
– Resting Periods: If you find the dough is too elastic and difficult to stretch, let it rest for a few minutes. This can help relax the gluten and make it easier to knead.
Ideal Conditions for Dough Rising
After kneading, place your dough in a lightly greased bowl and cover it with a clean kitchen towel or plastic wrap. The dough needs a warm environment to rise effectively. Here are some tips to create the ideal conditions:
– Warm Oven Method: Preheat your oven to the lowest setting, then turn it off. Place the covered dough inside. The residual heat will create a cozy environment for the dough to rise.
– Humidity: If your home is particularly dry, consider placing a shallow pan of hot water in the oven with the dough to add moisture to the air.
Visual Cues for Knowing When the Dough has Doubled in Size
The dough is ready for the next step once it has doubled in size. Look for the following signs:
– Puffy Appearance: The dough should appear puffed up and light.
– Indentation Test: Gently press your finger into the dough; if the indentation remains, it’s ready to proceed. If it springs back quickly, give it a bit more time.
Preparing the Filling
As your dough rises, it’s the perfect time to prepare the filling that will infuse your rolls with sweetness and spice.
Breakdown of the Filling Ingredients
The filling consists of simple yet flavorful ingredients:
– Brown Sugar: This adds a rich, caramel-like sweetness that pairs wonderfully with the pumpkin and spices.
– Cinnamon and Nutmeg: These spices enhance the overall flavor profile, ensuring that each roll is bursting with warmth.
– Softened Butter: Spreading softened butter on the rolled-out dough ensures that the filling adheres well, creating a gooey center.
Balancing Sweetness and Spice
While the combination of brown sugar and spices is sure to satisfy your sweet tooth, it’s important to balance the flavors. You want the sweetness to complement the spices without overpowering them. Adjusting the amount of cinnamon and nutmeg based on your personal preference can help you achieve the perfect blend.
Shaping the Rolls
Once the dough has risen and the filling is ready, it’s time to roll out the dough and shape the rolls.
Instructions for Rolling Out the Dough
1. Flour Your Surface: Lightly flour your work surface to prevent sticking.
2. Roll to Desired Thickness: Using a rolling pin, roll out the dough into a rectangle about ¼ inch thick. Make sure the thickness is even for consistent baking.
3. Spread the Filling: Evenly spread the softened butter over the surface of the rolled-out dough, followed by a generous sprinkle of the brown sugar and spice mixture.
4. Rolling It Up: Starting from one long edge, tightly roll the dough into a log. Try to keep the roll tight to ensure that the filling doesn’t spill out during baking.
Once you have shaped your rolls, you will be ready to prepare them for their second rise and eventual baking. The anticipation of enjoying warm, gooey Maple-Glazed Pumpkin Spice Rolls will surely make your autumn baking experience even more delightful.
Techniques for Evenly Spreading the Filling
To ensure that your filling is evenly distributed throughout the dough, start by using a spatula or the back of a spoon to spread the pumpkin filling. Begin at the center of the rolled-out dough and work your way to the edges, applying gentle pressure to avoid tearing the dough. Using an offset spatula can be particularly helpful, allowing you to reach the corners with ease. Aim for a thin, even layer that covers the entire surface without clumping in certain areas. This consistency will ensure that every bite of your Maple-Glazed Pumpkin Spice Rolls is packed with the delightful flavors of cinnamon, nutmeg, and pumpkin.
Tips for Rolling the Dough into a Tight Log
Achieving a tight log when rolling your dough is crucial for creating even slices and ensuring that your pumpkin spice rolls hold their shape during baking. Start by rolling the dough from one end to the other, using your fingers to guide the roll and applying even pressure. As you roll, tuck the dough inwards, creating a compact log. If you find the dough is sticking to your work surface, use a bench scraper to help lift it gently without tearing. Once you’ve rolled it up, pinch the seam at the end to seal it. This will help prevent the filling from leaking out during the second rise and baking process.
Slicing and Second Rise
Importance of Cutting the Rolls Evenly for Uniform Baking
After rolling your dough into a log, it’s time to slice it into individual rolls. Using a sharp knife or a bench scraper, cut the log into equal sections, typically about 1 to 1.5 inches thick. The key here is to maintain uniformity in size; this will ensure that all rolls bake evenly. If the slices are too thick, some may remain doughy, while others could overbake. An easy trick is to use a piece of dental floss to slice the rolls. Simply slide a length of floss underneath the log, cross the ends over the top, and pull to cut through the dough cleanly without squishing it.
How the Second Rise Helps Achieve a Light and Airy Texture
The second rise is essential for creating that fluffy, airy texture we all adore in a good cinnamon roll. After slicing, place each roll in a greased baking dish, allowing a bit of space between them to expand. Cover the dish with a clean kitchen towel and let the rolls rise in a warm, draft-free area for about 30 to 45 minutes. This resting period allows the yeast to activate again, resulting in beautifully puffy rolls. If your kitchen is cooler, consider placing the dish in an oven that’s preheated to its lowest setting for a few minutes and then turned off, providing a cozy environment for the dough to rise.
Best Practices for Letting the Rolls Rise in a Warm Environment
Finding the right environment for the second rise can significantly impact your results. Ideally, you want a warm, humid space. You can create this by placing a pan of hot water in the oven with the rolls (after turning the oven off) or simply letting them rise on your countertop, covered with a damp cloth. Avoid placing them in direct sunlight, as this can dry out the dough. The goal is to maintain a temperature of about 75-80°F, which is optimal for yeast activity.
Baking the Rolls
Optimal Oven Temperature for Baking Pumpkin Spice Rolls
Once your rolls have completed their second rise, it’s time to bake them. Preheat your oven to 350°F (175°C). This temperature is ideal for baking pumpkin spice rolls, allowing them to cook evenly without browning too quickly. Always ensure your oven is preheated before placing the rolls inside to achieve the best rise and texture.
Signs That the Rolls Are Ready to Be Taken Out of the Oven
After about 25 to 30 minutes of baking, your kitchen will be filled with a warm, inviting aroma that signals the rolls are almost ready. Check for a golden-brown color on the tops of the rolls and an internal temperature of around 190°F (88°C) if you have a kitchen thermometer. The rolls should also spring back slightly when pressed gently in the center. If they appear too pale, let them bake for an additional few minutes, keeping a close eye to avoid overbaking.
Importance of Letting the Rolls Cool Slightly Before Glazing
Once baked, remove the rolls from the oven and allow them to cool in the pan for about 10 minutes. This short cooling period is crucial before glazing. It helps the rolls set and ensures that the glaze doesn’t melt into the rolls completely, allowing for that lovely drizzle effect. Glazing warm rolls will create a beautiful shine as the glaze seeps into the nooks and crannies, enhancing both flavor and presentation.
Making the Maple Glaze
Ingredients for the Glaze and Their Significance
For the maple glaze, you’ll need the following ingredients:
– 1 cup powdered sugar
– 2 tablespoons pure maple syrup
– 1-2 tablespoons milk or cream (adjust for consistency)
– A pinch of salt
The powdered sugar serves as the base, providing sweetness and a smooth texture. Maple syrup adds a rich, earthy flavor that complements the pumpkin spice perfectly, while milk or cream adjusts the consistency of the glaze. A pinch of salt helps balance the sweetness, enhancing the overall taste.
Step-by-Step Instructions for Achieving the Right Consistency
1. In a medium bowl, combine the powdered sugar and maple syrup.
2. Gradually add milk or cream, one tablespoon at a time, whisking until smooth.
3. If the glaze is too thick, add more milk; if it’s too thin, add a little more powdered sugar until you reach your desired consistency. The glaze should be pourable but thick enough to cling to the rolls.
Variations for the Glaze, Such as Adding Spices or Flavored Extracts
Feel free to customize your maple glaze! Consider adding a pinch of cinnamon or nutmeg for an extra spice kick that complements the rolls. You can also experiment with flavored extracts, such as vanilla or almond, to create a unique twist on the classic glaze.
Glazing and Serving the Rolls
Techniques for Drizzling the Glaze for Aesthetic Appeal
Once your rolls have cooled slightly, it’s time to glaze them. Use a spoon to drizzle the glaze over the rolls in a zigzag pattern, or for a more refined look, transfer the glaze to a piping bag or a plastic zip-top bag with a corner snipped off. This method allows for more control and precision, creating an elegant finish that enhances the presentation.
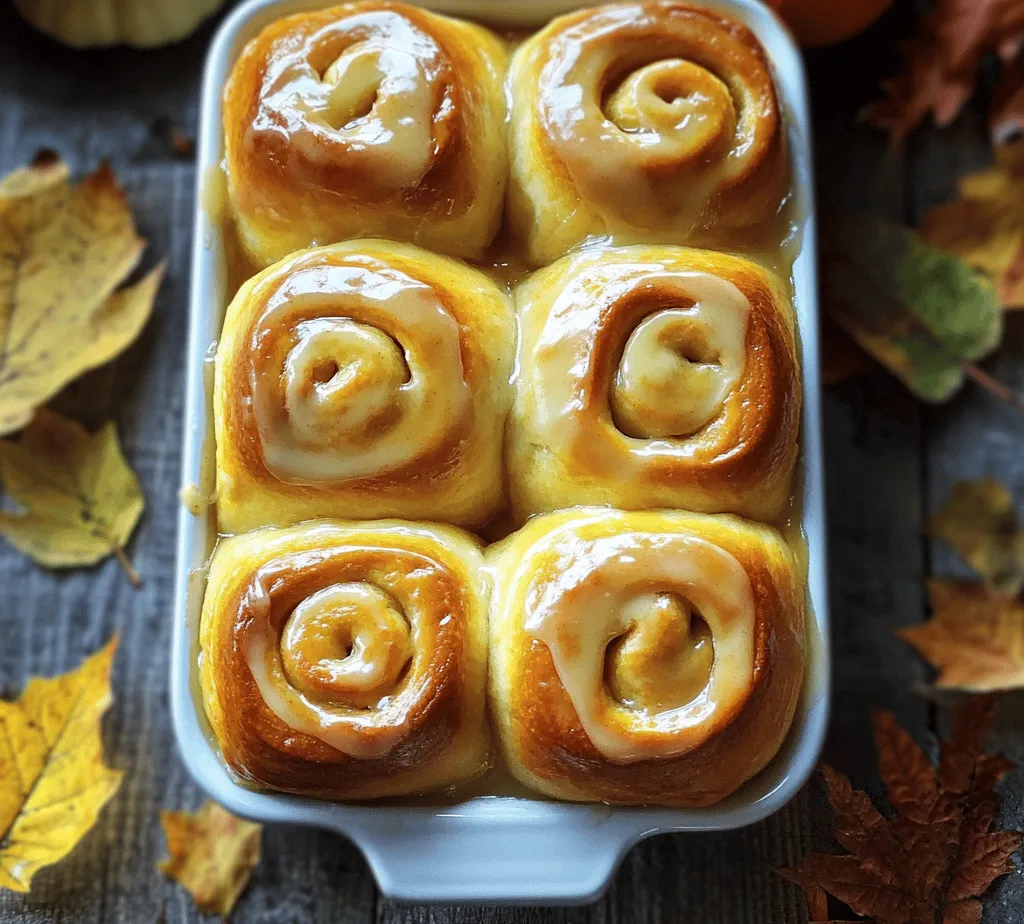
Suggestions for Serving the Rolls Warm
Serve your Maple-Glazed Pumpkin Spice Rolls warm, fresh out of the oven for the best experience. They can be enjoyed as a delightful breakfast treat, an afternoon snack, or a dessert after dinner. For an added touch, serve them with a dollop of whipped cream or a side of cream cheese frosting for those who enjoy a richer flavor profile.
Pairing Ideas with Beverages Like Coffee or Tea
These rolls pair beautifully with a warm cup of coffee, tea, or hot apple cider. The rich flavors of the rolls complement the warmth and aroma of these beverages, making for a cozy experience that’s perfect for fall gatherings or chilly mornings.
Nutritional Information and Serving Suggestions
Overview of the Nutritional Value of Pumpkin Spice Rolls
While indulging in these delicious rolls, it’s essential to be mindful of their nutritional content. Each roll contains approximately:
– Calories: 250
– Total Fat: 8g
– Saturated Fat: 3g
– Carbohydrates: 40g
– Sugars: 12g
– Protein: 4g
These values can vary based on the specific ingredients used, portion sizes, and any additions or substitutions made during preparation.
Serving Size and Portion Recommendations
For a satisfying treat, consider serving one or two rolls per person. This allows everyone to enjoy the rich flavors without overindulging. If you’re serving them as part of a larger brunch or gathering, cut the rolls into smaller portions for guests to sample.
Ideas for Enjoying Leftovers or Repurposing the Rolls
If you find yourself with leftover rolls, don’t worry! They can be stored in an airtight container at room temperature for up to three days or refrigerated for up to a week. For an indulgent breakfast, try reheating leftover rolls in the microwave for about 15 seconds or toasting them lightly to restore their warmth. Alternatively, consider transforming them into a bread pudding by cubing the rolls and baking them with a simple egg and milk custard for a delicious new dessert.
Conclusion
Making Maple-Glazed Pumpkin Spice Rolls is a delightful experience that captures the essence of fall baking. The combination of warm spices, fluffy dough, and sweet maple glaze creates a treat that’s perfect for sharing with family and friends. Whether you enjoy them fresh out of the oven or repurpose them into a new dessert, these rolls are sure to bring warmth and joy to your gatherings.
As we embrace the flavors of fall, consider trying this recipe and letting the enticing aroma fill your home. Homemade treats like these not only satisfy your taste buds but also create lasting memories shared around the table. So, gather your ingredients, roll up your sleeves, and indulge in the joy of baking!


