Introduction
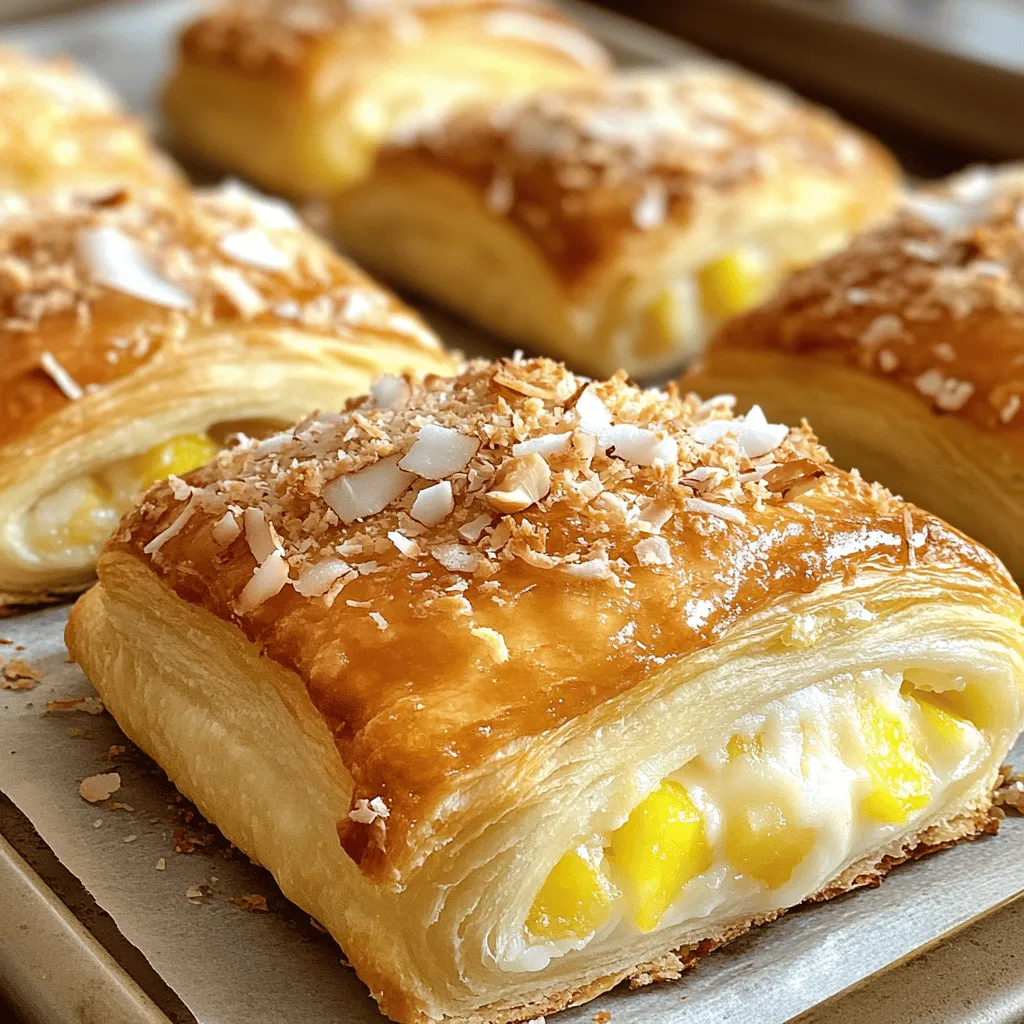
If you’re looking for a dessert that embodies the essence of tropical paradise while delivering a creamy, rich satisfaction, look no further than the King’s Hawaiian Cheesecake Danish. This delightful treat marries the classic flavors of a traditional cheesecake with the sweet, airy texture of Hawaiian bread. The result is a pastry that not only pleases the palate but also transports you to sun-kissed beaches with every bite.
The inspiration for this recipe draws heavily from the delightful Hawaiian culture, known for its vibrant flavors and fresh ingredients. The fusion of these tastes creates a unique experience, where the creamy cheesecake filling is complemented by the sweetness of pineapple and the nuttiness of macadamia nuts. This combination makes for a dessert that is not just a treat but a celebration of flavor that can brighten any day.
Incorporating easy and delightful recipes like the King’s Hawaiian Cheesecake Danish into your everyday cooking can elevate your culinary repertoire. Whether you’re hosting a brunch, celebrating a special occasion, or simply wanting to indulge yourself, this recipe is perfect for making a lasting impression with minimal hassle.
Understanding the Ingredients
To truly appreciate the King’s Hawaiian Cheesecake Danish, it’s essential to understand the role each ingredient plays in creating this luscious dessert. Here, we’ll break down the key components.
Key Ingredients
1. High-Quality Cream Cheese: The foundation of any cheesecake, cream cheese provides a rich, creamy texture that is essential for achieving the right consistency. Opting for high-quality cream cheese ensures a smoother filling that blends well and creates that decadent cheesecake experience we all love.
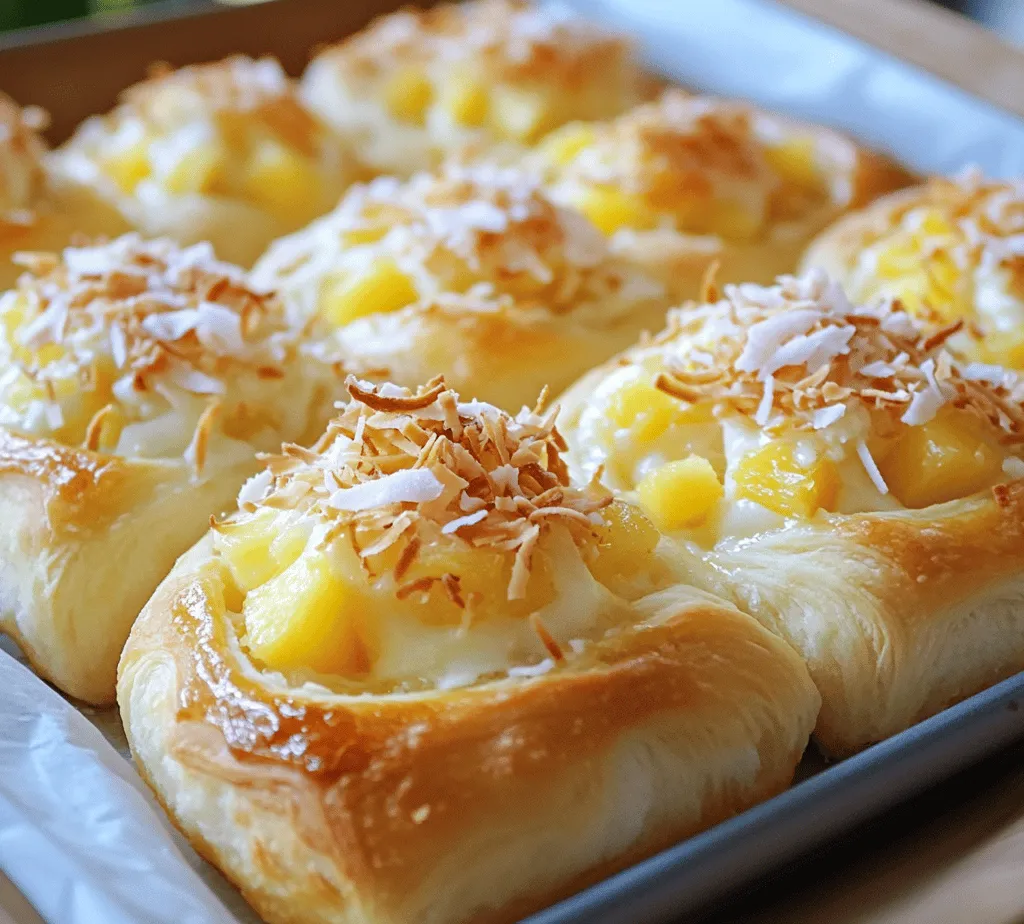
2. Pineapple: Known for its bright, tropical flavor, pineapple adds a refreshing sweetness to the cheesecake filling. Whether you choose fresh, canned, or crushed pineapple, its juices contribute to the overall flavor profile, making it a perfect complement to the creaminess of the cheese.
3. Coconut: Adding coconut elevates the tropical flair of this dessert even further. Shredded coconut not only enhances the flavor but also introduces a chewy texture that contrasts beautifully with the smooth filling. Coconut is also known for its health benefits, being rich in fiber and healthy fats.
4. Macadamia Nuts: These nuts are iconic in Hawaiian cuisine and bring a unique, buttery flavor to the dish. Their crunchy texture adds an enjoyable contrast to the creamy filling while contributing a hint of nuttiness that rounds out the tropical flavors.
5. Crescent Dough: The dough serves as the base for the Danish and is key to achieving that flaky, buttery texture. The crescent dough is easy to work with, making it a great choice for those who may not be experienced in pastry-making.
Benefits of Using Quality Ingredients
Using high-quality ingredients not only enhances the flavor of your King’s Hawaiian Cheesecake Danish but also improves the texture and overall presentation. Fresh and premium ingredients result in a pastry that is both visually appealing and delicious, making it a treat you’ll be proud to serve.
Step-by-Step Guide to Making King’s Hawaiian Cheesecake Danish
Before diving into the recipe, it’s essential to prep your kitchen and gather all necessary tools and ingredients. A well-organized workspace sets the stage for a successful baking experience.
Prepping the Kitchen: Essential Tools and Equipment
To make the King’s Hawaiian Cheesecake Danish, you’ll need a few essential tools:
– Mixing Bowls: A set of bowls in various sizes for mixing ingredients will streamline your process.
– Electric Mixer: While you can mix by hand, an electric mixer will help achieve a smooth, creamy filling with minimal effort.
– Measuring Cups and Spoons: Accurate measurements are crucial for baking success, so have these handy.
– Baking Sheet: A large, flat baking sheet is ideal for placing your Danish during baking.
– Parchment Paper: Lining your baking sheet with parchment prevents sticking and makes cleanup easier.
– Spatula: A rubber spatula will help you mix and fold ingredients seamlessly.
Having a clean workspace is also vital. Before you begin, make sure your countertops are tidy, and all ingredients are easily accessible. This not only makes the cooking process more enjoyable but also minimizes the risk of missing an ingredient.
Preheat the Oven: Setting the Right Temperature
Before you start mixing, preheat your oven to 375°F (190°C). Preheating is a crucial step in baking. It ensures that your Danish will bake evenly and rise properly. If you place your dough in an unheated oven, it may not yield the flaky, tender texture that makes this dessert so irresistible. By starting with a hot oven, you set the stage for perfect browning and a beautifully cooked pastry.
Creating the Cream Cheese Mixture
Now, let’s move on to creating the luscious cream cheese filling.
1. Soften the Cream Cheese: Begin by allowing your cream cheese to sit at room temperature for about 30 minutes. Softened cream cheese mixes more easily, resulting in a smoother filling.
2. Mixing: In a large mixing bowl, add the softened cream cheese along with sugar and vanilla extract. Using an electric mixer, beat the ingredients together on medium speed until the mixture is creamy and free of lumps. This step is essential for achieving the velvety texture that characterizes a great cheesecake filling.
3. Texture and Consistency: As you mix, pay attention to the consistency. You want it to be creamy but not overly runny. A well-mixed cream cheese filling should hold its shape when dolloped onto the dough.
4. Achieving Perfect Creaminess: For an even creamier texture, you can add a splash of heavy cream. This additional ingredient will help lighten the mixture and bring a luxurious mouthfeel to the final product.
Incorporating Pineapple and Coconut
Next, it’s time to fold in the tropical elements that make this Danish truly special.
1. Prepare the Pineapple: If using fresh pineapple, chop it into small, bite-sized pieces. If you’re using canned pineapple, make sure to drain it thoroughly to remove excess moisture, which can affect the filling’s consistency.
2. Add Coconut: Mix in shredded coconut along with the pineapple. Be sure to use sweetened shredded coconut for added flavor, unless you prefer a less sweet option.
3. Folding Technique: Gently fold the pineapple and coconut into the cream cheese mixture using a spatula. The goal here is to ensure that the pieces are evenly distributed throughout the filling without overmixing, which can cause the mixture to become too loose.
The sweet, tangy pineapple and chewy coconut will enhance the creaminess of the cheese, creating a well-rounded flavor that is distinctly tropical.
Working with Crescent Dough
With your cream cheese mixture ready, it’s time to work with the crescent dough.
1. Unroll the Dough: Carefully unroll the crescent dough onto a lightly floured surface. The dough should be kept cool for ease of handling and to maintain its flaky texture.
2. Rolling and Shaping: Depending on the size of your Danish, you may want to cut the dough into triangles or rectangles. For a classic Danish shape, cut along the pre-scored lines of the crescent dough, and then gently roll each piece from the wide end toward the narrow tip.
3. Sealing the Seams: After rolling, it’s crucial to seal the seams properly to prevent the filling from leaking out during baking. Pinch the edges together firmly and ensure they’re well-sealed. This not only helps maintain the integrity of the pastry but also contributes to a beautiful presentation.
By paying close attention to these details, you’ll ensure that your King’s Hawaiian Cheesecake Danish is not only delicious but also visually stunning.
In the next section, we will cover the baking process and provide tips for ensuring your Danish turns out perfectly every time. Get ready to indulge in a tropical dessert that will have everyone asking for seconds!
Shaping Your Danish: A Visual Guide
Shaping your King’s Hawaiian Cheesecake Danish is a crucial step that not only influences the final appearance but also the texture of the pastry. Here’s how you can cut and shape the dough effectively:
1. Cutting the Dough: After chilling the dough, roll it out on a lightly floured surface to about 1/4 inch thickness. Use a pizza cutter or sharp knife to slice the dough into squares or rectangles, approximately 4 inches by 4 inches.
2. Creating the Shape: To form traditional Danish shapes, take each square of dough and make a small cut from each corner toward the center, leaving about an inch uncut in the middle. This technique allows you to fold the corners over the filling, creating a beautiful pinwheel effect.
3. Suggestions for Creative Shapes: Don’t be afraid to get creative! You can try different shapes such as:
– Braided Danish: Roll the dough into long strips, fill them, and braid them together before baking.
– Wraps: Place filling on one side of the square and fold it over to create a pocket.
– Twists: Cut the dough into strips, fill them, and twist them before baking.
The Importance of Egg Wash
Applying an egg wash before baking is a vital step that enhances both the appearance and texture of your Danish pastries. The egg wash gives the pastries a beautiful golden-brown finish while also helping to seal the edges.
1. Aesthetic and Functional Benefits: An egg wash not only adds a shiny finish but also helps the dough stick together, preventing the filling from leaking out during baking. This results in a more polished look and ensures that your Danish holds its shape.
2. Alternative Egg Wash Options for a Vegan Version: If you’re looking for a vegan-friendly option, consider using a mixture of plant-based milk and maple syrup or a simple cornstarch slurry. These alternatives can achieve a similar glossy finish without using eggs.
Optional Toppings: Enhancing Flavor and Texture
To elevate your King’s Hawaiian Cheesecake Danish, consider adding toppings that complement and enhance the overall flavor profile.
1. Insight into the Choice of Macadamia Nuts: Macadamia nuts add a rich, buttery flavor and a pleasing crunch that pairs beautifully with the creaminess of the cheesecake filling. They also align perfectly with the Hawaiian theme of the dish.
2. Exploring Other Potential Toppings for Customization: Get creative with other toppings to suit your taste:
– Coconut Flakes: Add toasted coconut flakes for a tropical twist.
– Fruit Preserves: A dollop of passionfruit or guava preserve can add a delightful sweetness.
– Drizzles: A simple glaze made from powdered sugar and lemon juice can give your Danish a refreshing zing.
Baking the Danish: Timing and Techniques
Baking your King’s Hawaiian Cheesecake Danish correctly is essential for achieving that perfect flaky texture and golden color. Here are some detailed instructions to guide you:
1. Baking Instructions: Preheat your oven to 375°F (190°C). Place the shaped Danish pastries on a parchment-lined baking sheet, ensuring they are spaced apart to allow for expansion. Bake for 20-25 minutes or until they are golden brown and puffed.
2. Tips for Doneness: Keep an eye on the pastries in the last few minutes of baking. If they are browning too quickly, you can tent them with aluminum foil to prevent burning while ensuring the insides cook through.
3. Importance of Cooling Before Garnishing: Allow the Danish to cool on a wire rack for at least 10 minutes before adding any toppings or glazes. This cooling period helps to set the filling and makes the Danish easier to handle.
Serving Suggestions
The King’s Hawaiian Cheesecake Danish is best served warm or at room temperature, allowing the flavors to shine while maintaining that delightful gooey texture.
1. Ideal Serving Temperatures and Presentation Ideas: For an elegant presentation, serve the Danish on a decorative platter, optionally dusted with powdered sugar for a touch of sweetness. Pair them with fresh fruits like sliced strawberries or pineapple for a colorful contrast.
2. Pairing Suggestions for Beverages: Elevate your serving experience by pairing the Danish with beverages such as:
– Coffee: A bold cup of coffee complements the creaminess of the cheesecake filling.
– Herbal Teas: A refreshing herbal tea can balance the richness of the pastry.
Nutritional Information
Understanding the nutritional benefits of your ingredients is essential for both health-conscious bakers and those looking to indulge mindfully.
1. Overview of Nutritional Benefits of the Main Ingredients:
– King’s Hawaiian Bread: This bread is soft and slightly sweet, made with ingredients like flour, sugar, and eggs, providing carbohydrates and protein.
– Cream Cheese: Rich in calcium and protein, cream cheese adds creaminess and flavor, although it is higher in fat.
– Macadamia Nuts: These nuts are a great source of healthy fats, fiber, and vitamins, contributing to heart health.
2. Caloric Considerations and Portion Sizes: Each Danish can be approximately 300-400 calories depending on the size and toppings. Consider portion sizes when serving, especially if you’re sharing with guests.
Frequently Asked Questions
Baking can sometimes come with its challenges. Here are common queries and troubleshooting tips for making Danish pastries:
1. Common Queries Related to Preparation and Storage:
– Can I prepare the dough in advance? Yes, you can prepare the dough a day ahead and store it in the refrigerator. Just allow it to come to room temperature before rolling it out.
– How should I store leftovers? Keep any leftover Danish in an airtight container at room temperature for up to 2 days, or refrigerate for longer freshness.
2. Troubleshooting Common Issues When Making Danish Pastries:
– Why are my pastries not rising? Ensure your yeast is fresh and activated properly. The dough should also be allowed to rise in a warm environment.
– How do I prevent leakage? Make sure the edges are sealed well when shaping the Danish. An egg wash can also help.
Conclusion
The King’s Hawaiian Cheesecake Danish is a delightful fusion of buttery pastry and rich cheesecake filling, making it an irresistible treat for any occasion. With its golden-brown finish, creative shapes, and customizable toppings, this pastry is sure to impress your family and friends.
Baking is not just about following a recipe; it’s an invitation to explore flavors and experiment with different ingredients. Don’t hesitate to try out your unique variations or flavors, from tropical fruits to nuts that bring out the best in this Danish.
Ultimately, the joy of baking lies in sharing these delicious creations with your loved ones, creating memories, and indulging in the sweet rewards of your efforts. Happy baking!


