Introduction
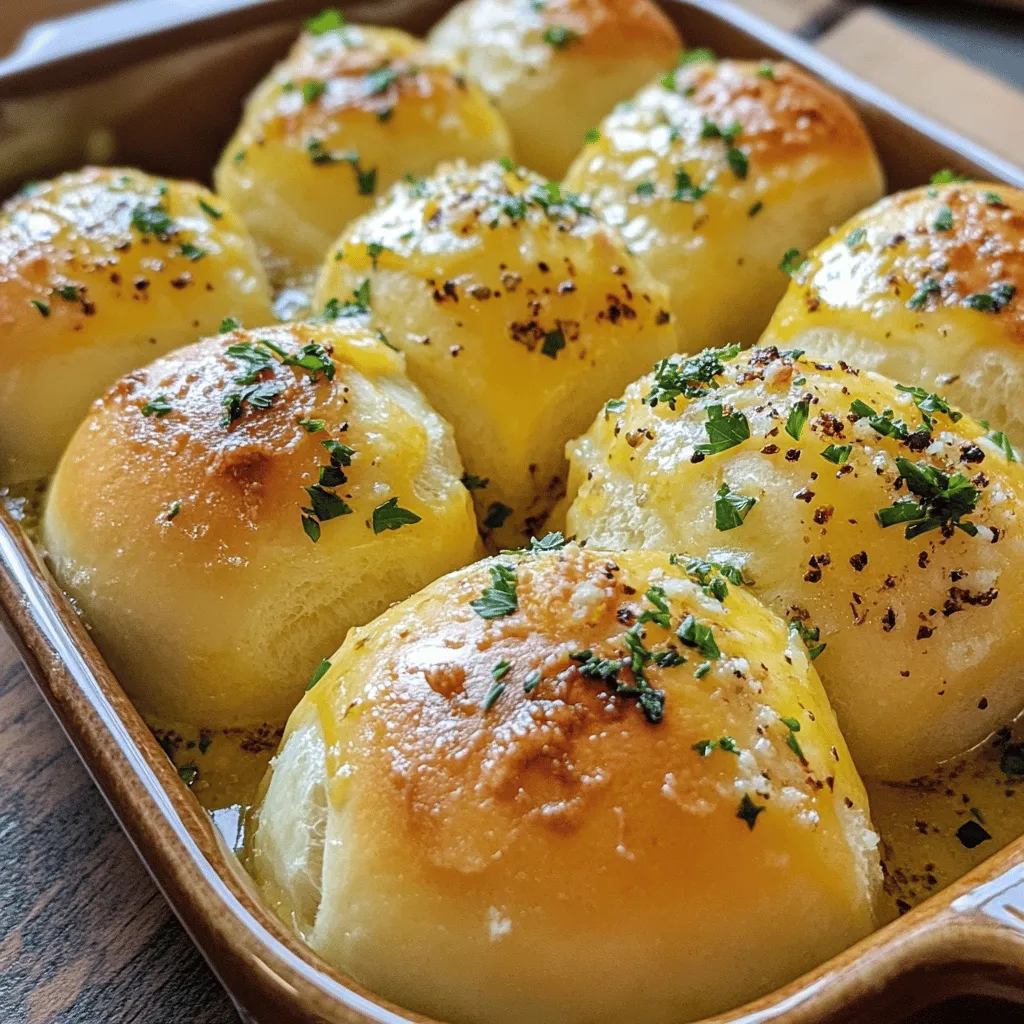
Garlic butter bread rolls are the epitome of comfort food, bringing a warmth and coziness that can elevate any meal into a memorable occasion. The enticing aroma of freshly baked rolls wafting through your home is a universal delight, beckoning everyone to gather around the dinner table. Whether you’re hosting a family dinner, celebrating a special occasion, or simply enjoying a casual meal with friends, these rolls are the perfect accompaniment. Their soft, fluffy texture combined with the rich flavor of garlic and butter makes them an irresistible treat that will leave everyone asking for seconds.
The joy of homemade bread is a unique experience, filled with anticipation as you mix, knead, and watch your dough rise. Not only does baking your own bread allow you to control the ingredients, but it also fills your kitchen with a comforting aroma that store-bought alternatives simply can’t replicate. With this simple yet rewarding recipe, you’ll discover just how easy it is to create these mouthwatering garlic butter bread rolls at home.
Understanding the Ingredients
To craft the perfect garlic butter bread rolls, understanding the role of each ingredient is crucial. Let’s explore the key elements that contribute to the delightful flavor and texture of these rolls.
All-Purpose Flour
All-purpose flour is the foundation of bread-making. Its balanced protein content, typically around 10-12%, makes it versatile enough for various baked goods, including bread. When flour is mixed with water, its proteins (glutenin and gliadin) combine to form gluten, which is essential for providing structure and elasticity in bread. The result is a roll that is soft yet sturdy, ideal for holding up to the generous garlic butter topping.
Active Dry Yeast
Active dry yeast is a key player in the rising process of bread. This form of yeast is packed with dormant microorganisms that react when activated with warm liquid. During this activation, the yeast begins to ferment, producing carbon dioxide gas that creates air pockets within the dough. This process is vital as it contributes to the light and airy texture of the rolls. It’s important to ensure that your yeast is fresh for optimal results; expired yeast may not rise effectively, leading to denser rolls.
Warm Milk
Warm milk serves multiple purposes in this recipe. It not only helps to activate the yeast but also adds moisture to the dough, contributing to a tender crumb. The warmth of the milk encourages the yeast to wake up, leading to a more vigorous fermentation process. Additionally, the fats and proteins found in milk enrich the dough, enhancing its flavor and texture.
Unsalted Butter
Unsalted butter is preferred in baking for its ability to allow precise control over the salt content in the recipe. It adds a rich flavor and a tender texture to the rolls. The fat in the butter coats the flour particles, inhibiting gluten formation slightly, which results in a softer crumb. When melted and brushed on top of the rolls before serving, the butter enriches the flavor and gives them a beautiful golden finish.
Garlic and Herbs
The star of the show—garlic—infuses these rolls with an aromatic and savory flavor that is simply irresistible. Freshly minced garlic is preferred for its robust taste, but you can also use garlic powder in a pinch. Complementing the garlic, a mix of herbs such as parsley, oregano, or even thyme can elevate the flavor profile, adding freshness and depth that balances the richness of the butter.
The Science of Bread-Making
Understanding the science behind bread-making can greatly enhance your baking skills and the quality of your rolls. Each step in the process plays a significant role in developing the right texture and flavor.
Yeast Activation
When you combine warm milk with active dry yeast, you’re initiating the fermentation process. Yeast consumes sugars present in the dough, producing carbon dioxide and alcohol as by-products. The carbon dioxide gas gets trapped within the gluten network, resulting in the dough rising. This fermentation not only aids in leavening but also contributes to the development of flavor.
Kneading
Kneading is an essential step in bread-making that helps develop gluten. As you knead the dough, the gluten proteins stretch and align, creating a strong network that can trap air. This is crucial for achieving a light and airy texture in your rolls. Kneading also helps to distribute the yeast and other ingredients evenly throughout the dough.
Rising Process
After kneading, the dough is left to rise, typically in a warm environment. This resting period, often referred to as the first rise, allows the dough to expand as yeast continues to ferment. The ideal rise time can vary, but generally, you want the dough to double in size. This process is vital for achieving the desired texture in the finished rolls; if the dough doesn’t rise sufficiently, the rolls may turn out dense and heavy.
Step-by-Step Guide to Making Garlic Butter Bread Rolls
Creating garlic butter bread rolls is a straightforward process that anyone can master. Here’s a detailed breakdown of the steps involved in making these delightful rolls.
Activating the Yeast
To begin, you’ll need to activate your yeast. Start by warming your milk to a temperature between 100°F and 110°F (about 37°C to 43°C). This temperature range is warm enough to awaken the yeast without killing it. In a mixing bowl, combine the warm milk with the active dry yeast and a teaspoon of sugar. The sugar acts as food for the yeast, accelerating the activation process. Allow this mixture to sit for about 5-10 minutes, or until you see a frothy layer forming on the surface. This frothiness indicates that the yeast is alive and ready to work its magic in your dough.
Mixing Dry Ingredients
While the yeast is activating, you can prepare your dry ingredients. In a large mixing bowl, combine all-purpose flour, salt, and any additional herbs you wish to include. It’s important to add salt to the dry ingredients rather than directly to the yeast mixture, as salt can inhibit yeast activity if added too early. Mixing the dry ingredients ensures that the salt and herbs are evenly distributed throughout the flour, which is essential for consistent flavor in your rolls.
Combining Ingredients
Once your yeast is activated and frothy, you can combine the wet and dry ingredients. Pour the yeast mixture into the bowl with the dry ingredients, along with the melted unsalted butter. Using a wooden spoon or your hands, mix until a shaggy dough forms. At this stage, the dough will be sticky and rough. Don’t worry; this is normal! As you continue to knead the dough, it will transform into a smoother, more cohesive ball.
As you proceed with the recipe, be sure to pay attention to the texture of the dough. It should be soft and slightly sticky but still manageable. If it feels too wet, you can sprinkle in a little extra flour, but be cautious not to over-flour, as this can lead to dense rolls. The key to perfect garlic butter bread rolls lies in finding the right balance of moisture and flour.
The next steps will guide you further into the delightful process of shaping, rising, and baking your garlic butter bread rolls, ensuring a warm and inviting experience that will leave you and your guests craving more.
Kneading the Dough
Kneading is a crucial step in bread-making, as it develops gluten, which gives bread its structure and chewiness. To knead the dough effectively, start by lightly dusting your work surface with flour to prevent sticking. Take the dough out of the mixing bowl and place it on the floured surface. Begin by pushing the dough down and away from you with the palms of your hands. Then fold the dough back over itself, give it a quarter turn, and repeat the process.
Kneading should last about 8-10 minutes. The dough is ready when it becomes smooth and elastic. A good test is to stretch a small piece of dough between your fingers; if it forms a thin, translucent membrane without tearing, you have successfully kneaded it. If the dough feels too sticky, sprinkle a little more flour on the surface and continue kneading. Conversely, if it feels dry, you can wet your hands slightly and continue kneading to incorporate moisture.
First Rise
The first rise, also known as fermentation, is essential for developing flavor and texture. After kneading, place the dough in a lightly greased bowl, turning it to coat the entire surface with oil. Cover the bowl with a damp cloth or plastic wrap to retain moisture. Let it rise in a warm, draft-free area for about 1-2 hours, or until it has doubled in size.
To know when the dough has risen enough, gently press two fingers into the surface. If the indentation remains, the dough is ready for the next step. If it springs back quickly, give it more time to rise. This simple test ensures that the yeast has properly fermented the dough, creating a light and airy texture.
Preparing the Garlic Butter
While the dough is rising, you can prepare the garlic butter that will infuse your rolls with rich flavor. In a small saucepan over low heat, melt about ½ cup of unsalted butter. Once melted, add 4-5 cloves of minced garlic—adjust this amount based on your preference for garlic intensity. Stir the mixture for about 2-3 minutes until the garlic becomes fragrant but does not brown.
To enhance the flavor, you can add a pinch of salt and a tablespoon of finely chopped fresh parsley or dried Italian herbs to the melted butter. The balance of buttery richness and aromatic garlic creates a delicious topping that complements the rolls beautifully.
Shaping the Rolls
Once the dough has completed its first rise, gently punch it down to release excess air. Transfer it to a lightly floured surface and divide it into equal portions, about 12-15 pieces, depending on your desired roll size. To shape the rolls, flatten each piece slightly and fold the edges toward the center, forming a ball. Pinch the seams together to seal and then roll the dough ball on the surface to create a smooth top.
Uniformity is key for even baking, so try to ensure each roll is approximately the same size. Once shaped, place the rolls in a greased baking dish, ensuring they are close but not touching, as they will expand during the second rise.
Second Rise
The second rise is critical for achieving soft and fluffy rolls. Cover the shaped rolls with a damp cloth or plastic wrap and allow them to rise again in a warm area for 30-60 minutes. The rolls should puff up significantly, filling the gaps between them. Again, perform the finger test; the dough should hold an indentation when gently pressed.
This step not only allows the dough to rise further but also enhances the flavor, resulting in a tender crumb that melts in your mouth.
Preheating and Baking
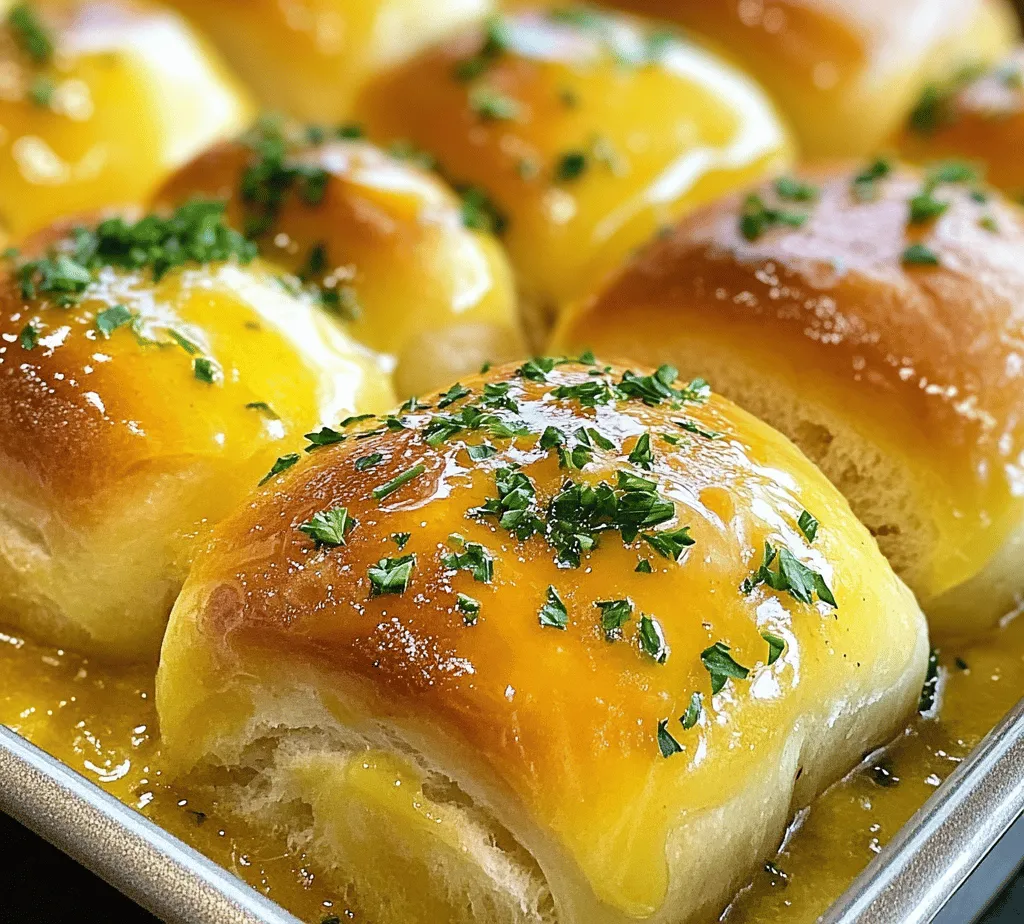
Before the second rise is complete, preheat your oven to 375°F (190°C). Baking the rolls at the right temperature is essential for achieving a golden-brown crust while keeping the inside soft and airy. Once the rolls have risen sufficiently, brush them generously with the prepared garlic butter, ensuring to drizzle some over the tops and in between.
Bake the rolls in the preheated oven for 20-25 minutes or until they are golden brown and sound hollow when tapped on the bottom. Keep an eye on them during the last few minutes of baking to avoid over-browning. If necessary, cover the rolls loosely with aluminum foil to prevent the tops from burning.
Serving Suggestions
Garlic butter bread rolls are incredibly versatile and can be served in numerous ways. They pair beautifully with a variety of dishes, making them a perfect addition to any meal. Consider serving them with:
– Soups and Stews: These rolls are perfect for soaking up delicious broths and sauces.
– Salads: Their rich flavor complements fresh salads, adding a satisfying element to your meal.
– Pasta Dishes: Serve alongside spaghetti, lasagna, or any pasta dish to create a comforting dining experience.
– As a Snack: Enjoy them warm, straight from the oven, or with extra garlic butter for a delightful snack.
Tips for Perfect Garlic Butter Bread Rolls
To ensure your garlic butter bread rolls come out perfectly every time, keep these tips in mind:
– Yeast Activation Troubles: If your yeast doesn’t froth when mixed with warm water, it may be expired or the water temperature may have been too hot or too cold. Aim for a temperature between 100°F and 110°F (37°C to 43°C) for optimal yeast activation.
– Dough Consistency: If your dough feels too sticky after kneading, add a small amount of flour—about a tablespoon at a time—until you achieve the desired texture. Conversely, if the dough is too dry, add water a teaspoon at a time until it reaches the right consistency.
– Baking Tips: To ensure even baking, rotate the baking dish halfway through the baking time. This helps prevent uneven browning. If you notice the tops browning too quickly, tent the rolls with aluminum foil to shield them from direct heat.
Culinary Variations
While the classic garlic butter flavor is irresistible, consider these variations to elevate your garlic butter bread rolls:
– Cheese-Stuffed Rolls: For a richer experience, insert a small piece of cheese, such as mozzarella or cheddar, into the center of each roll before shaping. This creates a gooey, cheesy surprise inside each fluffy roll.
– Herb Variations: Experiment with different herbs to customize the flavor. Fresh rosemary, thyme, or dill can add unique aromas and tastes that complement the garlic beautifully.
– Spicy Twist: If you enjoy a bit of heat, consider incorporating finely chopped jalapeños or red pepper flakes into the garlic butter. This adds a delightful kick that spice lovers will appreciate.
The Joy of Homemade Bread
Making bread at home is a rewarding experience that brings joy and satisfaction. The process allows you to connect with your ingredients and create something delicious from scratch. The aroma of freshly baked rolls wafting through your kitchen is an experience unlike any other, evoking feelings of warmth and comfort.
Additionally, homemade bread is often healthier than store-bought alternatives, as you can control the quality of the ingredients and avoid preservatives or additives. Sharing these rolls with family and friends enhances the joy of cooking, creating lasting memories around the dinner table.
Conclusion
Garlic butter bread rolls are a delightful addition to any meal, offering a perfect balance of flavors and textures. The process of making these rolls is not only fulfilling but also allows for creativity through various adaptations and flavors. Whether served alongside your favorite dishes or enjoyed on their own, these rolls are sure to impress.
Encourage your family and friends to gather around as you bake, sharing the experience of creating something delicious together. The warmth of the kitchen and the joy of sharing homemade food will undoubtedly lead to heartwarming moments that linger long after the last roll is gone. So, roll up your sleeves, follow the recipe, and enjoy the delicious results of your hard work!


