
Italian Pinwheels: A Flavorful Delight from the Heart of Italy
Introduction Explore the delightful world of Italian cuisine with our easy-to-make Italian Pinwheels. Perfect for …
Introduction Explore the delightful world of Italian cuisine with our easy-to-make Italian Pinwheels. Perfect for …

Introduction Comfort food holds a special place in our hearts and kitchens, evoking feelings of …

In the world of culinary delights, few dishes can capture the essence of outdoor cooking …
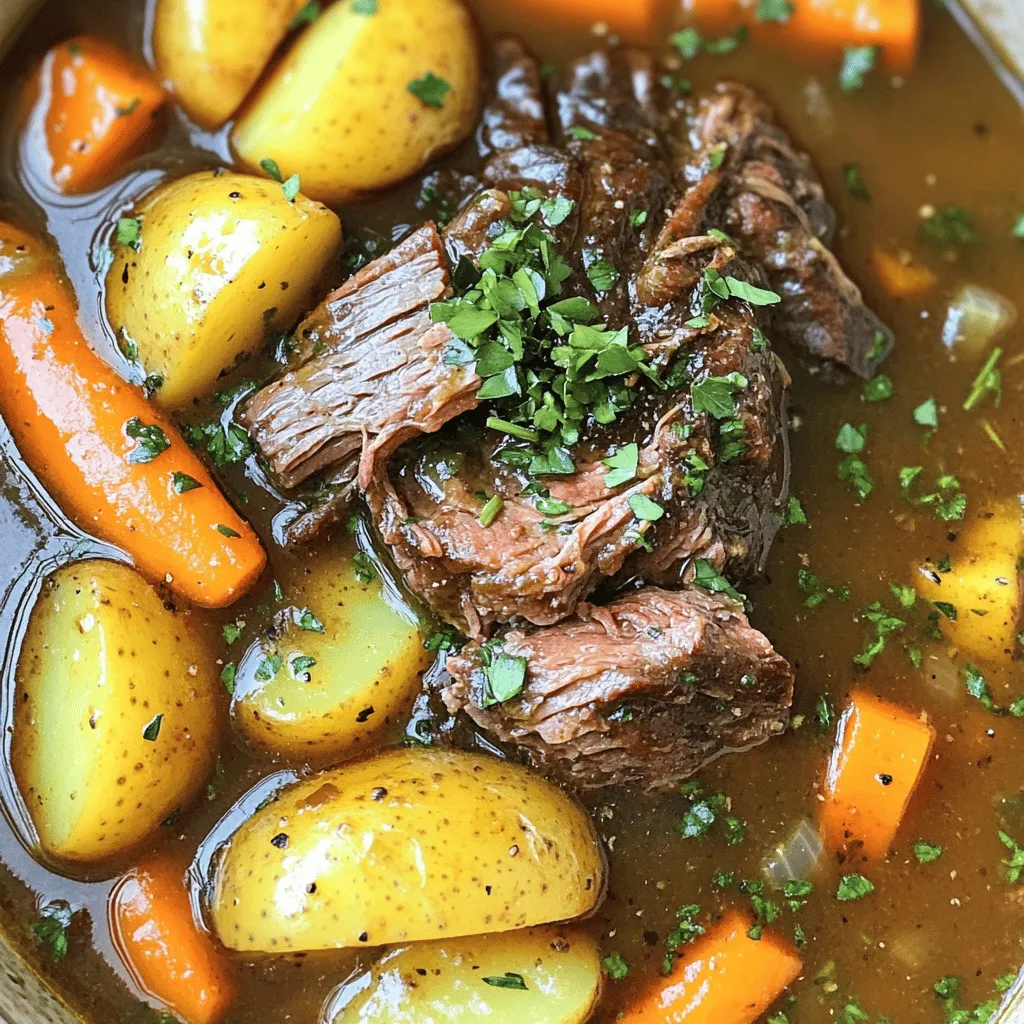
Introduction When it comes to comfort food, few things can rival the classic pot roast. …

Introduction Buffalo shrimp is a delightful appetizer that marries the crunch of perfectly fried shrimp …
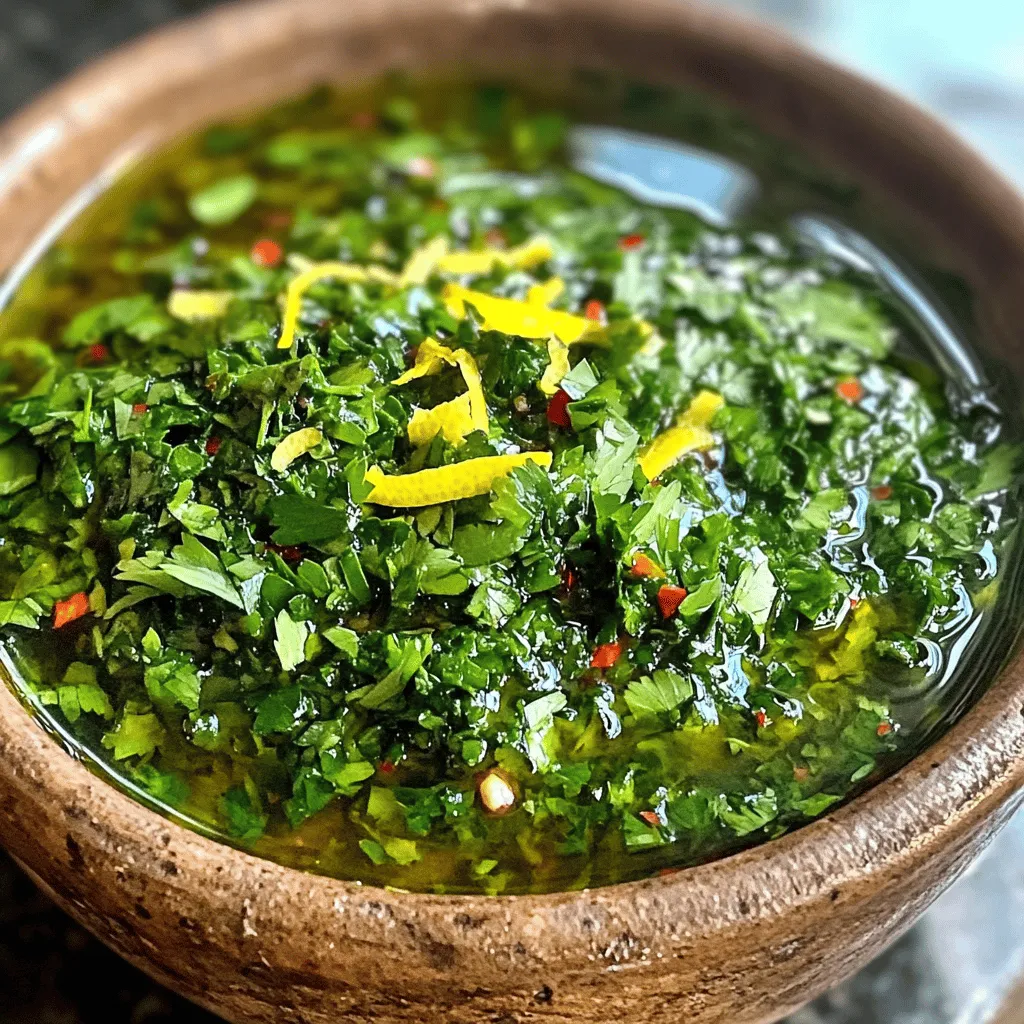
Chimichurri Fiesta Sauce is more than just a condiment; it’s a vibrant celebration of flavor …
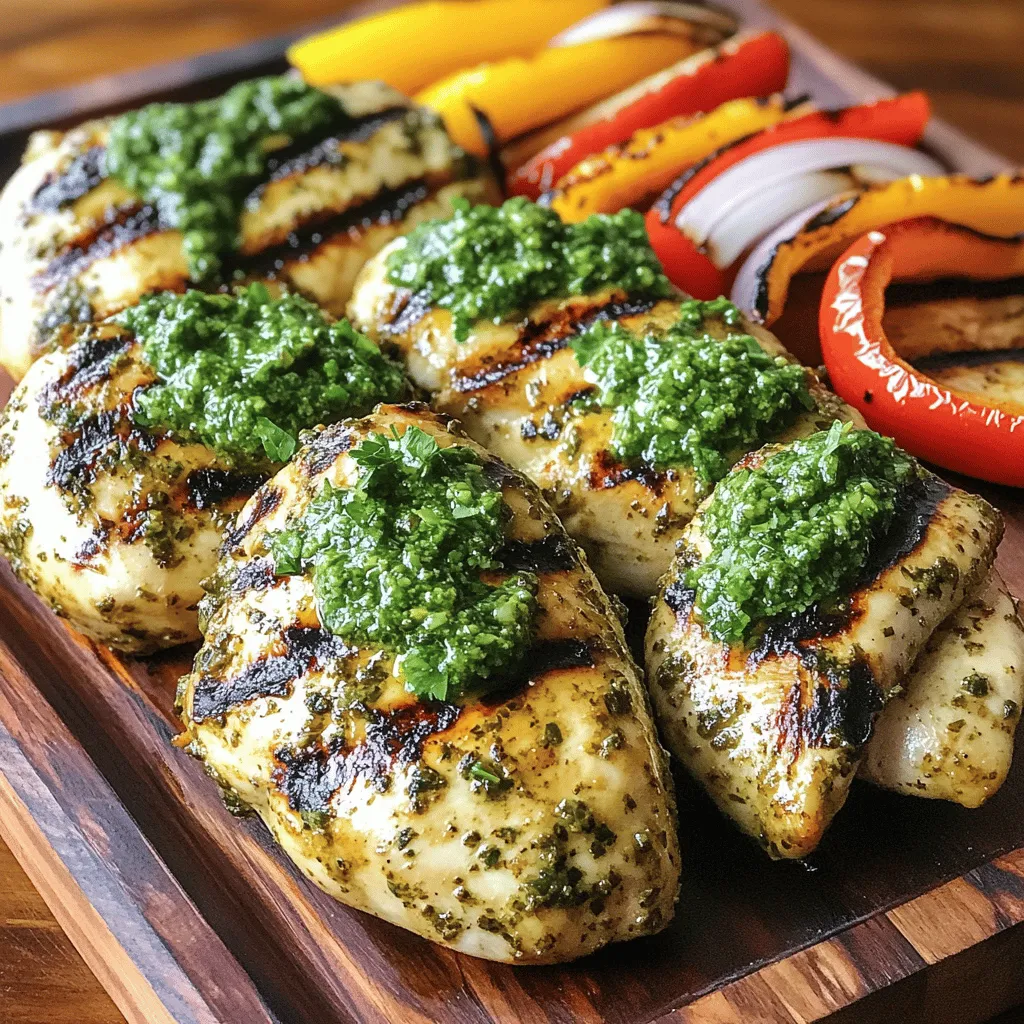
Introduction Welcome to the vibrant world of Chimichurri Chicken Fiesta, a dish that promises to …
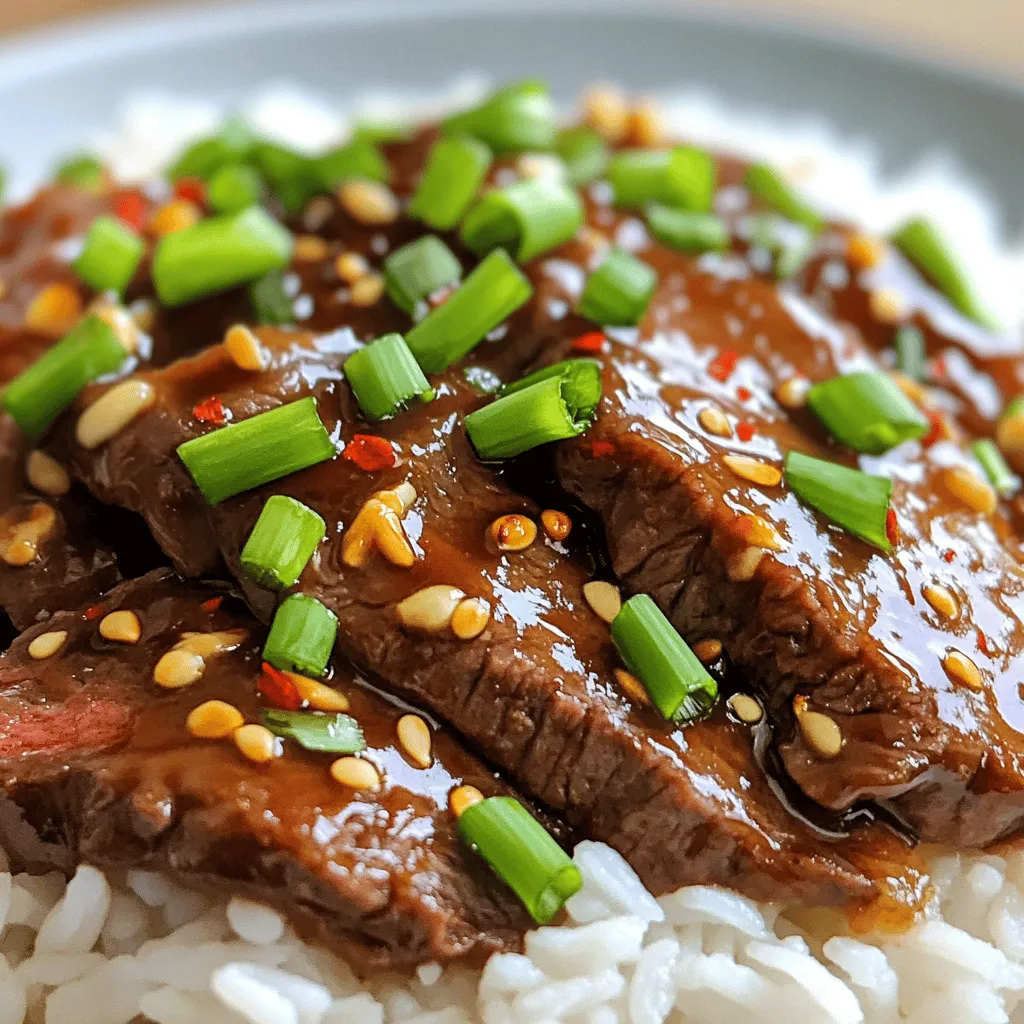
Mongolian Beef has captured the hearts and palates of food lovers around the globe. Originating …

Introduction Comfort food holds a special place in our hearts, transcending borders and cultures to …

Introduction Garlic Parmesan Chicken Skewers are a delightful and mouthwatering dish that combines tender pieces …