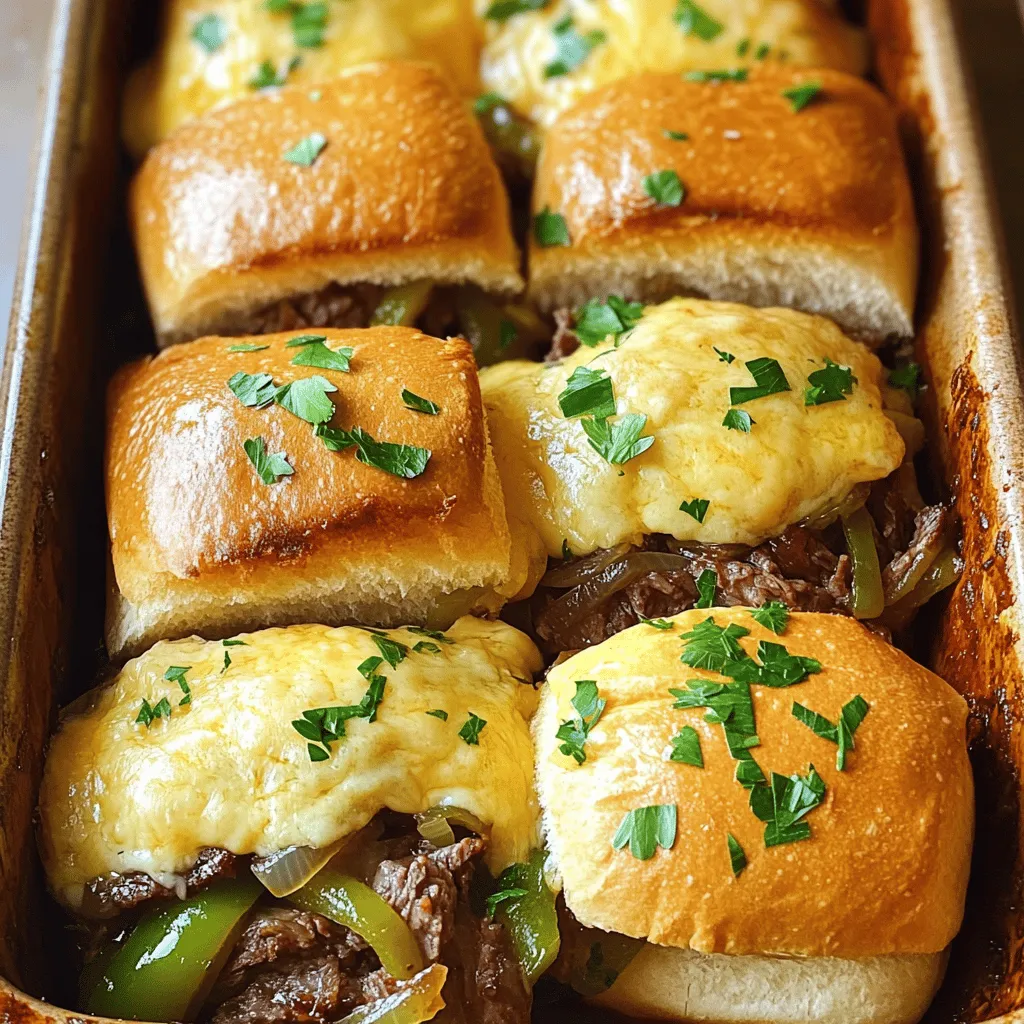
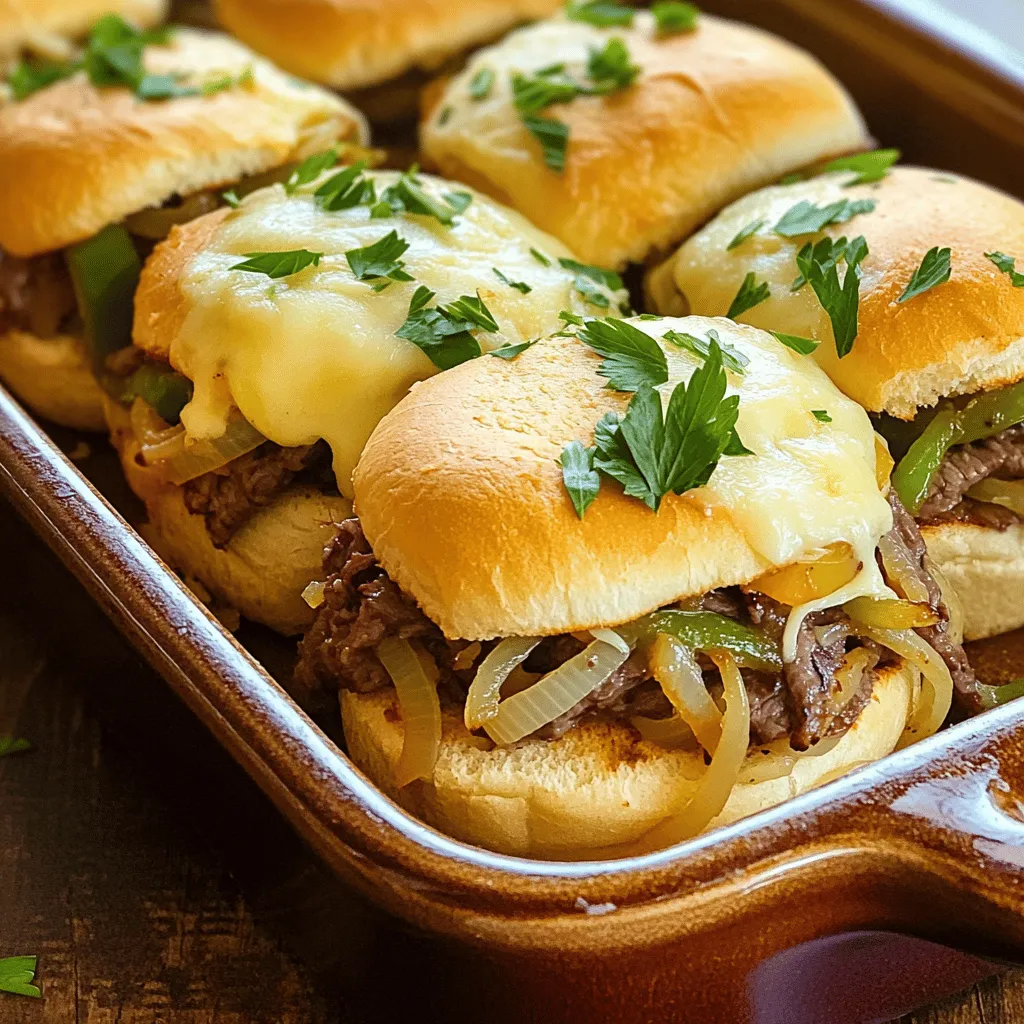
Looking for a tasty game day treat? Look no further than these Philly Cheesesteak Sliders! They pack all the classic flavors of a traditional cheesesteak into bite-sized goodness. With juicy beef, sautéed veggies, and melty cheese, these sliders are easy to make and perfect for sharing. Whether you’re hosting friends or just craving something special, this recipe will have everyone asking for seconds. Let’s dive into the delicious details!
Ingredients
Main Ingredients
– 1 lb thinly sliced beef steak (ribeye or sirloin works best)
– 1 onion, thinly sliced
– 1 green bell pepper, thinly sliced
– 8 slider buns
– 8 slices provolone cheese
The beef steak is the star here. Ribeye gives a rich flavor, while sirloin is leaner. Both options are great. Next, we have the vegetables. Onions add sweetness, and green bell peppers give crunch and color. For cheese, provolone melts nicely. You can also use mozzarella for a different taste.
Essential Condiments
– 2 tablespoons olive oil
– 1 tablespoon Worcestershire sauce
– 1 teaspoon garlic powder
– Salt and pepper to taste
Olive oil helps cook the veggies. It adds a nice flavor too. Worcestershire sauce adds depth and a bit of tang. Garlic powder gives that warm, savory taste. Salt and pepper are must-haves for seasoning.
Slider Components
– 8 slider buns
– Fresh parsley for garnish (optional)
Slider buns hold all the goodness together. They should be soft but sturdy. Fresh parsley adds a pop of color and freshness. It’s not necessary but it looks nice.
Step-by-Step Instructions
Cooking the Vegetables
Start by heating a large skillet over medium heat. Add 2 tablespoons of olive oil to the skillet. Once the oil is hot, add 1 thinly sliced onion and 1 thinly sliced green bell pepper. Sauté them for about 4-5 minutes. You want the veggies to be soft and slightly translucent. This step adds great flavor to your sliders.
Preparing the Beef
Next, increase the heat to medium-high. Add 1 pound of thinly sliced beef steak to the skillet. I recommend using ribeye or sirloin for the best taste. Season the beef with 1 teaspoon of garlic powder, salt, and pepper. Stir and cook for about 3-4 minutes until the beef is browned and cooked through. Pour in 1 tablespoon of Worcestershire sauce and stir to mix everything well. Remove the skillet from heat when combined.
Assembling the Sliders
Now, preheat your oven to 350°F (175°C). Get a baking dish ready by placing the bottom halves of 8 slider buns in it. Evenly distribute the beef and vegetable mixture over the buns. Then, place 8 slices of provolone cheese on top. Make sure some cheese overlaps to create that melty goodness we all love.
Baking Instructions
Cover the dish with aluminum foil. Bake in your preheated oven for about 10-12 minutes. This helps the cheese melt perfectly. For an extra melty texture, you can remove the foil for the last 2 minutes of baking. Let the sliders cool for a minute before cutting them into individual pieces.
Tips & Tricks
Meal Prep Ideas
You can make these Philly cheesesteak sliders ahead of time. Prepare the beef and veggies, then store them in an airtight container. They will stay fresh for up to three days in the fridge. When you’re ready, just reheat the mixture on the stove.
For storing leftovers, place the sliders in a container. Cover them tightly to keep them from drying out. They are best eaten within two days. To reheat, warm them in the oven at 350°F (175°C) for about 10 minutes. This keeps the sliders soft and the cheese melty.
Perfecting Flavor
To add more flavor, try using spices like smoked paprika or crushed red pepper. These spices can give your sliders a nice kick. You can also mix in some sautéed mushrooms for an earthy taste.
Balancing flavors is key. If your beef is rich, add a splash of vinegar for tang. Fresh herbs like cilantro or basil can brighten the dish. Just sprinkle some on before serving for a fresh touch.
Serving Suggestions
These sliders go well with a side of crispy fries or a fresh salad. You could also serve them with coleslaw for a crunchy contrast. For drinks, cold beers or sweet iced tea pair nicely with the savory sliders.
If you want something fun, try a fruity soda to complement the flavors. You can even make a small platter with different dips like ranch or spicy ketchup. This adds a fun twist to your game day spread.
Variations
Philly cheesesteak sliders are versatile. You can easily switch up the ingredients to suit your taste.
Classic Alternatives
One great option is swapping beef for chicken or turkey. Thinly sliced chicken or turkey works well. It keeps the dish light but still tasty.
For vegetarian options, try using mushrooms and bell peppers. The mushrooms give a nice meaty texture. Pair them with colorful peppers for added flavor.
Flavor Twist Ideas
Want to add some heat? Toss in jalapeños for a spicy kick. They bring a nice crunch and warmth to each bite.
You can also explore different cheese varieties. Try cheddar, gouda, or even pepper jack for a fun twist. Each cheese adds its own unique flavor.
Slider Size and Style
Consider the size of your sliders. Mini sliders are perfect for parties. They let guests enjoy a bite-sized treat. Full-size sliders can be a hearty meal.
When it comes to presentation, think about how you serve them. Arrange sliders on a large platter. Add fresh parsley for a pop of color. This makes your dish look as good as it tastes.
Storage Info
Refrigeration Guidelines
To store leftover Philly Cheesesteak Sliders, place them in an airtight container. Make sure to seal it tightly. This keeps the sliders fresh and prevents them from drying out. You can also wrap them in plastic wrap before placing them in a container for added protection. The shelf life of your sliders in the fridge is about 3 to 4 days. After this time, the flavors may fade, and the texture can change.
Freezing Tips
You can freeze Philly Cheesesteak Sliders before or after baking. If you freeze them before baking, assemble the sliders as usual, but skip the baking step. Wrap them tightly in plastic wrap and then in aluminum foil. This helps prevent freezer burn. If you choose to freeze after baking, let the sliders cool completely first. Then, wrap them well and place them in a freezer-safe bag.
For reheating frozen sliders, take them out and let them thaw in the fridge overnight. This keeps them from getting soggy. When you are ready to enjoy, bake them at 350°F (175°C) for about 15 to 20 minutes. This will help regain that fresh-baked taste and melty texture.
FAQs
How long do Philly Cheesesteak Sliders last in the fridge?
Philly cheesesteak sliders can last up to three days in the fridge. Store them in an airtight container to keep them fresh. If you want them to taste great, eat them within this time. After three days, they may lose flavor and texture.
Can I make Philly Cheesesteak Sliders without cheese?
Yes, you can make these sliders without cheese. Try using mashed avocado or hummus for a creamy texture. You can also add more veggies like mushrooms or spinach for added flavor. This keeps the dish tasty while fitting your diet.
What sides pair well with Philly Cheesesteak Sliders?
Many sides go well with these sliders. Here are some popular choices:
– Potato chips
– French fries
– Coleslaw
– Pickles
– Sweet potato fries
These sides add crunch and balance the rich flavor of the sliders.
How can I make these sliders spicier?
To spice up your sliders, consider these options:
– Add sliced jalapeños for a nice kick.
– Use pepper jack cheese instead of provolone.
– Mix in hot sauce with the beef and veggies.
These options add heat without taking away the great flavors of the cheesesteak.
Philly Cheesesteak Sliders are fun to make and taste great. We discussed key ingredients like ribeye, onions, and provolone cheese. I shared easy steps to cook everything and assemble the sliders. You can customize flavor with spices and even switch up main ingredients. Plus, I gave tips on storing and reheating your sliders for future meals. Don’t forget to explore add-ons and serving ideas for your next gathering. Enjoy making these delicious treats for family or friends!