If you love dessert and want a fun twist on a classic, you’ll adore these Muffin Tin Mini Pineapple Upside Down Cakes! They’re easy to make and packed with sweet flavor. With just a few simple ingredients and my step-by-step guide, you’ll impress friends and family in no time. Get ready to bring a taste of tropical paradise to your kitchen! Let’s dive into making this delightful treat!
Ingredients
To make Muffin Tin Mini Pineapple Upside Down Cakes, you’ll need a few key ingredients. Each one adds a special touch to the final cake, making it both tasty and fun to eat. Here’s what you should gather:
– Pineapple Slices
– Butter and Sugars
– Dry Ingredients
– Wet Ingredients
– Optional Garnish
Pineapple Slices
The star of this dessert is the pineapple. Use canned pineapple slices for ease. These slices caramelize well. If you prefer, fresh pineapple can work too, but it needs more prep.
Butter and Sugars
You will need unsalted butter for this recipe. It adds richness to the cakes. Brown sugar brings a soft sweetness and helps create that lovely caramel layer. Regular granulated sugar adds lightness to the cake.
Dry Ingredients
The dry ingredients include all-purpose flour, baking powder, baking soda, and salt. These help the cakes rise and keep them light. Mixing them well ensures even distribution in the batter.
Wet Ingredients
For the wet mix, you need a large egg, vanilla extract, and reserved pineapple juice. The juice adds flavor and moisture to the batter. Creaming the sugar and egg together creates a fluffy base.
Optional Garnish
Maraschino cherries are great for decoration. They add a pop of color and a sweet taste. You can skip them if you want a simpler look.Each ingredient plays a role in this delightful treat. Enjoy the process as you gather your items!
Step-by-Step Instructions
Preparation Steps
1. Preheating Oven & Greasing Muffin Tin
Start by preheating your oven to 350°F (175°C). This step is key. While it’s heating, grease your muffin tin with cooking spray or melted butter. This helps the cakes pop out easily.
2. Preparing Brown Sugar Mixture
In a small bowl, mix melted butter and brown sugar. Stir until it’s well combined. You will need about one tablespoon of this mixture in each muffin slot.
3. Arranging Pineapple Slices
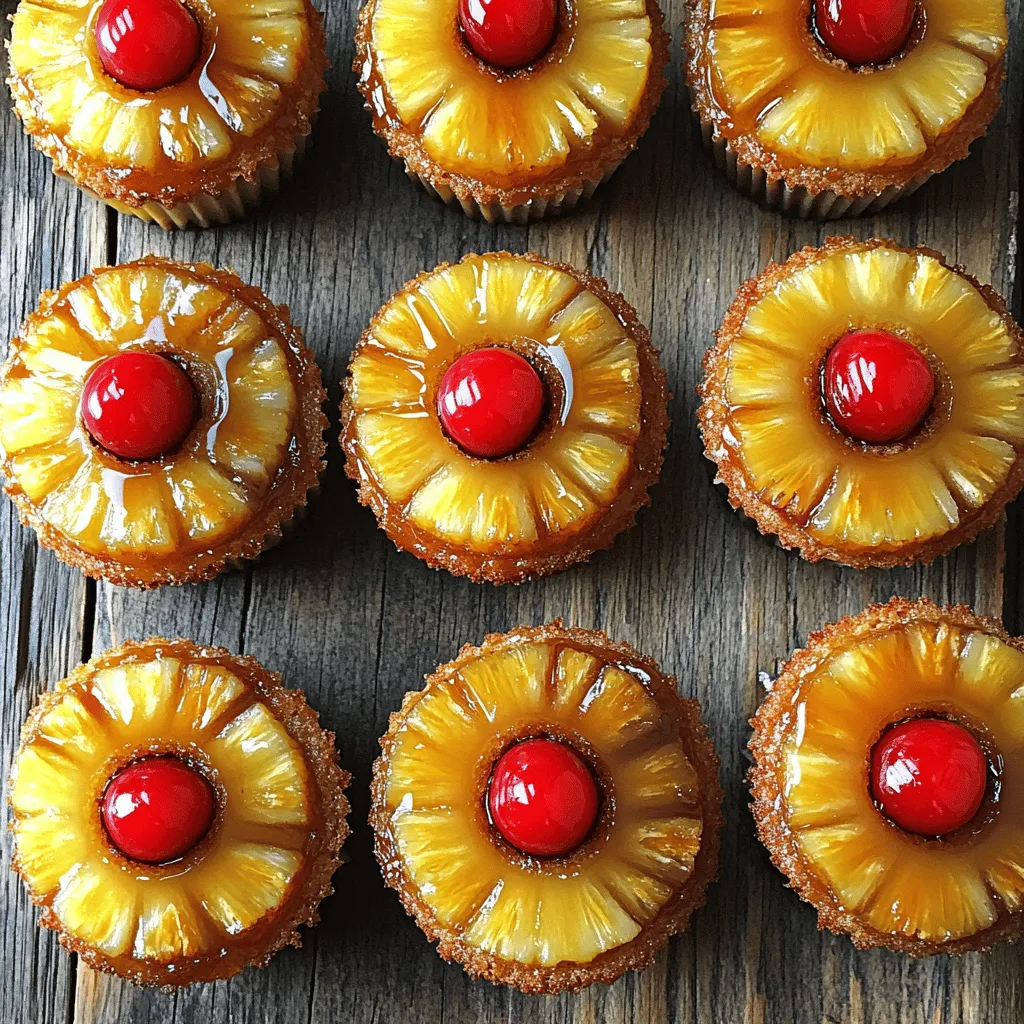
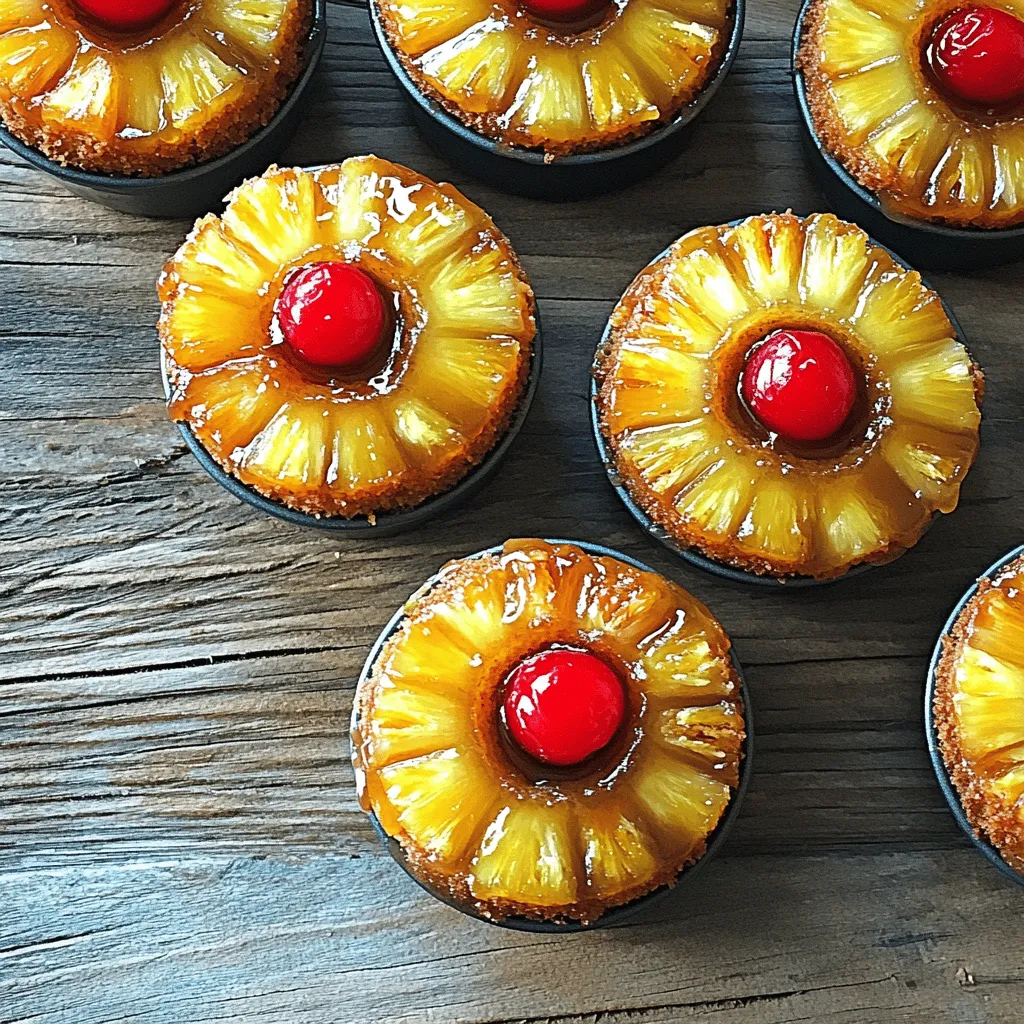
Now, place a pineapple slice on top of the brown sugar mixture in each slot. You can add a cherry in the center of each slice for a pop of color and flavor.
Mixing Ingredients
1. Combining Dry Ingredients
In another bowl, whisk together the flour, baking powder, baking soda, and salt. This mixture gives your mini cakes structure and helps them rise.
2. Creaming Wet Ingredients
In a larger bowl, cream granulated sugar and egg together until fluffy. Then, add reserved pineapple juice and vanilla extract. Mix well until everything is combined.
3. Combining Wet and Dry Mixtures
Gradually add the dry mixture to the wet mixture. Stir until just combined. Be careful not to overmix; this keeps your cakes light and fluffy.
Baking Process
1. Filling the Muffin Tin
Spoon the batter over the pineapple slices in the muffin tin. Fill each slot about three-quarters full. This allows room for the cakes to rise.
2. Baking Time and Temperature
Bake in your preheated oven for 18-20 minutes. To check for doneness, insert a toothpick in the center. If it comes out clean, the cakes are ready.
3. Cooling and Inverting Mini Cakes
Once baked, remove the muffin tin from the oven. Let it cool for about five minutes. Carefully run a knife around the edges of each cake. Then, invert the muffin tin onto a serving plate. Your mini cakes should fall out easily, revealing the pineapple on top.
Tips & Tricks
Best Practices for Success
Avoiding Overmixing
Mixing too much can ruin your mini cakes. Stir just until the ingredients blend. This keeps the cakes light and fluffy. If you see dry bits, that’s fine! It will bake perfectly.
Ensuring Proper Greasing
Greasing the muffin tin is key for easy release. Use cooking spray or melted butter. Make sure to coat every slot. This prevents sticking and helps the cakes pop out easily.
Baking Tips
Checking for Doneness
To check if your cakes are done, use a toothpick. Insert it into the center. If it comes out clean, your cakes are ready! If not, bake for a few more minutes. Keep an eye on them!
Cooling Tips for Easy Removal
After baking, let the cakes cool for 5 minutes. This helps them set but still be warm. Run a knife around the edges to loosen them. Invert the tin onto a plate gently. The cakes should slide out nicely.
Serving Suggestions
Presentation Ideas
For a fun look, place the mini cakes upside down on a plate. You can add a cherry on top for color. A sprinkle of powdered sugar also looks nice. Serve them warm for the best taste.
Pairing with Ice Cream or Whipped Cream
These mini cakes taste great with ice cream or whipped cream. The cool cream balances the sweet pineapple. It adds a soft texture to the dessert. Try vanilla or coconut flavors for a twist!
Variations
Ingredient Substitutions
Using Fresh Pineapple
You can use fresh pineapple instead of canned. Fresh fruit adds bright flavor. Cut the pineapple into rings. You can grill or roast them first for extra caramelization. This change gives your mini cakes a fresh taste that is hard to beat.
Alternative Sweeteners
If you want to reduce sugar, try using honey or maple syrup. Just remember to adjust the liquid in the batter. You can also use stevia or monk fruit for a low-calorie option. These sweeteners work well and keep the cakes moist.
Flavor Additions
Adding Coconut Flakes
Coconut flakes add a tropical twist. Mix about 1/4 cup of sweetened coconut into the batter. This addition gives your cakes a lovely texture and extra flavor. You can also sprinkle more on top before baking for a nice crunch.
Incorporating Nuts
Chopped nuts bring a nice crunch to the mini cakes. Use walnuts, pecans, or macadamia nuts. Just fold in about 1/4 cup of nuts into the batter. This step adds richness and makes the cakes even more satisfying.
Mini Cakes for Different Occasions
Holiday Themes
For special occasions, decorate the mini cakes with holiday themes. Use colored frosting or edible glitter. You can also top them with themed sprinkles. These small touches make your dessert stand out during celebrations.
Kid-Friendly Decorations
Kids love fun designs. Consider using whipped cream and chocolate chips to create faces. You can also add colorful candy for a playful look. This makes the mini cakes appealing and fun for little ones to enjoy.
Storage Info
Storing Leftovers
– Room Temperature Storage: You can keep the mini cakes at room temperature for one day. Make sure to cover them with plastic wrap or place them in an airtight container.
– Refrigeration Guidelines: If you want to store them longer, put the mini cakes in the fridge. They can last up to five days when wrapped well.
Reheating Instructions
– Best Methods for Reheating: I recommend using an oven to reheat your mini cakes. Set it to 350°F (175°C) and warm them for about 5-10 minutes. This keeps them crispy and tasty.
– How to Keep Cakes Moist: To keep your cakes moist, cover them with foil while reheating. You can also add a splash of pineapple juice for extra moisture.
Freezing Options
– Freezing Mini Cakes: You can freeze the mini cakes for up to three months. Wrap each cake in plastic wrap, then place them in a freezer bag. This helps to avoid freezer burn.
– Thawing Tips: To thaw, move the cakes to the fridge overnight. If you need them fast, leave them at room temperature for a couple of hours. Enjoy them fresh after thawing!
FAQs
Common Questions
Can I use a regular cake pan instead of a muffin tin?
Yes, you can use a regular cake pan. Just adjust your baking time. A larger pan may need more time to bake. Check with a toothpick to know when it’s done.
What can I substitute for the egg?
You can use applesauce or mashed banana. About 1/4 cup will work well. These will help keep your cakes moist and tasty.
How long do these cakes last?
These mini cakes last about three days at room temperature. If you put them in the fridge, they stay fresh for up to a week.
Baking-Related Queries
Why did my cakes stick to the tin?
If your cakes stick, you may not have greased the tin well. Make sure to coat it evenly with butter or cooking spray.
Can I make these ahead of time?
Yes! You can bake these mini cakes a day ahead. Just keep them in an airtight container until you are ready to serve.
Ingredient Questions
Can I use other fruits besides pineapple?
Absolutely! You can use peaches, cherries, or even apples. Just cut them into slices and follow the same steps.
Is there a gluten-free option for this recipe?
Yes, you can use a gluten-free flour blend. Just replace all-purpose flour with it. Make sure it has a good binding agent to keep the cakes together.
We covered how to make delicious mini pineapple cakes, step by step. Start with simple ingredients like pineapple slices and sugars. Follow the preparation and baking tips for the best results. Don’t forget to explore variations and storage info to keep your cakes fresh. Finally, these mini cakes are perfect for any occasion. Enjoy sharing this treat with friends and family!


