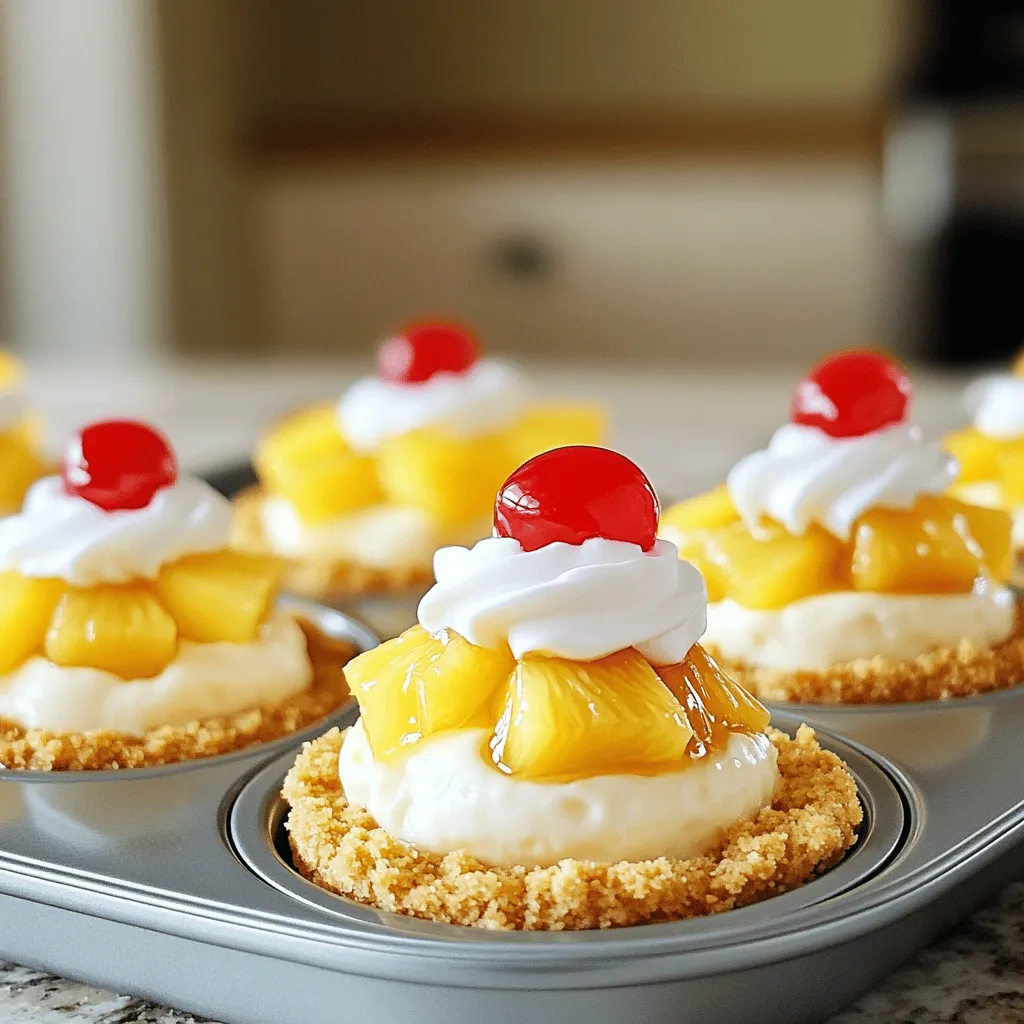
If you’re looking for a treat that brings a tropical twist to dessert, you’re in the right place! Mini Pineapple Upside Down Cheesecakes combine creamy cheesecake goodness with the bright flavor of pineapple. This easy-to-follow recipe will have you baking up a storm. Let’s dive into the sweet world of these delightful mini cheesecakes! Grab your ingredients and get ready for a fun kitchen adventure!
Ingredients
List of Ingredients
– 1 cup graham cracker crumbs
– 5 tablespoons unsalted butter, melted
– 2 tablespoons brown sugar
– 8 oz cream cheese, softened
– 1/2 cup granulated sugar
– 1 teaspoon vanilla extract
– 1/2 cup sour cream
– 1 large egg
– 1 can (8 oz) sliced pineapple, drained
– Maraschino cherries for topping
Ingredient Substitutions
– You can use crushed cookies or oatmeal for graham cracker crumbs.
– For a non-dairy option, try plant-based cream cheese.
– Swap granulated sugar with honey or agave for a healthier choice.
Using these substitutes can still give you a great taste. Each ingredient plays a role. The graham cracker crumbs give a nice crunch. The cream cheese provides that creamy delight we crave. By adjusting these ingredients, you can make the recipe fit your needs.Enjoy making these delightful treats!
Step-by-Step Instructions
Preheating and Preparing the Pan
First, preheat your oven to 325°F (160°C). This step is key for even baking. Next, line a muffin tin with paper liners. These liners help to lift the mini cheesecakes out easily.
Making the Crust
In a medium bowl, mix together the graham cracker crumbs, melted butter, and brown sugar. Stir until the mixture looks like wet sand. This adds flavor and crunch. Divide the crumb mixture among the muffin cups, using about one tablespoon for each cup. Press down firmly to form a solid crust.
Preparing the Cheesecake Filling
In a large mixing bowl, beat the softened cream cheese with granulated sugar. Mix until it’s smooth and creamy. This is where the magic happens! Add in the vanilla extract and sour cream, blending until everything is well combined. Then, beat in the egg until just mixed. Be careful not to overmix, as this can affect the texture.
Assembling the Cheesecakes
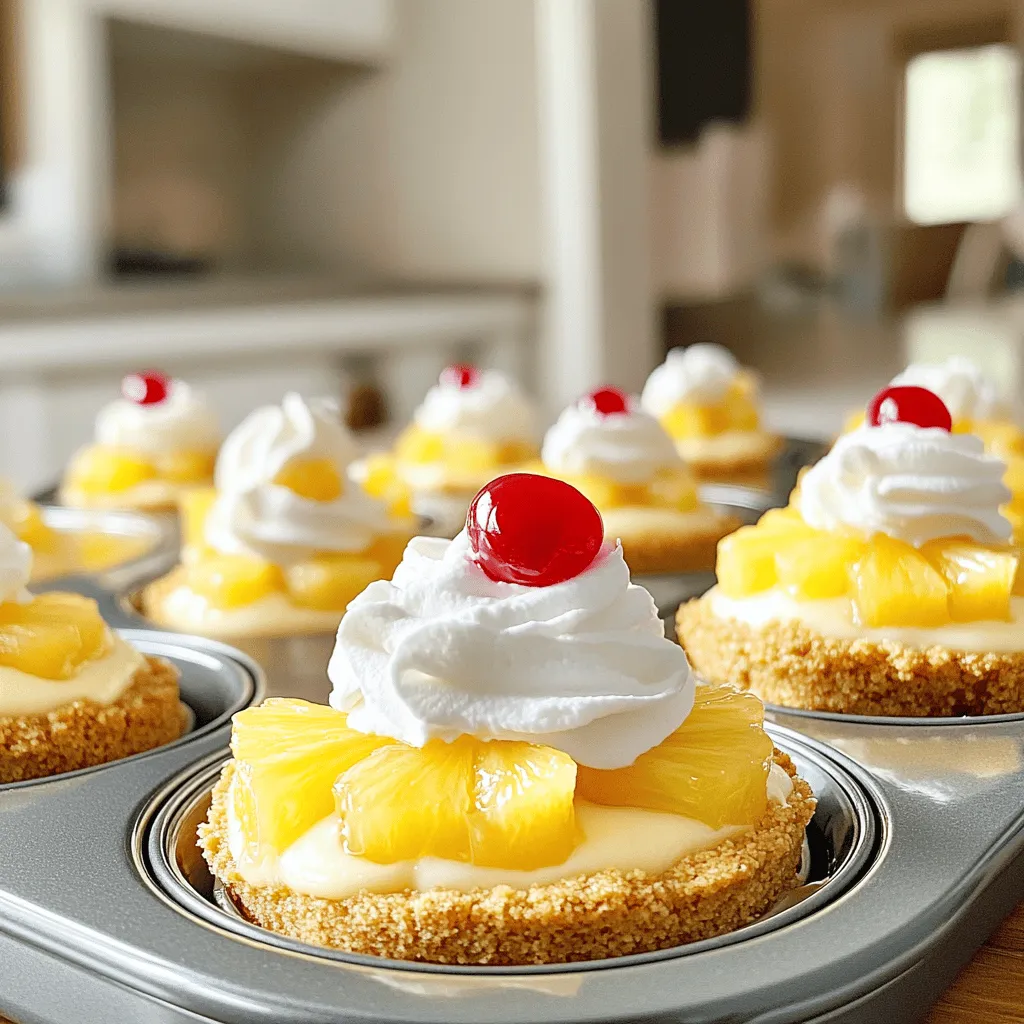
Now, it’s time to spoon the cheesecake filling into the crusts. Fill each cup about three-quarters full. This allows room for the topping. Cut the pineapple slices into small pieces. Place one piece on top of each cheesecake. Don’t forget to add a cherry for a pop of color!
Baking
Bake your mini cheesecakes in the oven for 20-25 minutes. They should be set but still slightly jiggly in the center. This indicates they are done. Keep an eye on them, as baking times can vary.
Cooling and Refrigerating
Once baked, remove the cheesecakes from the oven. Let them cool for about 30 minutes at room temperature. Then, refrigerate them for at least 2 hours before serving. This cooling is important; it helps set the texture and enhances the taste.
Enjoy this delightful treat as a sweet ending to your meal!
Tips & Tricks
Baking Recommendations
– To avoid cracks in cheesecakes, do not overmix the filling. Mix the cream cheese and sugar until smooth, then add the egg and blend gently. This keeps air bubbles out.
– Ensure even baking by using a water bath. Place a pan of water on the oven rack below your cheesecakes. This helps maintain moisture and prevents over-baking.
Serving Suggestions
– For presentation, garnish with a dollop of whipped cream and a slice of fresh pineapple. This adds a nice touch and enhances the tropical feel.
– Pair these cheesecakes with a refreshing drink like coconut water or iced tea. The light flavors balance the sweetness of the dessert.
Common Errors to Avoid
– Do not overmix ingredients. Overmixing can make the cheesecake too airy and cause cracks during baking. Mix just until combined.
– Avoid underbaking cheesecakes. They should be set with a slight jiggle in the center. If they look too soft, give them a few more minutes.
Variations
Flavor Variations
You can make mini pineapple upside down cheesecakes even more fun! Adding coconut gives them a tropical twist. Just mix in shredded coconut when you beat the cream cheese. You can also drizzle melted chocolate on top for a sweet contrast. This extra layer makes each bite even better.
Dietary Modifications
Need to change things up? You can use gluten-free graham cracker crumbs for the crust. This way, everyone can enjoy them! For a vegan option, swap the cream cheese for a nut-based cheese. Use flax eggs instead of the regular egg. These changes keep the taste while meeting dietary needs.
Mini Cheesecake Alternatives
Want to switch up the fruit? Try using other fruits like peaches or berries. They add unique flavors to your cheesecake. You can also change the base flavor. Instead of vanilla, use almond or lemon extract for a different taste. Each twist makes your desserts special and fun!
Storage Info
Short-term Storage
To keep your mini pineapple upside down cheesecakes fresh, store them in the refrigerator. Place them in an airtight container or cover them tightly with plastic wrap. This helps prevent them from drying out and keeps them tasty. For the best flavor, enjoy them within three days. If you want to keep them even fresher, wait to add the cherries until you’re ready to serve.
Freezing Guidelines
You can freeze these mini cheesecakes for a longer shelf life. First, make sure they are completely cool. Then, wrap each cheesecake tightly in plastic wrap and place them in a freezer-safe container. This way, they won’t get freezer burn. When you’re ready to eat, take them out and thaw them in the fridge overnight. This keeps the texture nice and creamy.
Shelf Life
For chilled mini cheesecakes, they last about three days in the fridge. If you freeze them, they can last up to two months. Just make sure to keep track of when you freeze them. Always check for any signs of freezer burn or changes in color before eating. Enjoy your delicious treats while they are fresh!
FAQs
How do I know when mini cheesecakes are done?
You can tell when mini cheesecakes are done by looking for a few signs. The edges should be set, while the center remains slightly jiggly. A toothpick inserted into the edge should come out clean. If it pulls out with some cheesecake mixture, it needs more time. Keep a close eye on them to avoid overbaking.
Can I make these mini cheesecakes ahead of time?
Yes, you can make these mini cheesecakes ahead of time! They taste great after a night in the fridge. Just follow the recipe, then chill them for at least two hours before serving. You can also freeze them for longer storage. Wrap them tightly in plastic wrap and place them in an airtight container.
What can I use instead of sour cream?
If you need an alternative for sour cream, you can use Greek yogurt or cream cheese. Both will add creaminess to your cheesecakes. You can also use buttermilk for a tangy flavor. Just make sure to adjust the quantity based on your choice.
Can I use fresh pineapple instead of canned?
Yes, you can use fresh pineapple! It adds a nice, bright flavor. Cut the pineapple into small pieces and make sure to remove the core. You may want to cook the fresh pineapple briefly to soften it. This step helps it blend better with the cheesecake filling.
How do I serve these cheesecakes?
Serve these cheesecakes chilled for the best taste. Top them with whipped cream for added sweetness. You can also add a slice of fresh pineapple or a maraschino cherry on top. Arrange them on a pretty platter for a nice presentation. For an extra touch, drizzle some caramel or chocolate sauce over them.
You now have a complete guide to making delicious mini cheesecakes. We covered key ingredients, step-by-step instructions, and helpful tips for the best results. Remember to choose ingredient substitutes if needed and avoid common mistakes during baking. Don’t forget to explore variations to make each cheesecake unique. Store them properly to keep them fresh. With these tools, you can create tasty treats for any occasion. Happy baking!
