Are you ready to dive into a refreshing dessert that screams summer? This Key Lime Cheesecake is the perfect blend of tart and sweet, bringing sun and zest right to your table. In this article, I’ll share easy steps and tips to help you create a cheesecake that is creamy, delicious, and sure to impress anyone who takes a bite. Let’s unlock the secrets to this fresh and flavorful delight!
Ingredients
List of Ingredients
– 1 ½ cups graham cracker crumbs
– ½ cup unsalted butter, melted
– 2 tablespoons sugar
– 2 (8-ounce) packages cream cheese, softened
– 1 cup granulated sugar
– 3 large eggs
– ½ cup sour cream
– ½ cup fresh key lime juice
– 1 tablespoon key lime zest
– 1 teaspoon vanilla extract
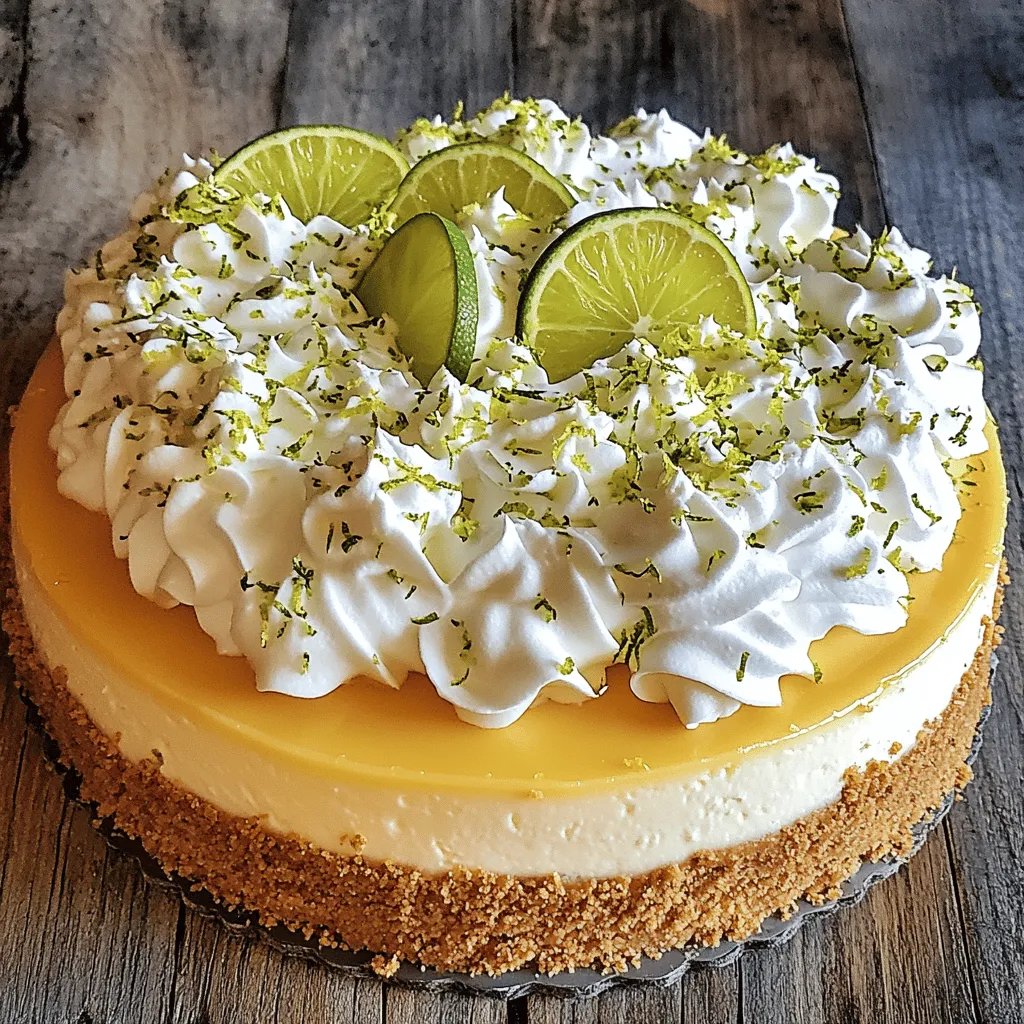
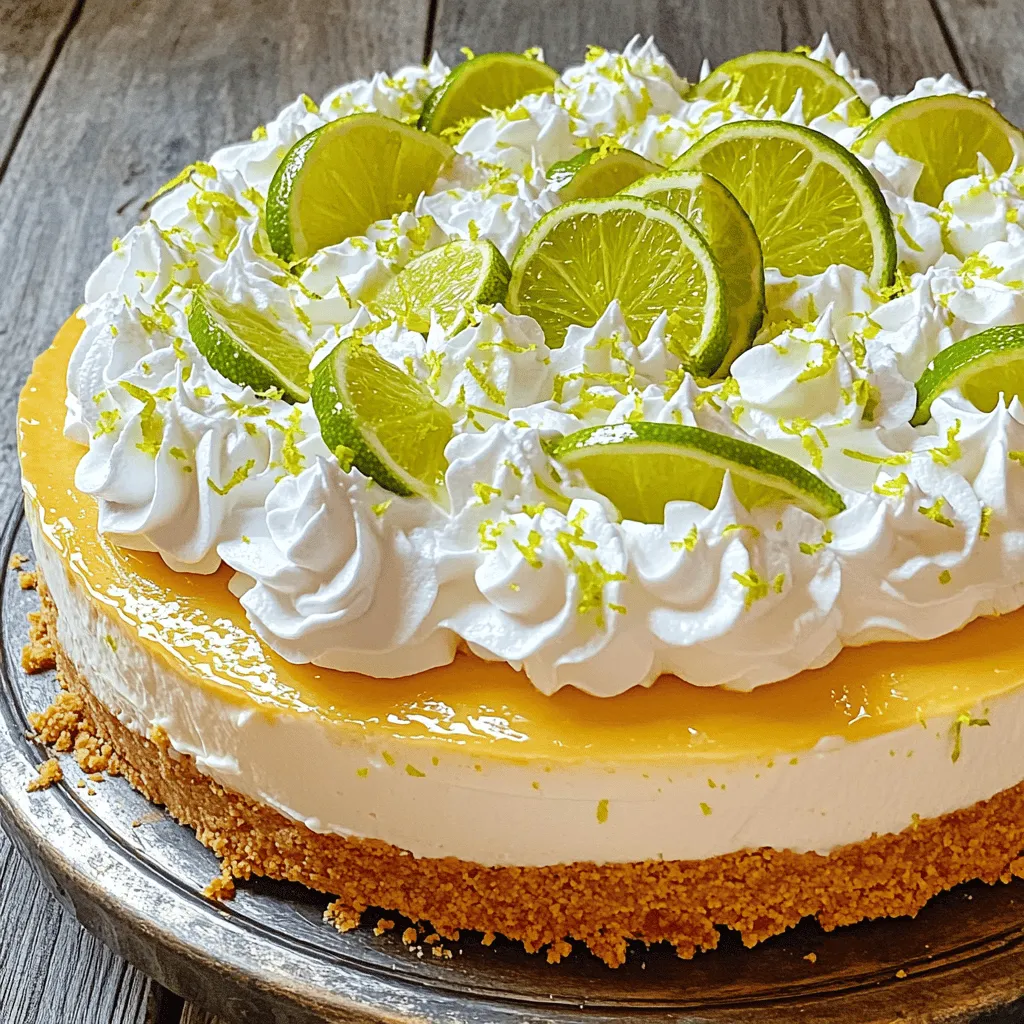
– Whipped cream (for topping)
– Lime slices and zest (for garnish)
Tips for Ingredient Quality
When making key lime cheesecake, the quality of your ingredients matters. It can change the taste of the dish.
– Fresh key limes vs. bottled juice: Fresh key limes give the best flavor. They are bright and zesty. You will need about 4-5 key limes for this recipe. Bottled juice can taste flat and less fresh. If you must use bottled juice, select a high-quality brand.
– Importance of room temperature ingredients: Using room temperature cream cheese and eggs helps create a smooth filling. Cold ingredients may not mix well. Take them out of the fridge an hour before you start. This small step leads to a creamy, well-blended cheesecake.
These tips will help you create a key lime cheesecake that stands out.
Step-by-Step Instructions
Preparation Steps
– Preheating the oven
Start by preheating your oven to 325°F (163°C). This step is key for even baking.
– Making the crust
In a medium bowl, mix 1 ½ cups of graham cracker crumbs, ½ cup of melted butter, and 2 tablespoons of sugar. Mix well until it looks like wet sand. Press this mixture firmly into the bottom of a 9-inch springform pan. Bake for 10 minutes, then let it cool.
– Preparing the filling
In a large bowl, use an electric mixer to beat 2 packages of softened cream cheese until it’s smooth and fluffy. Gradually add 1 cup of granulated sugar, beating until well mixed. Add 3 large eggs, one at a time. Beat well after each. Then mix in ½ cup of sour cream, ½ cup of fresh key lime juice, 1 tablespoon of key lime zest, and 1 teaspoon of vanilla extract. Make sure everything is combined well.
Baking the Cheesecake
– Pouring filling into crust
Pour your creamy cheesecake filling over the cooled crust in the springform pan. Spread it out evenly.
– Baking and cooling process
Bake in your preheated oven for 50-60 minutes. The center should be set but slightly jiggly. The edges may look a bit golden. Once done, turn off the oven. Crack the door open and let the cheesecake cool for about an hour inside.
Chilling Time
– Why chilling is crucial
Chilling the cheesecake is vital. It helps the texture become smooth and creamy. It also lets the flavors mix well.
– Best practices for chilling the cheesecake
Once cooled, refrigerate your cheesecake for at least 4 hours or overnight. This wait makes it taste even better! Before serving, top with whipped cream and garnish with lime slices and zest for a fresh pop of flavor.
Tips & Tricks
Common Mistakes to Avoid
– Overmixing the batter: This can add too much air. It makes the cheesecake puff up. A light mix keeps it smooth.
– Not cooling the cheesecake properly: This step is key. If you skip it, your cheesecake may crack. Always cool it slowly in the oven.
Perfecting the Texture
– How to achieve a creamy consistency: Start with room temperature cream cheese. Beat it until fluffy. Add ingredients one at a time, mixing gently.
– Monitoring baking time: Watch closely as it bakes. The center should jiggle a bit. Remove it when edges are golden and set.
Serving Suggestions
– Best ways to present and serve the cheesecake: Slice into wedges for a clean look. Drizzle extra key lime zest on top for flair.
– Pairing recommendations: Serve with whipped cream for creaminess. A chilled glass of iced tea or sparkling water complements it well. Enjoy the bright flavors!
Variations
No-Bake Key Lime Cheesecake
A no-bake key lime cheesecake offers a creamy texture without the oven. For this version, you swap baking for chilling. Use the same crust made from graham cracker crumbs, butter, and sugar. But, for the filling, mix cream cheese, sweetened condensed milk, fresh key lime juice, and zest. This mix sets in the fridge for a few hours. The result is a light and zesty dessert that’s easy and quick.
Vegan Key Lime Cheesecake
If you want a vegan option, it’s simple. Instead of cream cheese, use soaked cashews or coconut cream. For sweetness, maple syrup or agave works well. Use coconut milk instead of sour cream for a creamy base. The fresh key lime juice and zest remain the same. This cheesecake is rich in flavor and perfect for plant-based diets.
Unique Flavor Pairings
To add a twist, try infusing other flavors. Coconut pairs beautifully with key lime. Just add shredded coconut into the crust or filling. You can also mix in some fresh berries for a fruity kick. Lavender or mint can add an interesting layer to the flavor. These variations keep your taste buds excited and your guests guessing.
Storage Info
How to Store Leftovers
To keep your Key Lime Cheesecake fresh, store it in the fridge. Wrap it well with plastic wrap or place it in an airtight container. This way, it stays moist and tasty. Set the fridge to a cool temperature, around 40°F (4°C). Make sure not to leave it out for more than two hours. The cheesecake loves coolness, just like you love a refreshing drink on a hot day!
Freezing Key Lime Cheesecake
You can freeze pieces of cheesecake if you have extras. First, let it cool completely in the fridge. Then, cut it into slices. Wrap each slice tightly in plastic wrap. Place the wrapped slices in a freezer-safe bag or container. Label it with the date. To thaw, take a slice out and place it in the fridge overnight. It will taste almost fresh when you enjoy it again!
Shelf Life
When stored in the fridge, Key Lime Cheesecake stays good for about 5 to 7 days. If you freeze it, you can keep it for up to 3 months. Just remember that the longer it stays in the freezer, the more the texture may change. So, enjoy it within that time for the best taste. With these tips, your cheesecake will stay a fresh and flavorful delight!
FAQs
Can I use regular limes instead of key limes?
Yes, you can use regular limes. They taste different from key limes. Key limes are smaller and sweeter. They have a unique tartness that is hard to match. If you use regular limes, adjust the sugar. You may want to add a little more to balance the flavor.
How do I know when my cheesecake is done baking?
Look for a slight jiggle in the center. The edges should be set and slightly golden. If it jiggles too much, it needs more time. A toothpick inserted should come out clean. This shows the cheesecake is baked just right.
Can I make this cheesecake ahead of time?
Yes, you can prepare it a day or two ahead. Make it and refrigerate it. This gives the flavors time to mix and deepen. Just wait to add the whipped cream until serving. Keep it covered to prevent drying out.
What can I substitute for sour cream?
You can use plain yogurt as a great substitute. Cream cheese can also work, but it may change the flavor a bit. If you want a dairy-free option, try coconut cream. It adds a nice hint of flavor while keeping it creamy.
This blog post covered the key ingredients and steps to make a delicious Key Lime Cheesecake. You learned how to choose fresh ingredients, avoid common mistakes, and perfect the texture. I shared storage tips and exciting variations like no-bake and vegan options. Don’t forget the importance of chilling for the best taste. Now, you have the tools to create an amazing dessert. Enjoy making it and sharing it with others!


