Looking for a cool, easy treat to beat the heat? These Chocolate Chip Mint Greek Yogurt Pops are a perfect choice! They combine creamy Greek yogurt with refreshing mint and sweet chocolate chips. Whether you want a healthier snack or a fun dessert, this recipe is both simple and delicious. Let’s dive into making these delightful pops that will impress everyone in your family. You’ll love how easy they are to prepare!
Ingredients
To make Chocolate Chip Mint Greek Yogurt Pops, you’ll need these simple ingredients:
– 2 cups plain Greek yogurt
– 1/3 cup honey or maple syrup
– 1 teaspoon pure peppermint extract
– 1/2 teaspoon vanilla extract
– 1/2 cup mini chocolate chips
– 1 tablespoon fresh mint leaves, finely chopped (optional for extra mint flavor)
– Pinch of salt
These ingredients come together to create a cool, creamy treat. The Greek yogurt gives it a rich texture, while the honey or maple syrup adds sweetness. Peppermint extract brings a refreshing minty flavor. The chocolate chips add a delightful crunch. If you want more mint, you can add fresh mint leaves. The pinch of salt enhances all the flavors. This recipe is easy to follow and perfect for hot days!
Step-by-Step Instructions
Preparation Steps
Mixing the Ingredients
Start by taking a mixing bowl. Add 2 cups of plain Greek yogurt, 1/3 cup of honey or maple syrup, 1 teaspoon of pure peppermint extract, and 1/2 teaspoon of vanilla extract. Don’t forget a pinch of salt! Mix these until they are smooth and creamy. This base gives the pops their rich taste.
Folding in Chocolate Chips and Mint
Next, gently fold in 1/2 cup of mini chocolate chips. If you like a stronger mint flavor, add 1 tablespoon of finely chopped fresh mint leaves. Make sure everything is mixed evenly. You want the chocolate and mint to spread throughout the yogurt.
Pouring into Molds
Now, grab your popsicle molds. Pour the yogurt mixture into each mold, filling them about 3/4 full. This space lets the pops expand as they freeze. It’s best to keep the mixture neat to avoid spills.
Freezing Process
Inserting Sticks
After filling the molds, carefully insert sticks into each one. Make sure they stand straight. This step is key for easy handling once they are frozen.
Recommended Freezing Time
Place the molds in the freezer. Let them freeze for at least 4-6 hours. Check them after 4 hours. They should be completely solid before you try to remove them.
Serving the Pops
How to Release from Molds
To take the pops out, run warm water over the outside of the molds for a few seconds. This helps loosen the pops. Then, gently pull on the sticks to remove them.
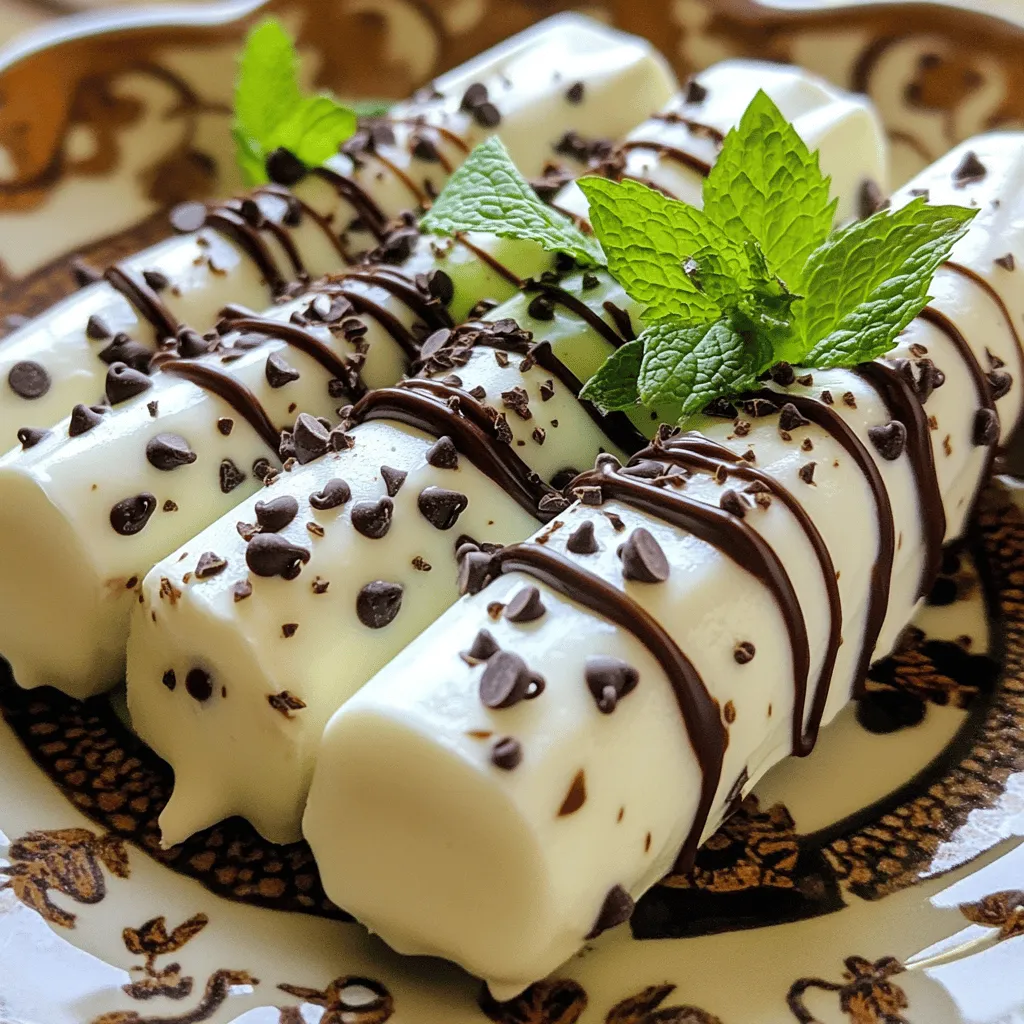
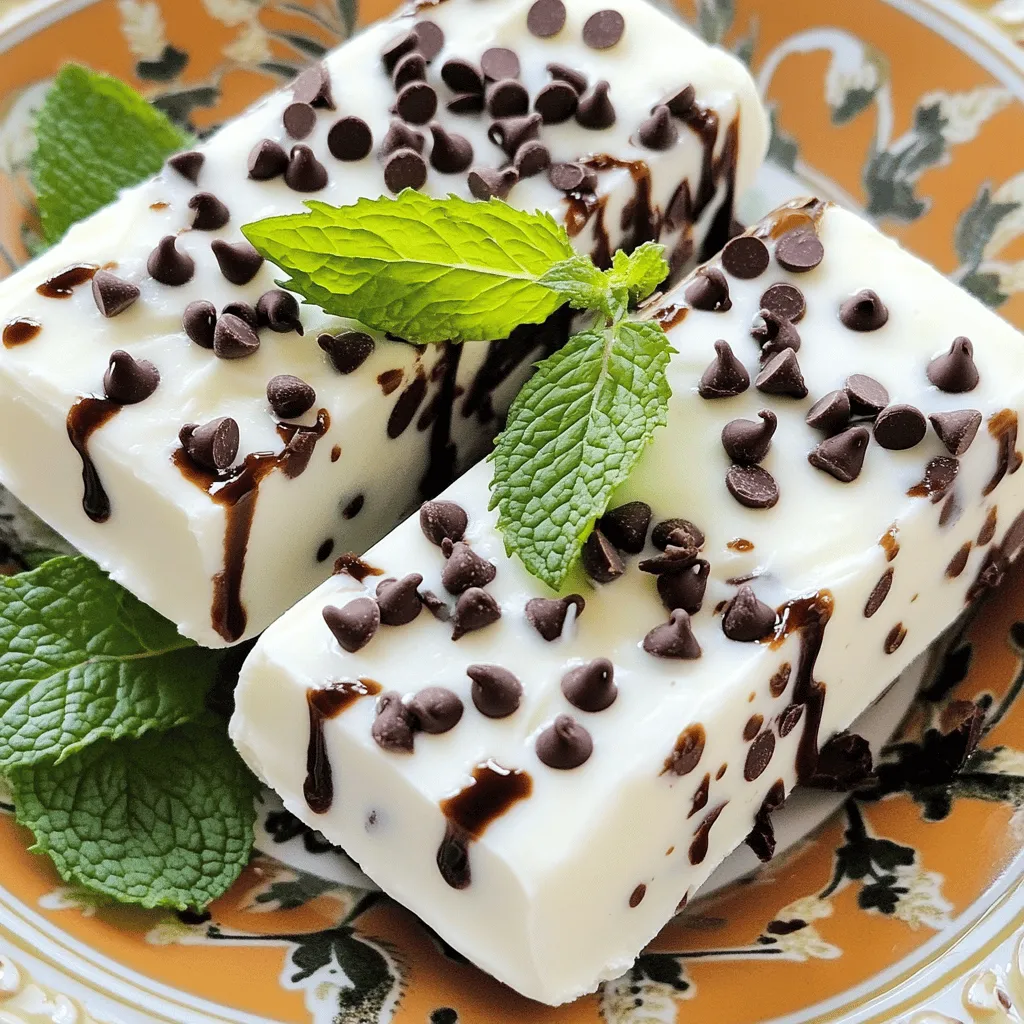
Presentation Tips
Serve the pops on a decorative plate. For a fun touch, garnish with fresh mint leaves. You can also drizzle melted dark chocolate over them for extra flair. Enjoy your refreshing treat!
Tips & Tricks
Customization Ideas
Alternative Sweeteners
You can swap honey or maple syrup for other sweeteners. Try agave syrup or stevia for a low-calorie option. Just adjust the amount to taste. Always check the sweetness level as it varies.
Flavor Variations
Get creative with flavors! Add a splash of almond extract or a dash of espresso powder. You can even mix in fresh fruits like berries or bananas for extra flavor. Each twist makes the pops unique and fun.
Perfecting Texture
Achieving Creaminess
To make your pops creamy, use full-fat Greek yogurt. It gives a rich texture. Mixing the ingredients thoroughly breaks down lumps. This step ensures a smooth, creamy mix.
Avoiding Ice Crystals
Ice crystals can ruin the texture. To prevent this, blend the mixture well. Use the right ratio of yogurt to sweetener. A pinch of salt also helps by balancing flavors and improving texture.
Equipment Recommendations
Best Popsicle Molds
Choose silicone molds for easy release. They allow you to pop out the treats without hassle. Metal molds are another good option, but they can freeze too quickly.
Helpful Mixing Tools
A sturdy mixing bowl and a whisk work well for this recipe. A spatula helps fold in the chocolate chips and mint. These tools ensure you mix everything evenly, making your pops delicious.
Variations
Dairy-Free Options
You can easily make these pops dairy-free. Try using coconut yogurt instead of Greek yogurt. Coconut yogurt has a creamy texture and adds a nice flavor. It works well with chocolate and mint.
For drinks, almond or oat milk are great choices. You can mix them with the other ingredients. This will keep the pops light and refreshing. Just remember to adjust the sweetness based on the milk you use.
Adding Fruits
Adding fruits can make your pops even better. You can mix in fresh berries like strawberries, blueberries, or raspberries. These fruits add color and a burst of flavor.
Another fun idea is making layered pops. Start with a layer of yogurt, then add fruit, and top with more yogurt. This makes each bite a surprise. It also looks great when you take them out of the molds.
Alternative Flavor Profiles
If you want to switch things up, try a chocolate mint swirl. Just melt some dark chocolate and swirl it into the yogurt. This adds a rich taste and a beautiful look.
You can also experiment with other herbs. Basil or thyme can add a unique twist. Just chop them fine and mix them in. This is a fun way to surprise your friends with new flavors.
Storage Info
How to Store Popsicles
To keep your chocolate chip mint Greek yogurt pops fresh, use airtight containers. These containers prevent freezer burn and keep the pops tasty. You can also wrap each pop in plastic wrap. This keeps them from sticking together. Store them in the freezer. They can last up to two months without losing flavor.
Defrosting Tips
When you want to enjoy a frozen pop, thaw it safely. The best way is to let it sit at room temperature for about five minutes. You can also run warm water over the mold for quick release. Avoid using a microwave. It can melt the pops too fast and ruin their texture.
Reusing Molds
After making pops, clean your molds right away. Just wash them with warm, soapy water. Rinse well to remove any soap. You can also use molds for other treats. Try making ice cubes or frozen fruit snacks. They are versatile and fun to use in different ways.
FAQs
What is the best way to release pops from molds?
To release your pops easily, run warm water over the outside of the molds. Hold the molds under the warm tap for a few seconds. This warms the outside and helps the pops slide out smoothly. Then, gently pull the pops from the molds. You want to avoid breaking them, so be gentle.
Can I use Greek yogurt alternatives?
Yes, you can use yogurt alternatives like coconut yogurt or almond yogurt. These options work well, but they may change the flavor and texture a bit. Check the labels to ensure they are thick and creamy. This will help you maintain that rich taste and texture that makes these pops so enjoyable.
How long do these pops last in the freezer?
These pops can last up to two months in the freezer. To keep them fresh, wrap them tightly in plastic wrap or place them in an airtight container. This helps prevent freezer burn. If you store them well, you can enjoy them even after a long time.
Are chocolate chip mint Greek yogurt pops healthy?
Yes, these pops are a healthy treat! They use Greek yogurt, which is high in protein and probiotics. The honey or maple syrup adds natural sweetness. Plus, the mini chocolate chips provide a small indulgence without too much added sugar. The fresh mint gives a refreshing flavor while adding vitamins.
Can I make these pops without sugar?
You can make these pops without sugar by using natural sweeteners. Try using stevia or erythritol if you want a low-calorie option. You can also use ripe bananas for sweetness, but this may change the flavor. Experiment to find what you like best! Remember, the goal is to enjoy a tasty treat without added sugar.
This blog post covered how to make tasty Greek yogurt pops. We discussed ingredients like Greek yogurt, chocolate chips, and mint. You learned clear steps for mixing, freezing, and serving pops. I shared tips on texture, storage, and alternative flavors too.
These pops are great for hot days and easy to customize. Try different flavors and enjoy every bite. Now you can make your own healthy treats at home. Getting creative in the kitchen is fun! Enjoy your sweet, cool snacks!


