Introduction
In the realm of culinary delights, few things resonate as deeply as comfort food. These dishes often evoke nostalgia, warmth, and a sense of well-being, reminding us of family gatherings, cozy evenings, and the simple joy of a homemade meal. Among the myriad of comfort food options, Cheesy Enchilada Chili stands out with its heartwarming blend of flavors and textures, making it a beloved choice for any occasion. This dish marries the robust essence of traditional chili with the rich, savory notes of enchiladas, resulting in a meal that is not only satisfying but also brimming with nutritional value.
Cheesy Enchilada Chili is remarkably versatile. It can easily transition from a quick weeknight dinner to a show-stopping dish for gatherings with friends and family. Whether you’re serving it at a casual get-together or enjoying a quiet night in, this chili is sure to please a crowd. The recipe can cater to various dietary preferences, allowing for the use of ground beef, turkey, or even a meat substitute for those following vegetarian or vegan diets. This adaptability ensures that everyone at the table can enjoy a bowl of this delightful dish, making it a staple in any home cook’s repertoire.
As we dive deeper into the world of Cheesy Enchilada Chili, you’ll discover that there is something incredibly satisfying about preparing a meal from scratch. The act of chopping fresh ingredients, simmering them together, and finally savoring the results not only fills the stomach but also nurtures the soul. Join us as we explore the intricacies of this recipe, highlighting its components, cooking techniques, and the joy it brings to our lives.
Understanding Cheesy Enchilada Chili
At its core, Cheesy Enchilada Chili is a harmonious fusion of two beloved culinary traditions: chili and enchiladas. Chili, with its many regional variations, has its roots deeply embedded in American and Mexican cooking, evolving over the years to become a favorite comfort food across the globe. The beauty of chili lies in its ability to be both hearty and flavorful, often featuring a rich blend of spices, meats, and vegetables that come together to create a satisfying dish.
What sets Cheesy Enchilada Chili apart is its incorporation of enchilada flavors—think of the warm spices, zesty sauces, and, of course, the gooey melted cheese that enchiladas are known for. This recipe captures the essence of enchiladas while presenting it in a less labor-intensive format, making it accessible to home cooks of all skill levels. It embraces the cultural significance of both chili and enchiladas, celebrating the vibrant flavors and comforting nature of these dishes.
From a health perspective, Cheesy Enchilada Chili boasts a variety of nourishing ingredients. The primary components—ground meat, beans, corn, and fresh vegetables—are rich in protein, fiber, and essential vitamins. Beans, in particular, offer a great source of plant-based protein and fiber, which can aid in digestion and help maintain a healthy weight. The inclusion of fresh vegetables like onions and garlic not only enhances the flavor profile but also adds nutritional benefits, providing antioxidants and anti-inflammatory properties that support overall health.
Ingredients Breakdown
To create a delectable Cheesy Enchilada Chili, gathering the right ingredients is crucial. Each component plays a specific role in building flavor, texture, and nutritional value. Below is a detailed breakdown of the key ingredients used in this recipe:
1. Ground Beef or Turkey: The choice between ground beef and turkey often comes down to personal preference and dietary considerations. Ground beef offers a richer flavor and higher fat content, contributing to a heartier chili. On the other hand, ground turkey is a leaner option that provides similar protein levels with less fat, making it a healthier alternative without sacrificing taste. Both options yield a delicious base for the chili.
2. Onions and Garlic: These aromatic ingredients are essential for building a flavor foundation. Sautéing onions until they become translucent releases their sweetness, while garlic adds a pungent, savory depth. Together, they create a fragrant base that enhances the overall taste of the chili.
3. Chili Powder, Cumin, and Smoked Paprika: This trio of spices is what gives Cheesy Enchilada Chili its signature flavor profile. Chili powder adds warmth and earthiness, cumin brings a nutty, aromatic essence, and smoked paprika introduces a subtle smokiness that elevates the dish. Balancing these spices is key to achieving the perfect depth of flavor.
4. Beans: Typically, kidney beans or black beans are used in chili recipes. They provide protein and fiber, making the dish more filling and nutritious. Beans also help to thicken the chili, contributing to its hearty texture.
5. Corn: Adding sweetness and crunch, corn is a delightful addition that complements the other ingredients. It also contributes valuable nutrients, including vitamin C and dietary fiber.
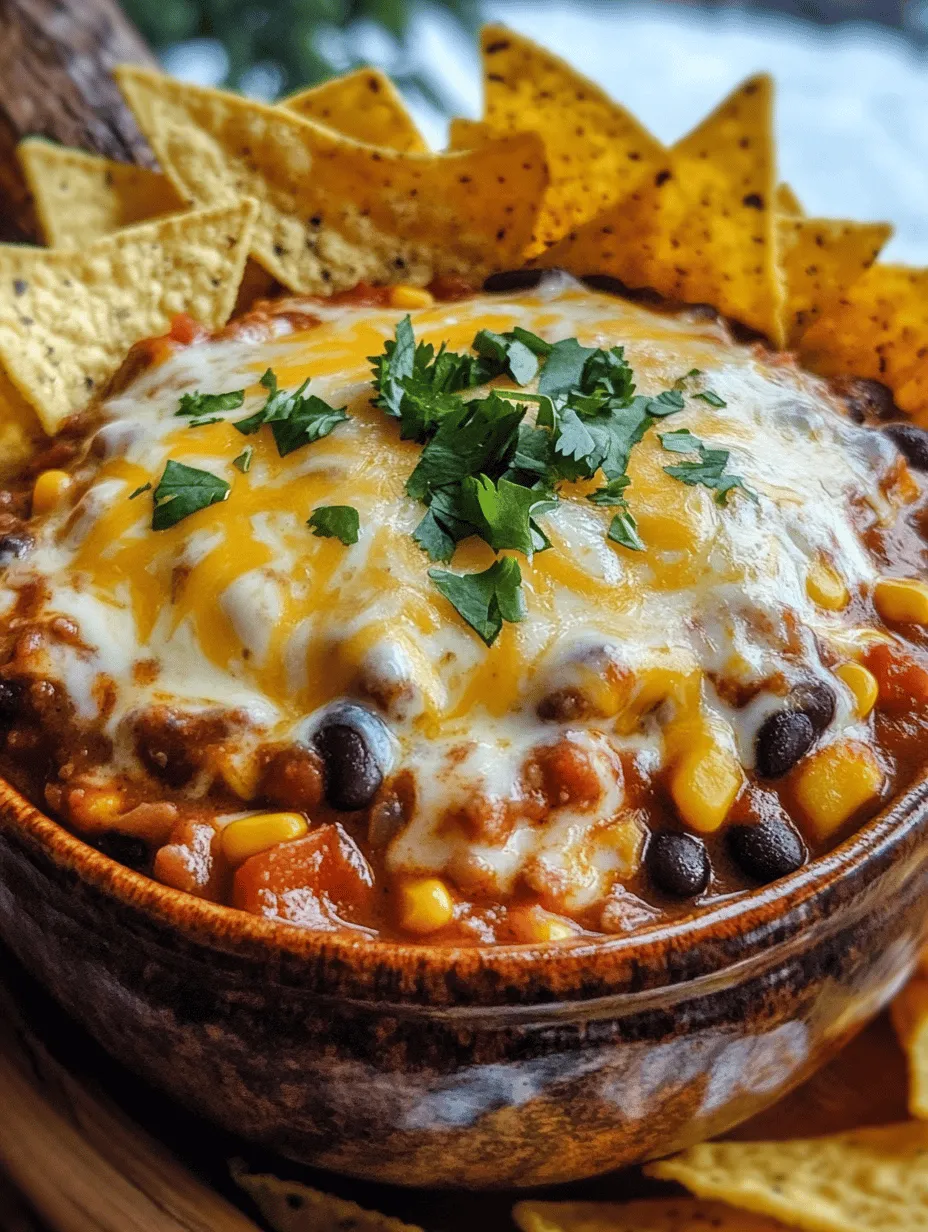
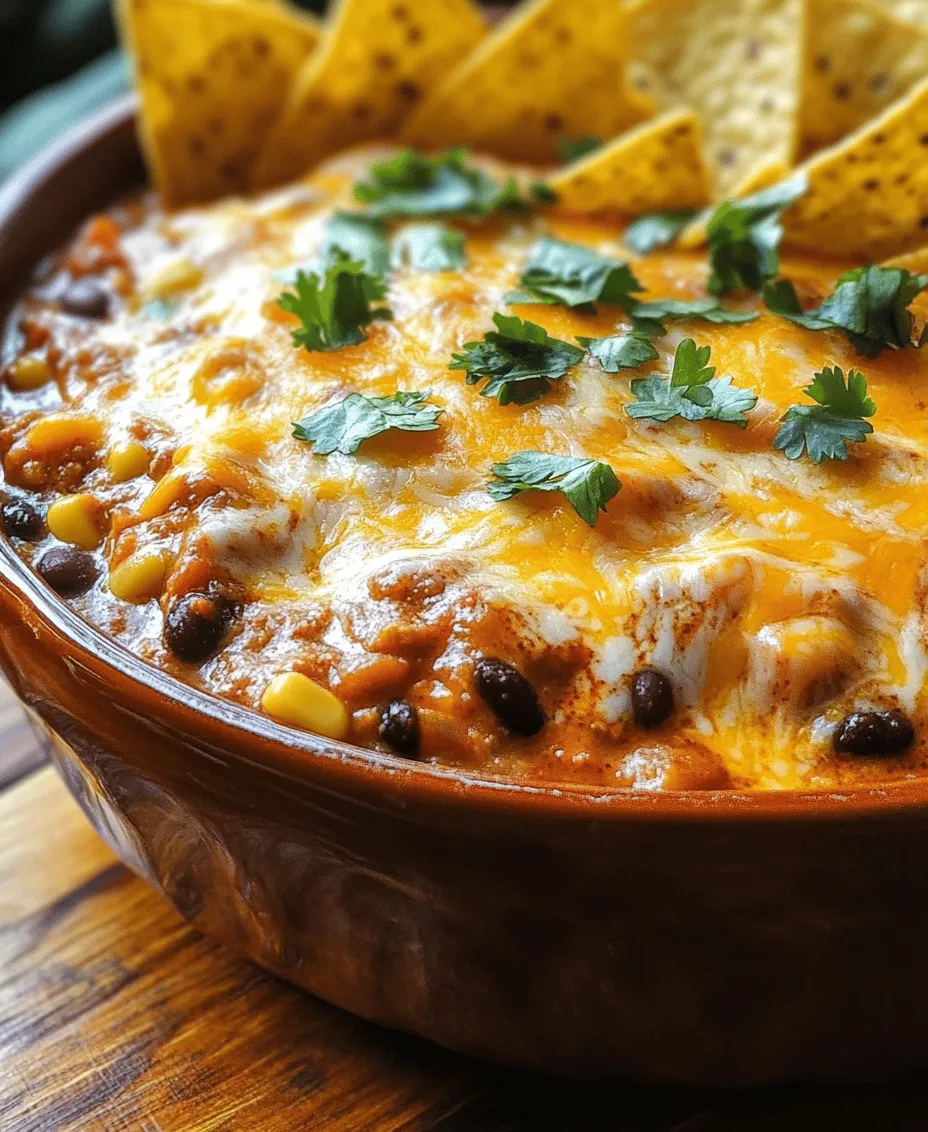
6. Cheddar Cheese: This is the star ingredient that transforms the chili into a cheesy delight. Cheddar cheese melts beautifully, creating a creamy, rich texture that melds perfectly with the spices and other ingredients. For added flavor, consider using sharp or aged cheddar.
7. Fresh Cilantro and Tortilla Chips: While optional, garnishes like chopped cilantro and crispy tortilla chips can elevate your Cheesy Enchilada Chili to new heights. Cilantro adds a burst of freshness, while tortilla chips provide a satisfying crunch, making each bite a delightful experience.
Step-by-Step Cooking Instructions
Now that we have a thorough understanding of the ingredients, it’s time to dive into the cooking process. This step-by-step guide will ensure that you create a delicious and comforting bowl of Cheesy Enchilada Chili.
Step 1: Prepare Your Ingredients
Start by gathering all your ingredients and measuring them out. This mise en place approach will make your cooking experience smoother and more enjoyable. Chop the onions and garlic, and have your spices at the ready. If you’re using fresh cilantro as a garnish, chop it as well.
Step 2: Sauté Onions and Garlic
In a large pot or Dutch oven, heat a tablespoon of olive oil over medium heat. Once hot, add the chopped onions and sauté for about 5 minutes until they become translucent and fragrant. Next, add the minced garlic and sauté for an additional minute, being careful not to burn it. This step is essential for building the flavor foundation of the chili.
Step 3: Brown the Ground Meat
Add the ground beef or turkey to the pot, breaking it apart with a wooden spoon. Cook for about 7-10 minutes, stirring occasionally, until the meat is fully browned. If there is excess fat, drain it off to ensure the chili doesn’t become greasy. Browning the meat adds depth to the flavor, enhancing the overall richness of the dish.
Step 4: Add Spices
Once the meat is browned, it’s time to add the spices. Sprinkle the chili powder, cumin, and smoked paprika over the meat and onions. Stir well to combine, allowing the spices to toast slightly in the hot pot for 1-2 minutes. This technique helps to release the spices’ essential oils, intensifying their flavors.
Step 5: Combine Remaining Ingredients
Next, add the drained beans, corn, and diced tomatoes (along with their juices) to the pot. Stir everything together, ensuring that the spices and meat are evenly distributed. This step is where the magic happens; the ingredients meld together, creating a vibrant and flavorful chili base.
Step 6: Simmer for Flavor Development
Pour in enough broth (beef or chicken) to cover the mixture, then bring the chili to a boil. Once boiling, reduce the heat to low and let it simmer uncovered for at least 20-30 minutes. This simmering time is crucial for flavor development, allowing the ingredients to meld and create a rich, complex taste. Stir occasionally to prevent sticking and ensure even cooking.
Step 7: Incorporate Cheese
About 5 minutes before serving, stir in the shredded cheddar cheese, allowing it to melt and blend into the chili. This step will create a creamy texture and enhance the overall richness of the dish. If you prefer a cheesier chili, feel free to add more cheese according to your taste.
By following these detailed steps, you’ll set the stage for a delicious and satisfying bowl of Cheesy Enchilada Chili that will warm your heart and fill your belly. Prepare to enjoy the delightful explosion of flavors and textures that this comforting dish has to offer.
Adjusting Cooking Times for Desired Thickness and Flavor Intensity
One of the great advantages of making Cheesy Enchilada Chili is its adaptability in terms of cooking time. The longer you let the chili simmer, the thicker its consistency will become, and the flavors will deepen, creating a hearty and satisfying dish. If you prefer a thicker chili, consider simmering it uncovered for an additional 15 to 30 minutes. This allows excess liquid to evaporate, resulting in a denser texture.
On the other hand, if you’re in a hurry or prefer a lighter chili, you can reduce the cooking time by about 10 to 15 minutes. This will yield a slightly thinner chili that is still packed with flavor. Remember to taste as you go; this is key to achieving the perfect balance of flavors. If you find the chili is too spicy or too mild, adjust it by adding a little more liquid (like broth or water) to dilute the heat or by incorporating additional spices to enhance the flavor profile.
Serving Suggestions
Cheesy Enchilada Chili is not only a dish on its own but also a versatile base for creating a complete meal. Here are some delightful serving suggestions to elevate your dining experience:
1. Cornbread: The sweetness of cornbread pairs beautifully with the savory and slightly spicy flavors of the chili. A slice of warm cornbread can provide a delightful contrast and is perfect for soaking up the chili.
2. Rice: For a heartier meal, serve the chili over a bed of fluffy white or brown rice. This combination adds substance and complements the chili’s richness.
3. Salads: A fresh green salad with a light vinaigrette can balance the richness of the chili. Consider adding ingredients like avocado, cherry tomatoes, and black beans for a southwestern flair.
4. Creative Toppings: While cilantro and cheese are traditional toppings, feel free to get creative. Add slices of creamy avocado for richness, a dollop of sour cream for coolness, or sliced jalapeños for an extra kick. You can even sprinkle some crushed tortilla chips on top for added crunch.
5. Tortilla Chips: No chili is complete without tortilla chips on the side. They are perfect for scooping up the chili and add a satisfying crunch that enhances the overall dining experience.
Nutritional Information
Understanding the nutritional profile of Cheesy Enchilada Chili can help you appreciate its health benefits. A typical serving (approximately one cup) offers a well-balanced mix of macronutrients:
– Protein: Thanks to the beans and cheese, each serving contains a healthy amount of protein, essential for muscle repair and growth.
– Fats: The dish includes healthy fats from the cheese and any added avocado, providing sustained energy and aiding in the absorption of fat-soluble vitamins.
– Carbohydrates: The combination of beans, corn, and any grains used (like rice or cornbread) contributes complex carbohydrates, which are vital for energy.
Additionally, Cheesy Enchilada Chili is rich in fiber, primarily from the beans and corn, making it a great choice for digestive health. The tomatoes and herbs provide essential vitamins and minerals, including Vitamin C and potassium, further enhancing the dish’s nutritional value.
Variations and Customizations
One of the best aspects of Cheesy Enchilada Chili is its flexibility. Here are some ideas for variations and customizations to suit different dietary preferences:
1. Vegetarian or Vegan Options: For a vegetarian version, simply omit any meat and increase the amount of beans or add lentils for protein. To make it vegan, substitute the cheese with a plant-based cheese alternative or nutritional yeast for a cheesy flavor without the dairy.
2. Adjusting Spice Levels: Spice levels can be tailored to individual tastes. If you prefer a milder chili, reduce the amount of chili powder or use a mild salsa. Conversely, for those who enjoy a kick, consider adding fresh diced jalapeños or a dash of hot sauce.
3. Dairy-Free Substitutions: If you’re looking to make a dairy-free version, there are many cheese alternatives available. Look for brands that offer shredded cheese made from nuts or soy, which melt well and add a creamy texture to the chili.
4. Experimenting with Toppings and Sides: Encourage creativity by trying different toppings. Beyond the usual options, consider adding pickled onions for acidity, fresh corn salsa for sweetness, or even a sprinkle of smoked paprika for a unique flavor twist. The sides can also be varied; try serving with quinoa or a polenta base for a different texture.
Storing and Reheating Cheesy Enchilada Chili
If you have leftovers, storing and reheating Cheesy Enchilada Chili properly ensures that you can enjoy it later without sacrificing flavor or texture. Here’s how:
1. Storing Leftovers: Allow the chili to cool completely before transferring it to an airtight container. It can be stored in the refrigerator for up to 4 days or in the freezer for up to 3 months. If freezing, consider portioning it out into smaller containers for easier reheating.
2. Reheating: When you’re ready to enjoy your leftovers, the best method is to reheat on the stovetop over low heat, stirring occasionally to ensure even warming. If the chili has thickened too much in the fridge, add a splash of broth or water to loosen it up. You can also reheat it in the microwave; just ensure it’s heated through evenly, stirring halfway through.
3. Flavor Improvement: One of the delightful surprises about Cheesy Enchilada Chili is how the flavors deepen and improve over time. The spices meld together beautifully, making the dish even more enjoyable the next day.
Conclusion
Cheesy Enchilada Chili is a comforting and satisfying dish that brings warmth and joy to any table. Its ease of preparation makes it ideal for busy weeknights or leisurely weekend gatherings. This recipe is not only versatile, allowing for various substitutions and customizations, but it also encourages creativity in serving and pairing options.
Whether you choose to enjoy it with cornbread, rice, or a fresh salad, Cheesy Enchilada Chili offers a delightful combination of flavors and textures. With the ability to cater to dietary preferences and spice levels, this dish can easily become a staple in your household. The joy of sharing a hearty, homemade meal with family and friends is what makes this chili truly special. Embrace the warmth and creativity it brings, and let it become a favorite in your culinary repertoire.