Skip to content
  • Disclaimer
  • Terms Of Use
  • GDPR Policy
  • Cookie Policy
themomdish.com
themomdish.com
  • Home
  • Drinks
  • Appetizer
  • Dinner
  • Desserts
  • Breakfast
  • About
  • Contact
  • Privacy Policy
  • Home
  • Drinks
  • Appetizer
  • Dinner
  • Desserts
  • Breakfast
  • About
  • Contact
  • Privacy Policy

Breakfast

Puff pastry dough is a light and flaky pastry. It has many layers that puff up when baked. You can use it for both sweet and savory dishes. Making puff pastry at home is fun and rewarding.

Puff Pastry Dough Easy Guide for Delicious Recipes

February 22, 2025February 22, 2025 by Emma

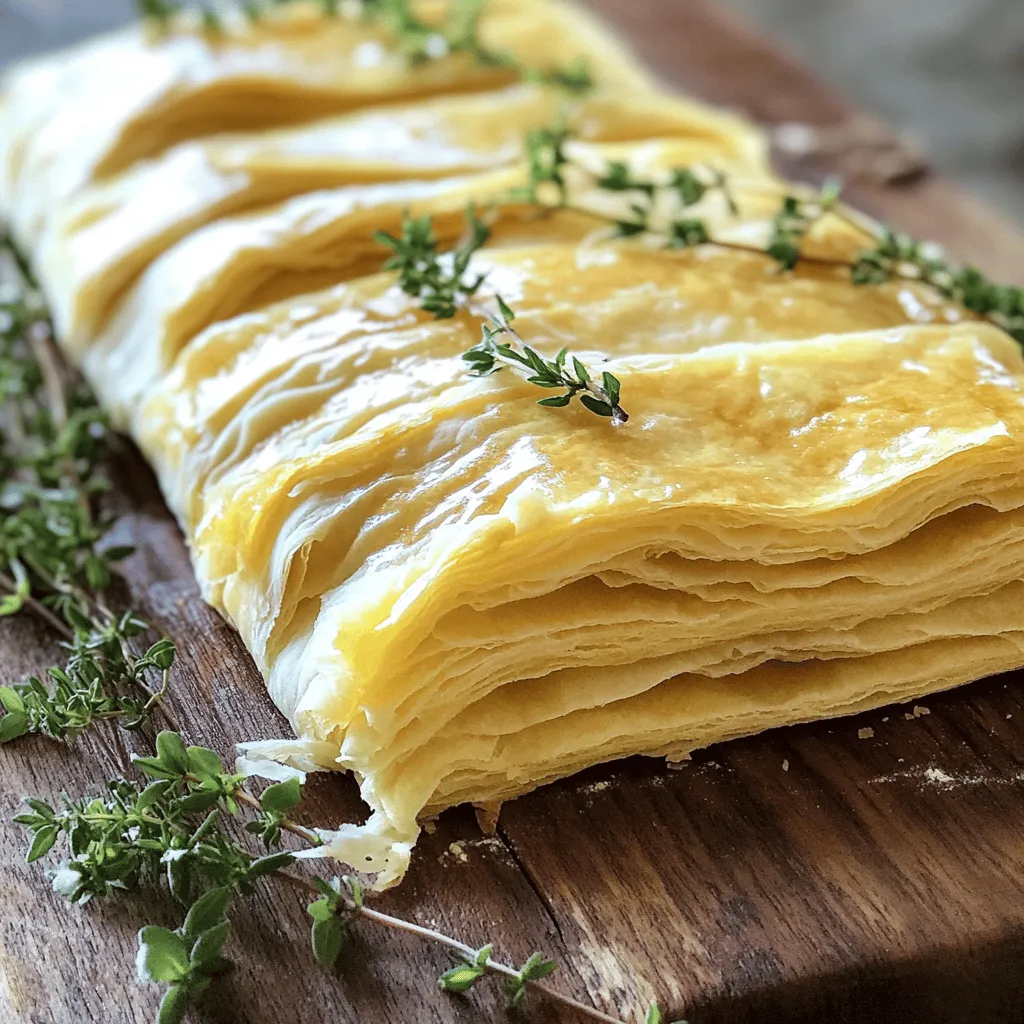
Are you ready to elevate your cooking game? Puff pastry dough is your secret weapon! …

Learn more

Categories Breakfast
To create a tasty Mexican omelette, you need fresh, vibrant ingredients. Start with four large eggs. They provide the base and protein. Next, add a quarter cup of milk. This helps the eggs become fluffy. For color and crunch, use half a cup of diced bell peppers. Mixed colors look great and taste better.

Savory Mexican Omelette Easy and Flavorful Recipe

February 22, 2025February 22, 2025 by Emma

Are you ready to spice up your breakfast? A savory Mexican omelette is the perfect …

Learn more

Categories Breakfast
Italian baked eggs are a delightful dish that combines eggs with fresh ingredients. This recipe often features tomatoes, cheese, and herbs. The dish is baked in the oven until the eggs are just right. The result is a warm and cozy meal perfect for any time of day.

Italian Baked Eggs Delightful Comfort Food Recipe

February 22, 2025February 22, 2025 by Emma

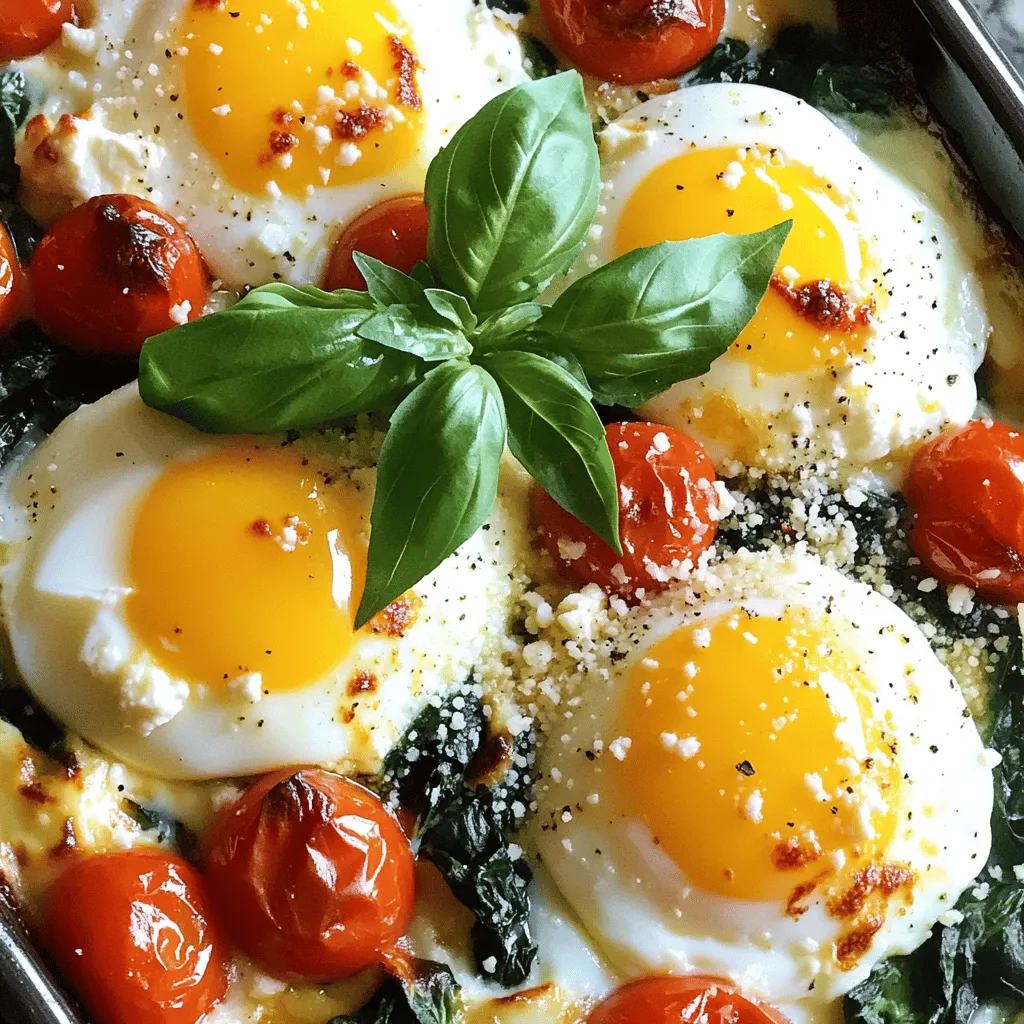
Craving a warm, hearty dish? Italian Baked Eggs is the perfect comfort food to satisfy …

Learn more

Categories Breakfast
A cozy baked potato bar is fun and easy to set up. It lets everyone create their own meal. First, you need the right ingredients. For a tasty baked potato bar, use large russet potatoes. They are perfect for baking. You will also need olive oil, garlic powder, and onion powder. Don’t forget salt and pepper!

Cozy Baked Potato Bar Delightful and Simple Setup

February 22, 2025February 19, 2025 by Emma

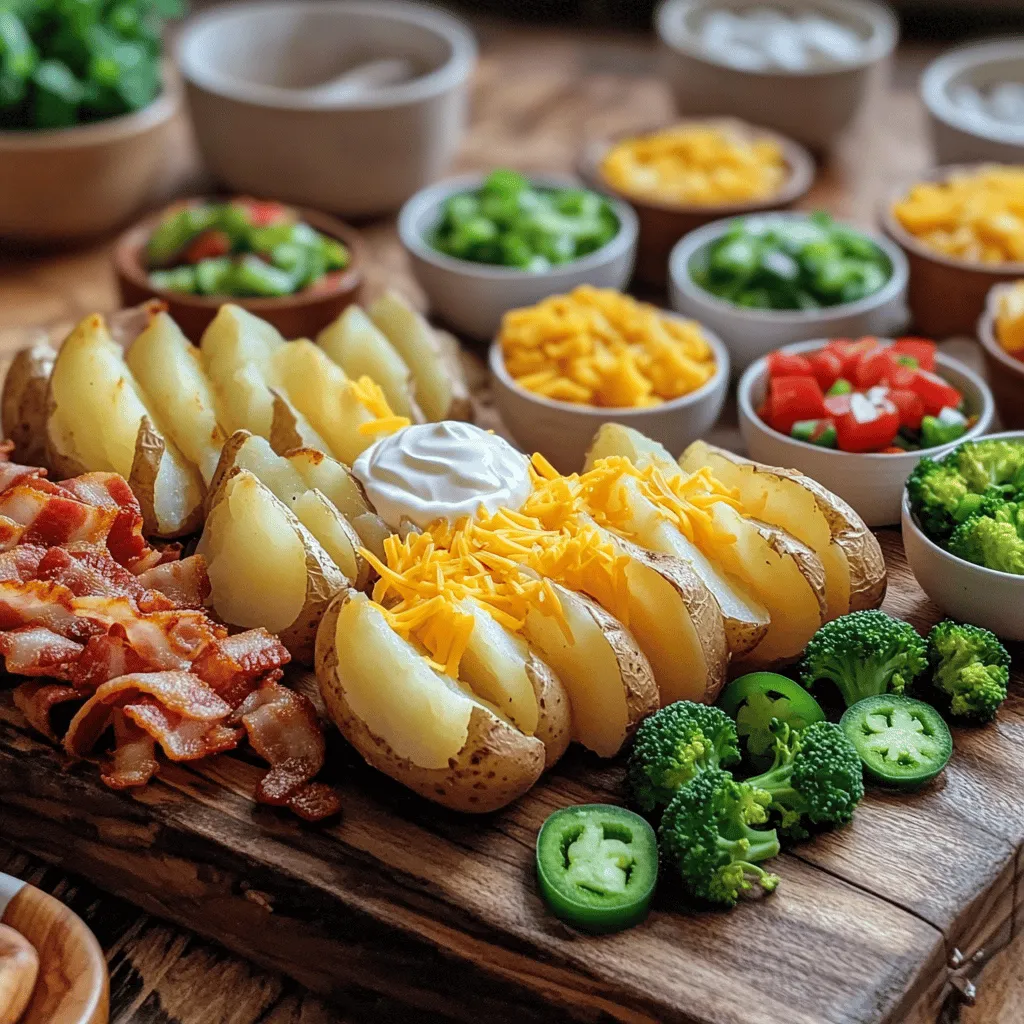
Imagine a warm gathering where everyone digs into a cozy baked potato bar. This simple …

Learn more

Categories Breakfast
To make loaded hash browns, you need a few key ingredients. First, use 4 large russet potatoes. These potatoes give the best texture. Peel and grate them for a crispy finish. Next, grab 1 cup of sharp cheddar cheese. This adds a rich flavor that melts perfectly.

Loaded Hash Browns Delightfully Crispy and Tasty Recipe

February 22, 2025February 19, 2025 by Emma

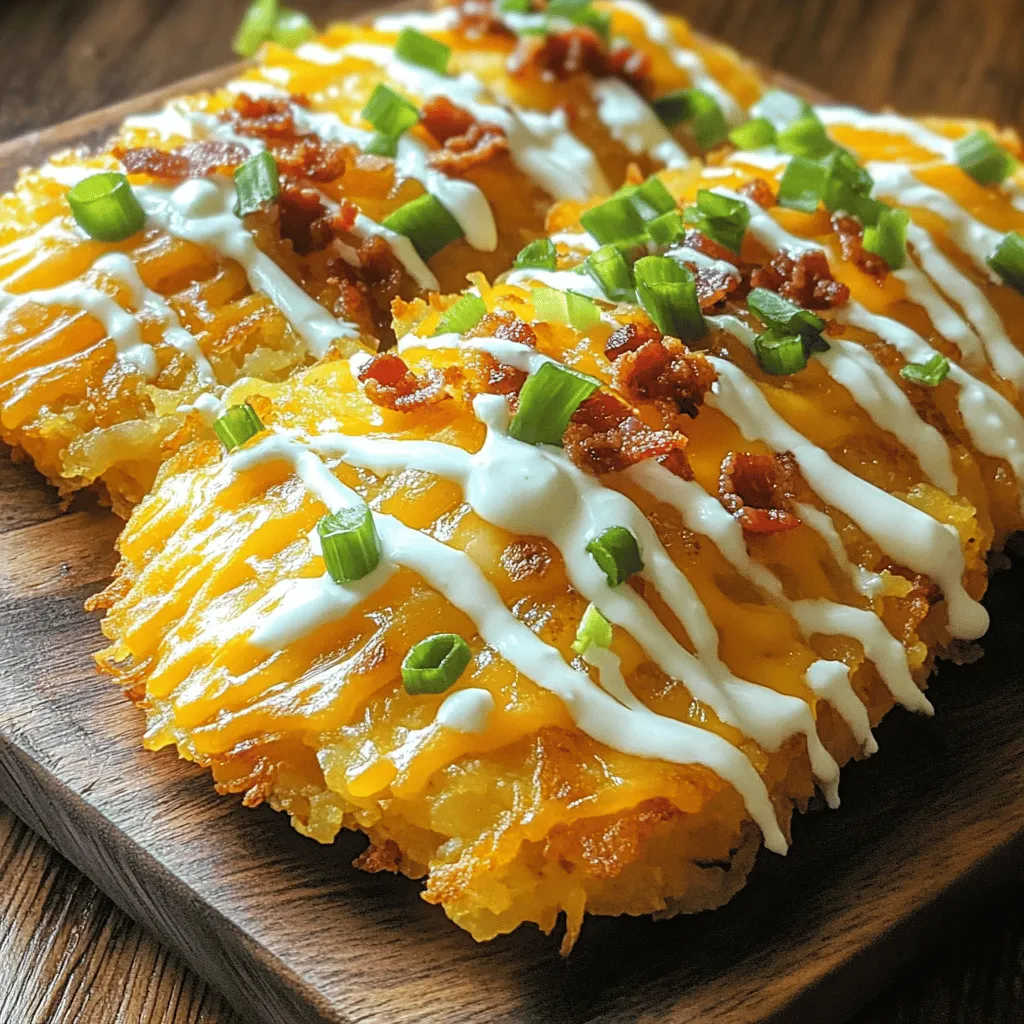
If you love crispy, golden-brown potatoes, then loaded hash browns are for you! This tasty …

Learn more

Categories Breakfast
The best Oreo pancakes recipe combines simple ingredients with a fun twist. You need a few key items to get started. First, gather 1 cup of all-purpose flour. Next, you will need 2 tablespoons of sugar and 2 teaspoons of baking powder. A pinch of salt, about 1/2 teaspoon, adds flavor.

Delicious Oreo Pancakes Fluffy and Flavorful Recipe

February 22, 2025February 19, 2025 by Emma

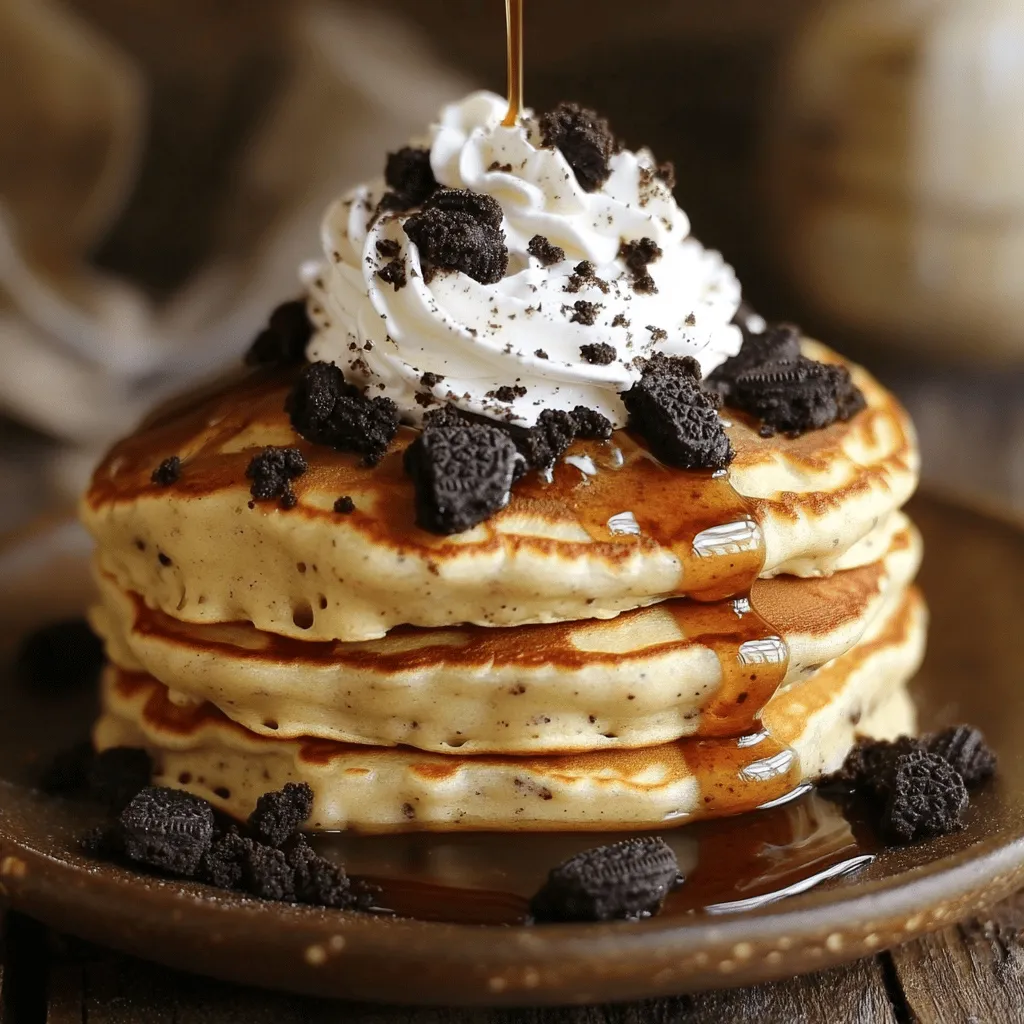
Get ready to treat your taste buds with my delicious Oreo pancakes! This fluffy and …

Learn more

Categories Breakfast
To make the best chicken and waffles, I focus on a crispy Southern chicken and waffles recipe. The key is in the preparation and ingredients. First, you want to marinate your chicken. Soak it in buttermilk and hot sauce for at least 30 minutes. This adds flavor and keeps the chicken moist.

Tasty Chicken and Waffles Recipe Simple and Easy Dish

February 22, 2025February 18, 2025 by Emma

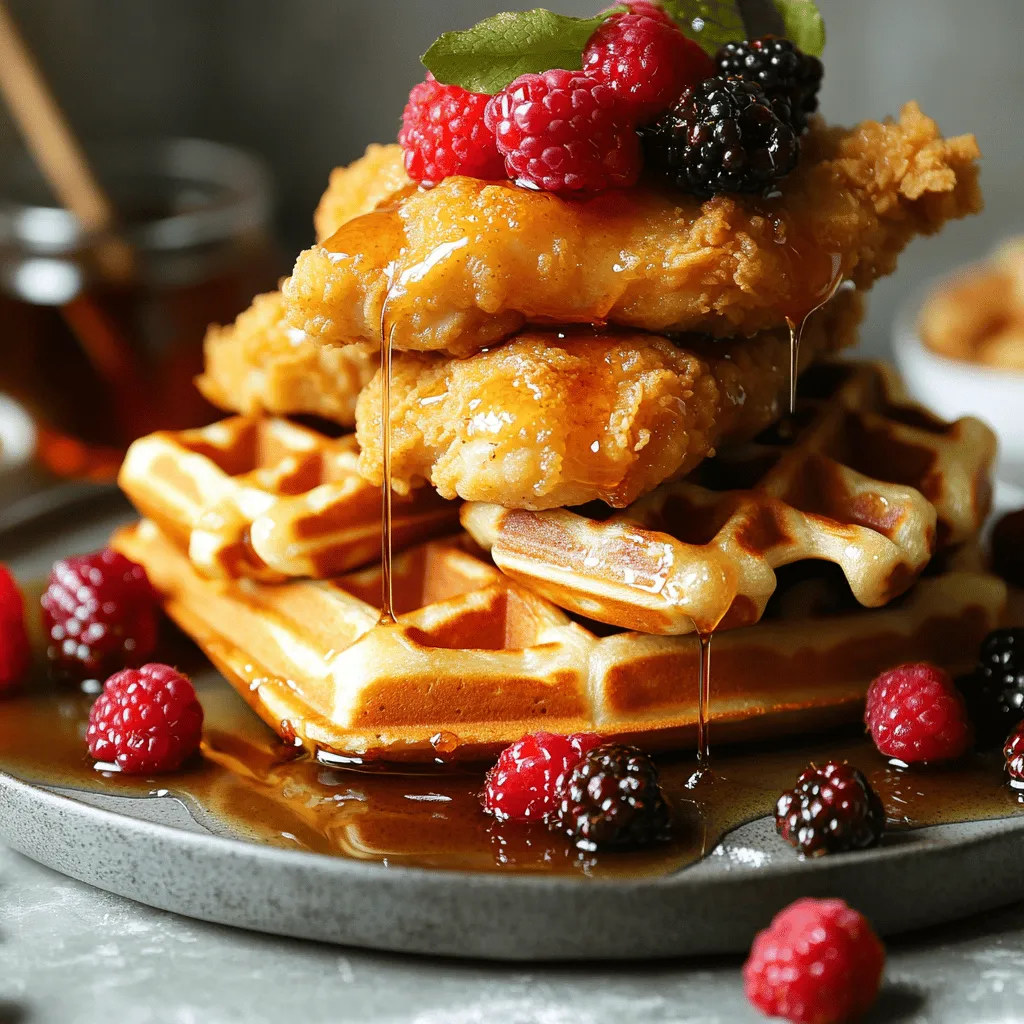
Are you ready to indulge in the mouthwatering delight of chicken and waffles? This dish …

Learn more

Categories Breakfast
To make ham and cheese butter swim biscuits, you need some simple ingredients. The full recipe includes:

Ham and Cheese Butter Swim Biscuits Easy Brunch Treat

February 22, 2025February 15, 2025 by Emma

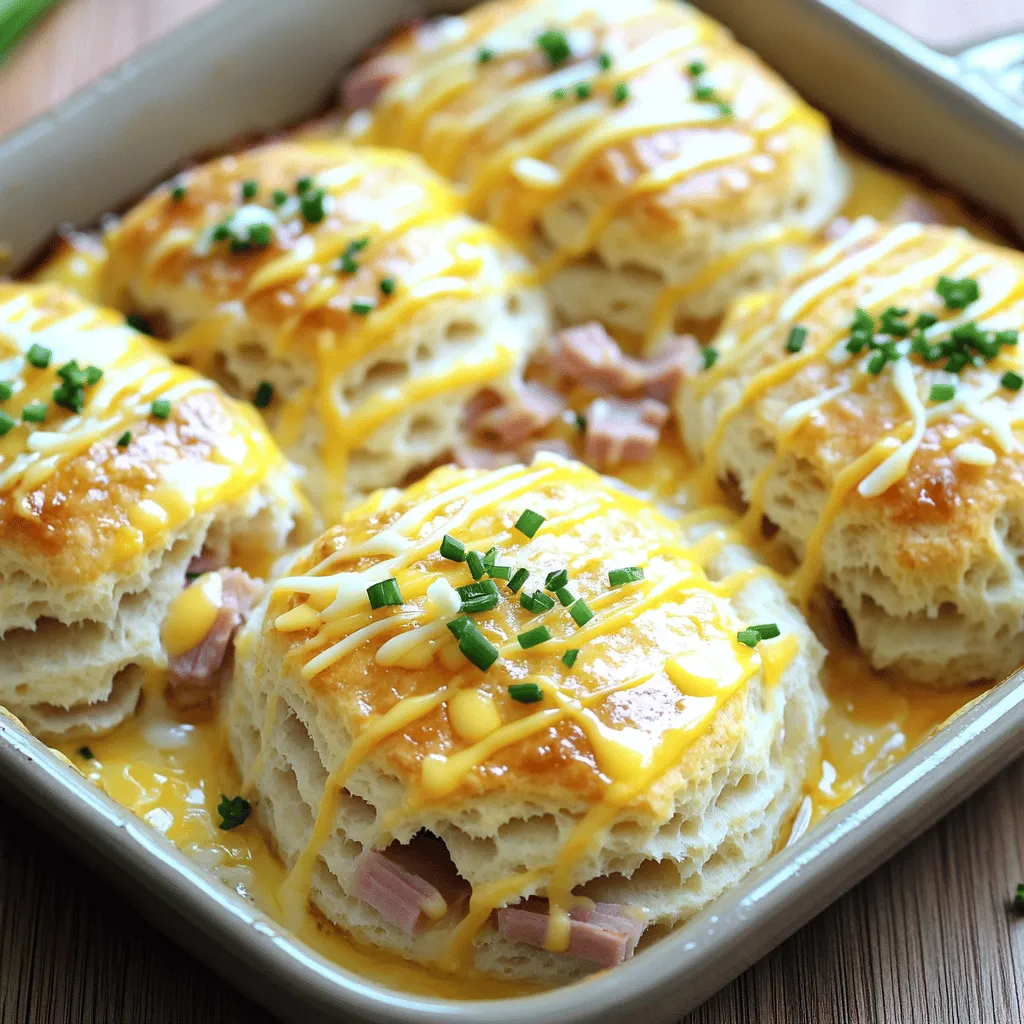
Looking for a delightful brunch treat? Try my Ham and Cheese Butter Swim Biscuits! These …

Learn more

Categories Breakfast
Cheesecake Crescent Rolls Casserole is a fun twist on classic cheesecake. It combines rich cream cheese with soft, flaky crescent rolls. You get the best of both worlds! This casserole is easy to make and tastes amazing. It’s perfect for breakfast or dessert.

Cheesecake Crescent Rolls Casserole Delightful Treat

February 22, 2025February 15, 2025 by Emma

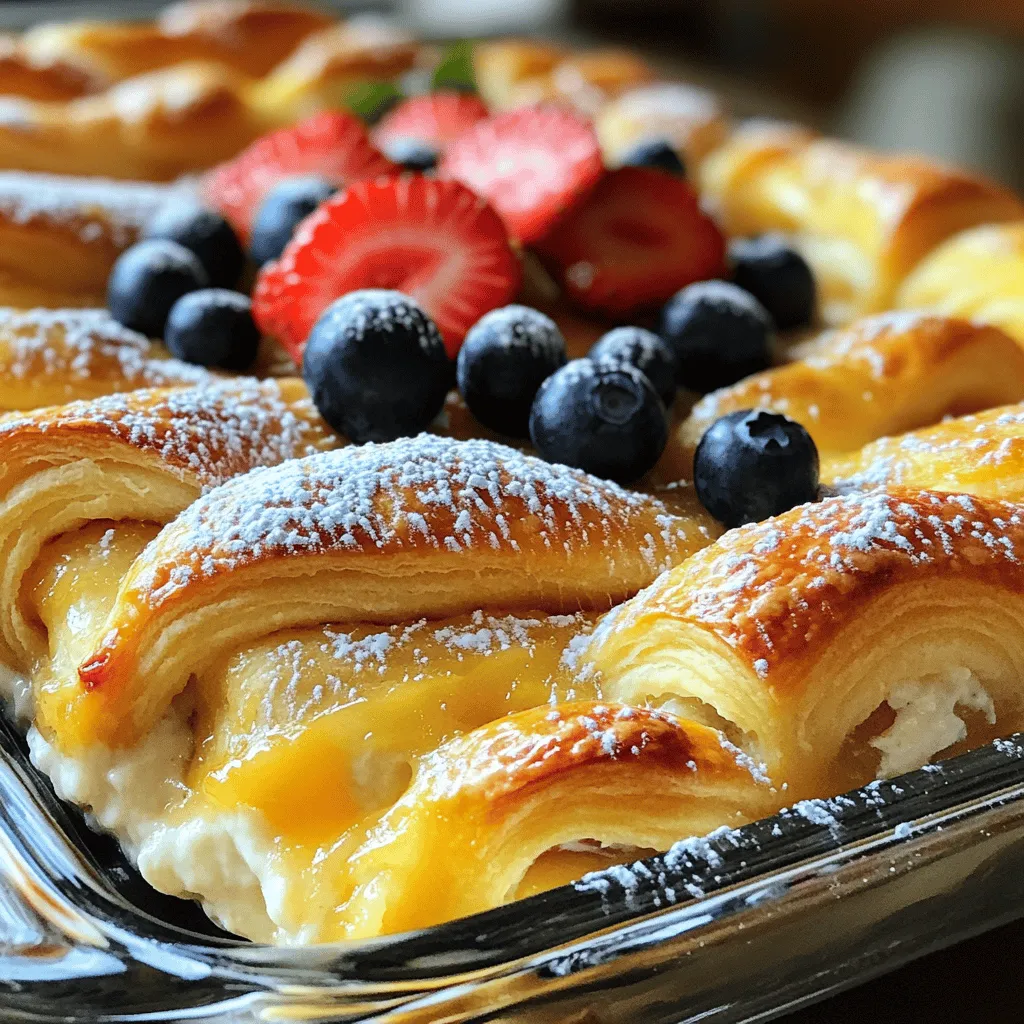
Are you ready to elevate your dessert game? Cheesecake Crescent Rolls Casserole is a simple, …

Learn more

Categories Breakfast
To make rotel sausage and cream cheese crescents, you need just a few simple ingredients. First, gather one pound of breakfast sausage. Next, get eight ounces of cream cheese that is soft. You also need a can of diced tomatoes and green chilies, like Rotel. Don’t forget garlic powder, onion powder, and refrigerated crescent roll dough. Lastly, grab some shredded cheddar cheese for extra flavor.

Rotel Sausage & Cream Cheese Crescents Simple Snack

February 22, 2025February 15, 2025 by Emma

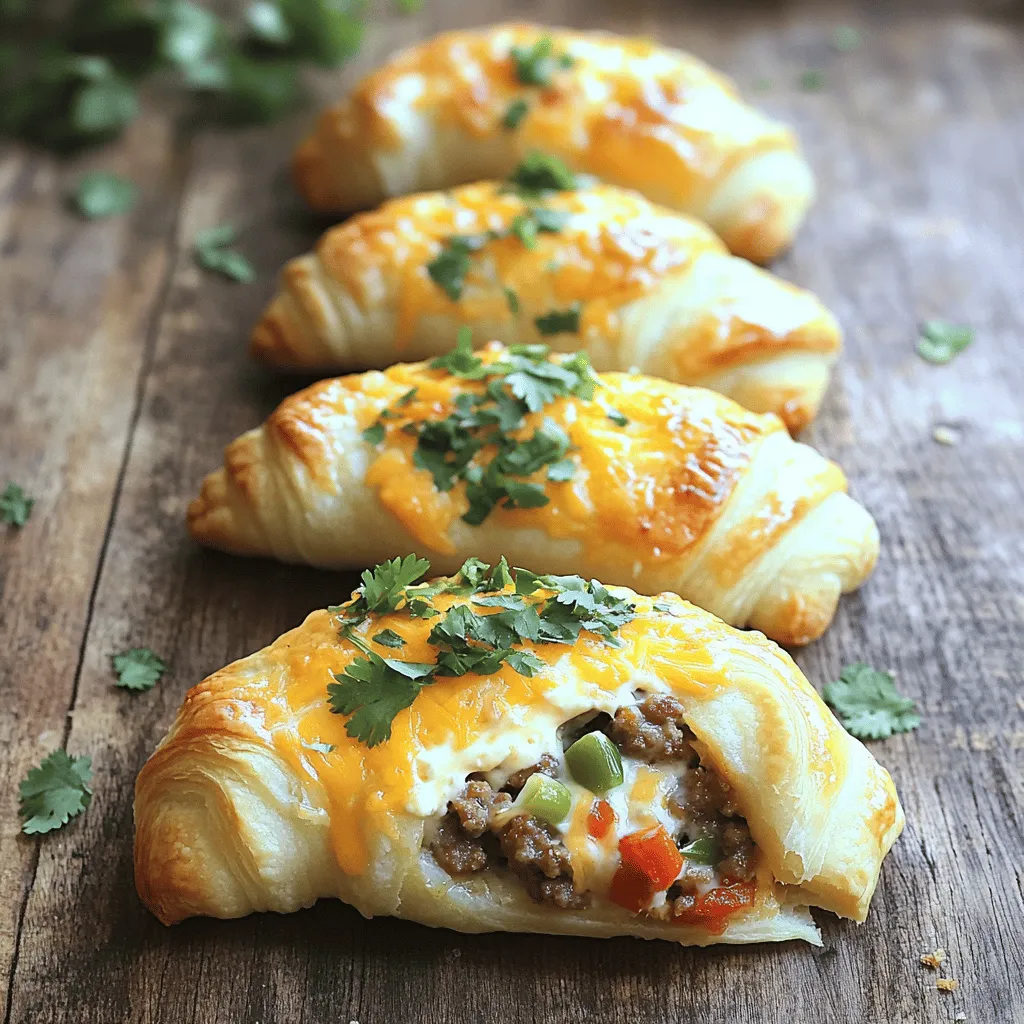
If you’re looking for an easy and tasty snack, Rotel Sausage & Cream Cheese Crescents …

Learn more

Categories Breakfast
Older posts
Page1 Page2 … Page5 Next →

I’m Emma, and I love sharing a diverse range of both sweet and savory recipes, each inspired by my love for cooking and exploring new flavors.

Learn more

  • To make Florida Shrimp Pie, you need a few tasty ingredients. Here’s the list: - 1 pound fresh shrimp, peeled and deveined - 1 pre-made pie crust (9-inch) - 2 tablespoons butter - 1 medium onion, finely chopped - 2 cloves garlic, minced - 1 red bell pepper, diced - 1 cup corn (fresh or frozen) - 1 cup heavy cream - 2 large eggs - 1 cup shredded cheddar cheese - 1 teaspoon Old Bay seasoning - Salt and pepper to taste - Fresh parsley, chopped (for garnish) Each ingredient plays a role in giving the pie its rich flavor. The shrimp brings a sweet taste, while the cream adds a nice creaminess. The Old Bay seasoning gives it that classic seafood kick. You can use fresh corn for a burst of sweetness or frozen corn for convenience. When you choose your shrimp, look for fresh ones. They should smell like the sea, not fishy. The pie crust saves time, but you can also make your own if you prefer. This list will help you create a dish that is both tasty and filling. For the full recipe, check out the detailed cooking steps. - Preheat your oven to 375°F (190°C). This helps the pie cook evenly. - In a skillet, melt 2 tablespoons of butter over medium heat. Add 1 medium onion, chopped finely, and sauté until it turns clear. This usually takes about 3-4 minutes. - Next, stir in 2 cloves of minced garlic and 1 diced red bell pepper. Cook for another 2-3 minutes until they are soft. - Then, add 1 pound of peeled and deveined shrimp and 1 cup of corn to the skillet. Cook for about 5 minutes. The shrimp should turn pink and be cooked through. Once done, remove from heat and let it cool a bit. - In a mixing bowl, whisk together 1 cup of heavy cream, 2 large eggs, 1 teaspoon of Old Bay seasoning, and some salt and pepper to taste. This mixture gives the pie its rich flavor. - Now, take your pre-made pie crust and place it in a pie dish. Pour the shrimp and veggie mix evenly into the crust. - Finally, pour the cream mixture over the shrimp. Don’t forget to sprinkle 1 cup of shredded cheddar cheese on top for that gooey goodness. - Place the pie in the preheated oven and bake for 30-35 minutes. Look for a golden and bubbling top. That means it's ready! - Once it’s out of the oven, let it cool for about 10 minutes. This helps the pie set. - Before serving, garnish with fresh chopped parsley for a pop of color and flavor. This is the full recipe for Florida Shrimp Pie! Enjoy the delicious blend of flavors! To ensure your shrimp are perfectly cooked, pay attention to color. Raw shrimp is gray. When they turn pink, they are done. Overcooked shrimp can become rubbery. Cook them just until they change color, about 5 minutes in the skillet. Choosing the right pie crust is key. A pre-made pie crust saves time and effort. Look for one that is sturdy enough to hold the filling. A flaky crust adds texture and flavor. If you’re feeling adventurous, you can make your own crust from scratch. Pair your Florida Shrimp Pie with fresh sides. A simple green salad complements the rich pie well. You can also serve it with garlic bread or coleslaw. For dips, try a zesty cocktail sauce or a tangy remoulade for a fun twist. Best drinks to serve with Florida Shrimp Pie include chilled white wine or a light beer. A refreshing lemonade can also balance the flavors. For a non-alcoholic option, iced tea with lemon works wonderfully. Garnishing techniques can elevate your dish. Use fresh parsley to sprinkle on top. This adds color and freshness. You can also add slices of lemon on the side for a pop of brightness. For plating ideas, use a wide plate to show off your pie. Slice it into wedges for a clean look. Add a small salad next to the pie for a touch of green. This makes your meal look special, perfect for hosting friends or family. For the full recipe, check out the [Full Recipe]. {{image_2}} You can easily change the main protein in this dish. Crab or lobster work well. They add rich flavors and a different texture. If you want a vegetarian option, try using mushrooms or tofu. Both can soak up the seasonings and give a nice bite. To spice things up, consider using cayenne or paprika. These spices add a nice kick. You can also add a touch of lemon zest for brightness. Fresh herbs like dill or cilantro can enhance the taste. They bring a fresh note that pairs well with seafood. If you want to mix things up, make a seafood casserole instead. Just layer the cooked shrimp and veggies in a baking dish with cheese on top. You can also grill the pie instead of baking it. Grilling adds a smoky flavor that is truly unique. For more details on making this delicious dish, check out the Full Recipe. To store leftovers, let the pie cool first. Cover it tightly with plastic wrap or foil. You can also use an airtight container. This keeps the pie fresh and tasty. Leftovers stay good in the fridge for up to three days. After that, the quality may drop. Always check for any off smells or signs of spoilage before eating. If you want to freeze Florida Shrimp Pie, let it cool completely. Wrap it tightly in plastic wrap, then place it in a freezer bag. You can store it for up to three months. To reheat, thaw the pie in the fridge overnight. Preheat your oven to 350°F (175°C). Bake the pie for about 25-30 minutes, until hot. This way, it keeps its flavor and texture. Enjoy your delicious pie even later! You can use crab or scallops as a great swap. If you want a plant-based option, try chickpeas or jackfruit. Both will add a nice texture and flavor to your pie. Yes, you can make this pie in advance. Prepare it, then cover it well and store it in the fridge. You can bake it the next day. This saves time and makes meal planning easy. Leftovers will stay fresh for about three days. Keep the pie in an airtight container. If it smells off or looks strange, it’s best to throw it away. I love serving this pie with a fresh salad or steamed veggies. Garlic bread also makes a nice side. For something light, try a fruit salad. Each goes well with the rich flavors of the pie. This blog post covered everything you need for Florida Shrimp Pie. We discussed the main ingredients, easy instructions, and helpful tips. Variations let you customize this dish, while storage info keeps it fresh. I encourage you to experiment with flavors and ingredients. Cooking should be fun! Now, gather your shrimp and get started on this tasty recipe. Enjoy your culinary adventure and impress your family and friends with your skills!
    Florida Shrimp Pie Flavorful and Easy to Make
  • - 1 pound ground beef - 1 cup shredded cheddar cheese - 1/2 cup grated Parmesan cheese - 1 tablespoon minced garlic - 1 teaspoon onion powder - 1 teaspoon dried oregano - Salt and pepper to taste The main stars of this recipe are ground beef and cheese. The beef gives a rich flavor, while cheddar and Parmesan add creaminess and a nice bite. Garlic and onion powder bring out the essence of the beef. Dried oregano adds a touch of earthiness, making each bite a delight. Adjusting salt and pepper helps customize the flavor to your taste. - 1 package refrigerated biscuit dough (8 biscuits) I use refrigerated biscuit dough for ease and speed. This dough is soft and puffs up nicely during baking. You can use Southern-style biscuits if you want a flakier texture. For a homemade option, try making your own biscuit dough with flour, baking powder, and butter. - Fresh parsley, chopped (for garnish) Fresh parsley adds a pop of color and freshness. You can also use other herbs like chives or basil for a different taste. These herbs balance the richness of the cheeseburger bombs. A little sprinkle on top makes them look even more tasty. For a complete recipe, check out the Full Recipe. Prepping the oven and baking sheet First, you need to preheat your oven to 375°F (190°C). This heat ensures your cheeseburger bombs cook evenly. While the oven warms up, line a baking sheet with parchment paper. This step helps prevent sticking and makes cleanup easier. Preparing the filling In a large mixing bowl, combine the ground beef, shredded cheddar cheese, grated Parmesan cheese, minced garlic, onion powder, dried oregano, salt, and pepper. Mix these ingredients well with your hands or a spoon. You want a uniform mixture for great flavor in every bite. How to flatten biscuit dough Open the package of refrigerated biscuit dough. Take out each biscuit and place it on a clean surface. Use your hands or a rolling pin to flatten each biscuit to about 4 inches in diameter. Make sure they are even for the best results. Filling and sealing techniques Spoon about 2 tablespoons of the cheeseburger mixture into the center of each flattened biscuit. Carefully fold the edges over the filling. Pinch the seams tightly to seal them completely. This helps the filling stay inside while baking. Optimal baking time and temperature Place the stuffed biscuits seam-side down on the prepared baking sheet. Brush the tops with melted butter and sprinkle extra Parmesan cheese on top. Bake the bombs in your preheated oven for about 15 to 20 minutes. Signs of doneness Look for a golden brown color on the tops of the bombs. You can also check if they are cooked through by cutting one open. The filling should be hot and bubbly. When done, remove them from the oven and let cool slightly before serving. For the full recipe, check out the detailed instructions above. Enjoy your delicious Garlic Parmesan Cheeseburger Bombs! To make your garlic Parmesan cheeseburger bombs shine, adjust the seasonings to your taste. If you love heat, add a dash of cayenne pepper. For a zestier flavor, mix in a teaspoon of Worcestershire sauce. You can also try adding diced jalapeños for a spicy kick. Another great option is to include finely chopped green onions for extra crunch and flavor. Feel free to get creative with additional ingredients. For instance, you can add cooked bacon bits to the beef mixture for a smoky flavor. You could also swap out cheeses. Try using mozzarella for a gooey texture or pepper jack for some spice. Each change can make your bombs unique. These cheeseburger bombs pair well with a variety of dipping sauces. Classic ketchup and mustard are always a hit. You might also enjoy ranch dressing for a creamy touch. For something bolder, try a spicy aioli or barbecue sauce. When it comes to side dishes, keep it simple. A fresh salad with tangy vinaigrette complements the rich flavors of the bombs. You can also serve them with crispy sweet potato fries for a fun twist. These options balance the meal and keep it light. If you want to save time, cook in batches. You can make a large batch of these bombs and freeze them before baking. Just place the unbaked bombs on a baking sheet and freeze for about an hour. Once frozen, transfer them to a freezer bag. This way, you can bake them whenever you want a quick snack. When you're ready to eat, you can reheat them straight from the freezer. Just add a few extra minutes to your baking time. This makes meal prep easy and allows you to enjoy delicious snacks anytime. {{image_2}} You can switch up the meat in this recipe. Ground turkey or chicken works well. Each gives the bombs a lighter taste. If you want to try something different, use pork or lamb. For a vegetarian option, use plant-based ground meat. You can also use black beans or lentils. They add a hearty texture and flavor. Just mix with the cheeses and seasonings as you would with meat. Want some heat? Add diced jalapeños or red pepper flakes to the filling. These spicy additions bring a kick to each bite. You can also try sriracha or hot sauce for an extra zing. Mixing cheeses can take your bombs to the next level. Instead of cheddar, use pepper jack for a spicy twist. Or try mozzarella for a gooey texture. You can even blend cheeses for a tasty surprise. These cheeseburger bombs can shine as an appetizer or a main course. Serve them hot with dipping sauces like ranch or ketchup. They are also great at parties or game days. If you want smaller bites, make sliders. Use the same filling but cut the dough into smaller pieces. Full-sized bombs are great for a meal. Choose what fits your occasion best. For the full recipe, check out the ingredients and steps above. To keep your leftover garlic Parmesan cheeseburger bombs fresh, wrap them tightly. Use plastic wrap or aluminum foil for the best results. You can also place them in an airtight container. This method protects them from air and moisture. Refrigerator vs. Freezer In the refrigerator, these bombs last about 3 days. If you freeze them, they can last up to 3 months. Just make sure to label the container with the date. This way, you know when you made them. When you're ready to enjoy your leftovers, the oven is the best choice. Preheat it to 350°F (175°C). Place the bombs on a baking sheet and heat for about 10-15 minutes. This keeps them crispy. Microwave Option You can use the microwave, but they might get soggy. If you do, heat them for about 30 seconds. Check if they are warm enough and heat more if needed. Re-crisping Techniques If they lose their crunch, try broiling them for a minute or two after microwaving. This adds back some crispiness. These garlic Parmesan cheeseburger bombs stay fresh for about 3 days in the fridge. If frozen, they can last for about 3 months. Signs of Spoilage Watch for changes in color or texture. If they smell off or look dry, it’s best to throw them away. Always trust your senses when checking for freshness. For the full recipe, please refer to the [Full Recipe]. Can I use frozen ground beef? Yes, you can use frozen ground beef. Just thaw it first. You can do this overnight in the fridge. If you’re in a hurry, use the microwave. Make sure it is fully thawed before mixing it with the cheese and spices. What can I use instead of biscuit dough? If you want, you can use pizza dough or puff pastry. Both will give a nice texture. You can also try crescent roll dough for a different taste. Just make sure to adjust baking time if needed. Can I prepare these ahead of time? Yes, you can make them ahead. Prepare the cheeseburger bombs and seal them. Store them in the fridge for up to one day. When ready, bake them as directed. This saves time on busy days. What is the best temperature for baking? The best temperature for baking these bombs is 375°F (190°C). This heat cooks them evenly and gives a golden color. Always preheat your oven to ensure the best results. How to adjust for dietary restrictions? To adjust for dietary needs, use ground turkey or chicken instead of beef. You can also replace cheese with dairy-free options. Always check labels for hidden allergens. Tips for making them gluten-free? For a gluten-free option, use gluten-free biscuit dough. Many stores sell this now. You can also make your own using gluten-free flour. Just follow a trusted recipe to ensure they turn out well. In this blog post, we explored how to make delicious biscuit bombs from start to finish. We discussed key ingredients like ground beef, tasty cheeses, and seasonings. We covered biscuit dough choices, garnishes, and essential tips to enhance flavor. You learned how to assemble and bake these treats, plus options for variations and storage. Now, go ahead and make your own biscuit bombs. Enjoy them as a snack, meal, or share them with friends. Happy cooking!
    Irresistible Garlic Parmesan Cheeseburger Bombs Recipe
  • Huli Huli Chicken hails from Hawaii. It first appeared in the 1950s. The name "Huli" means "turn" in Hawaiian. This dish gets its name from the grilling method. You turn the chicken on the grill for even cooking. Locals often serve Huli Huli Chicken at luaus and gatherings. Its sweet and savory flavor makes it a favorite among many. People love Huli Huli Chicken for its unique taste. The mix of pineapple juice and soy sauce gives it a great balance. The dish is simple to make and full of flavor. It appeals to both kids and adults, making it perfect for family meals. Plus, grilling adds a smoky touch that enhances the dish. You can serve it at barbecues, parties, or just for a nice dinner at home. The key ingredients bring Huli Huli Chicken to life. Here’s what you need: - 4 chicken thighs, bone-in and skin-on - 1 cup pineapple juice - 1/4 cup soy sauce - 1/4 cup brown sugar - 2 tablespoons sesame oil - 2 garlic cloves, minced - 1 tablespoon fresh ginger, grated - 1 teaspoon red pepper flakes - 1 green onion, chopped (for garnish) - 1/4 cup fresh cilantro, chopped (for garnish) These ingredients create a delicious marinade. They work together to tenderize the chicken and add layers of flavor. You can find the full recipe [here]. To make Huli Huli chicken, gather these simple items: - 4 chicken thighs, bone-in and skin-on - 1 cup pineapple juice - 1/4 cup soy sauce - 1/4 cup brown sugar - 2 tablespoons sesame oil - 2 garlic cloves, minced - 1 tablespoon fresh ginger, grated - 1 teaspoon red pepper flakes - 1 green onion, chopped (for garnish) - 1/4 cup fresh cilantro, chopped (for garnish) Using fresh ingredients makes a big difference. Fresh chicken enhances the taste and texture. Fresh garlic and ginger also add vibrant flavors. Pineapple juice can be fresh or canned. I prefer fresh for a brighter flavor. Pre-packaged sauces can save time but may contain preservatives. If you use them, check the label for quality. Each serving provides a burst of flavor along with key nutrients. Here’s what you get per serving: - Calories: 300 - Protein: 24g - Carbohydrates: 25g - Fat: 15g - Fiber: 1g - Sugars: 10g This dish gives you a balanced meal with protein and some natural sugars. When you use the Full Recipe, you can enjoy a tasty meal that's both healthy and satisfying. To start, gather your ingredients. You need chicken thighs, pineapple juice, soy sauce, brown sugar, sesame oil, garlic, ginger, and red pepper flakes. In a mixing bowl, combine the pineapple juice, soy sauce, brown sugar, sesame oil, minced garlic, grated ginger, and red pepper flakes. Whisk it all together until well mixed. This marinade gives the chicken a sweet and tangy flavor. Place the chicken thighs in a large zip-top bag or a shallow dish. Pour the marinade over the chicken. Seal the bag or cover the dish. Refrigerate for at least 2 hours, or better yet, overnight. This step is key for the best taste. When you are ready to grill, preheat your grill to medium-high heat. This is important to get perfect grill marks and a nice sear on the chicken. Make sure your grill grates are clean. You can oil the grates lightly to prevent sticking. This small step can save you from a messy cooking experience later. Now, it’s time to grill! Remove the chicken from the marinade and let any excess drip off. Keep the leftover marinade for basting later. Place the chicken skin-side down on the grill. Grill for about 7-8 minutes until the skin is crispy and golden. Flip the chicken carefully, then baste it with the reserved marinade. Grill for another 7-8 minutes. You want the internal temperature to reach 165°F (75°C) for safe eating. Once done, remove the chicken from the grill and let it rest for 5 minutes. This will help keep it juicy. Before serving, garnish with chopped green onions and fresh cilantro. Enjoy your flavorful Huli Huli chicken! For the full recipe, check out the previous section. {{image_2}} Marinating chicken is key to great flavor. I recommend marinating for at least two hours. For the best taste, leave it overnight. The longer you marinate, the more delicious the chicken becomes. The pineapple juice tenderizes the meat and adds a sweet taste. Grill marks make your dish look amazing. To get those perfect lines, set your grill to medium-high heat. Place the chicken skin-side down on the grill. Don't move it for about 7-8 minutes. Once you see nice grill marks, flip the chicken carefully. This helps keep the juices inside. Using the right tools makes cooking easier. A good grill is essential for Huli Huli chicken. I also suggest using tongs to flip the chicken. A meat thermometer is important too. It ensures your chicken reaches 165°F (75°C) for safety. Lastly, have a basting brush ready for the marinade. This will keep the chicken juicy and full of flavor. For the full recipe and detailed steps, check out the [Full Recipe]. You can cook Huli Huli chicken in two main ways: grilling or baking. Grilling gives a smoky flavor and crispy skin. The heat from the grill adds nice char marks. For fun, try using a charcoal grill for extra flavor. Bake it for a more hands-off method. Just set your oven to 375°F (190°C). Place the chicken in a baking dish and pour the marinade over it. Bake for about 45 minutes. Check that the chicken reaches 165°F (75°C) for safety. Huli Huli chicken is great in bowls. Start with a base of rice or quinoa. Add grilled veggies like bell peppers and zucchini. Slice the chicken and place it on top. Drizzle with extra marinade or teriyaki sauce for added flavor. You can also sprinkle chopped green onions and cilantro for a fresh touch. Add slices of avocado or mango for a tropical twist. This makes for a colorful and tasty meal. You can easily adapt this recipe for different diets. For gluten-free options, use tamari instead of soy sauce. If you want a lower-sugar version, try using a sugar substitute like stevia. For a vegan option, swap the chicken for tofu or tempeh. Marinate it in the same sauce. Cooking times will vary, so check for doneness. These swaps keep the dish flavorful while meeting your dietary needs. For the full recipe, check out the details above! Yes, you can use different cuts. Huli Huli chicken works great with chicken breasts or drumsticks. Each cut offers a unique taste and texture. Keep in mind that cooking times may change. Breasts may cook faster than thighs. Always check the internal temperature to ensure it reaches 165°F (75°C). To store leftovers, let the chicken cool first. Place it in an airtight container. It will keep well in the fridge for up to four days. You can also freeze it for up to three months. When reheating, make sure the chicken is hot all the way through. You can find great Huli Huli chicken at Hawaiian restaurants. Look for local spots that specialize in island cuisine. Some food trucks also serve this dish. Check reviews online to find the best places. If you can't find a restaurant nearby, try making it at home using the Full Recipe. Huli Huli chicken is a tasty dish with rich history. We explored its origins, key ingredients, and why people love it. You learned how to marinate, grill, and serve this dish perfectly. I shared helpful tips and tasty variations to try. Enjoy making Huli Huli chicken in your kitchen. Each bite brings a taste of Hawaii to your home. Whether grilling or baking, have fun and get creative with flavors!
    Huli Huli Chicken Flavorful Recipe to Try Today
  • To make a tasty strawberry cheesecake, you need the following items: - 1 ½ cups graham cracker crumbs - ⅓ cup granulated sugar - ½ cup unsalted butter, melted - 16 oz cream cheese, softened - 1 cup powdered sugar - 1 teaspoon vanilla extract - 2 cups heavy cream - 1 cup fresh strawberries, pureed - 1 tablespoon lemon juice - Fresh strawberries for topping You can swap some ingredients if needed. Here are a few ideas: - Instead of graham cracker crumbs, use crushed cookies or nuts. - For granulated sugar, you can use brown sugar for a deeper flavor. - Use coconut oil in place of unsalted butter for a dairy-free option. - If you want a lighter version, use low-fat cream cheese. - You can substitute fresh strawberries with frozen ones, but fresh is best for flavor. Choosing ripe strawberries is key for great flavor. Here’s how: - Look for bright red berries. They should feel firm and plump. - Check for green, leafy tops; this shows they are fresh. - Avoid berries with soft spots or mold. This means they are past their prime. - If possible, buy local strawberries for the best taste. To start, preheat your oven to 325°F (163°C). Take a mixing bowl and add the graham cracker crumbs, granulated sugar, and melted butter. Mix these together until all crumbs feel wet. This step is key for a tasty crust. Next, press this mixture into the bottom of a 9-inch springform pan. Make sure it is even. Bake it in the oven for about 10 minutes. Once done, take it out and let it cool completely. Now, let’s make the filling. In a large bowl, beat the softened cream cheese with an electric mixer. You want it to be smooth and creamy. Slowly add the powdered sugar and vanilla extract. Keep mixing until everything is blended well. This process gives the cheesecake its rich taste. Next, take another bowl and whip the heavy cream. You want to whip it until soft peaks form. This adds lightness to your cheesecake. Carefully fold the whipped cream into the cream cheese mixture. Do this gently, so it stays fluffy. Time to add some flavor! Fold in the pureed strawberries and lemon juice. Mix until the color is uniformly pink. This will make your cheesecake taste fresh and fruity. Now, pour this strawberry cheesecake filling over the cooled crust in the springform pan. Smooth the top with a spatula to make it nice and neat. Cover it with plastic wrap and place it in the fridge. For the best flavor, chill it for at least 4 hours, or even overnight. Follow these steps, and you’ll have an amazing strawberry cheesecake. For exact measurements and more details, check the Full Recipe. To make your cheesecake creamy, use softened cream cheese. Cold cream cheese can cause lumps. Beat it well until smooth before adding any sugar. Mixing in the powdered sugar slowly helps keep the creaminess. Always fold in the whipped cream gently. This keeps the mixture light and fluffy. One common mistake is overmixing the filling. Overmixing can add too much air and cause cracks. Make sure to mix just until combined. Another mistake is not chilling long enough. Chilling for at least four hours helps set the cheesecake. Don’t skip the fresh strawberry topping. It adds flavor and looks great! To whip cream perfectly, start with cold heavy cream. Use a clean bowl and beaters for best results. Beat on medium speed until soft peaks form. This takes only a few minutes. Don’t overwhip, or it may turn into butter. Fold it into your cheesecake mixture gently to keep the light texture. You can find the full recipe for this delightful dessert to guide you in making the best strawberry cheesecake! {{image_2}} A no-bake version is simple and quick. You skip the oven and save time. Start with the same crust made from graham cracker crumbs. Mix the cream cheese, powdered sugar, and vanilla like in the original recipe. Instead of baking, spread the filling over the crust. Chill it for at least four hours. This method gives you a smooth, creamy slice without any baking fuss. If you want a vegan cheesecake, you can use plant-based ingredients. For the crust, use vegan butter instead of regular butter. Swap the cream cheese with soaked cashews blended until creamy. Use maple syrup or agave instead of powdered sugar. Coconut cream is a great choice to replace heavy cream. This vegan option tastes rich and delicious and is perfect for plant-based diets. For a gluten-free version, you can use almond flour or gluten-free graham crackers. Mix them with coconut oil to create a crust that holds together well. Press it into your pan just like the regular crust. This way, you enjoy the same great taste without gluten. You can even try crushed nuts for a unique twist. Explore these variations to find your favorite way to enjoy Strawberry Cheesecake Delight! For the complete recipe, check out the Full Recipe. After you enjoy your strawberry cheesecake, store leftovers properly. First, cover it well. Use plastic wrap or a lid to keep it fresh. This keeps out air and moisture. Place it in the fridge. It helps maintain its taste and texture. Always put it on a flat surface to avoid spills. You can freeze strawberry cheesecake for later. First, let it cool completely. Then, wrap it tightly in plastic wrap. Next, place it in an airtight container or freezer bag. This protects it from freezer burn. You can freeze it for up to three months. When you are ready to enjoy it, thaw it in the fridge overnight. Strawberry cheesecake lasts about five days in the fridge. Keep it covered to maintain quality. If it looks or smells off, don’t eat it. If frozen, it stays good for three months. Always check for any signs of spoilage before serving. Knowing these tips helps you enjoy this delightful dessert longer. For the full recipe, visit the complete guide. To make strawberry cheesecake from scratch, follow these steps. First, prepare the crust by mixing graham cracker crumbs, sugar, and melted butter. Press this mix into a springform pan and bake. Next, beat cream cheese until smooth. Then, add powdered sugar and vanilla. In another bowl, whip heavy cream until soft peaks form. Fold this whipped cream into the cream cheese mixture gently. Add pureed strawberries and lemon juice. Mix until it’s a nice pink color. Pour this filling over the crust and chill for at least 4 hours. You can find the full recipe in the earlier sections. Yes, you can use frozen strawberries. Just remember to thaw them first. Drain any excess liquid to avoid a watery filling. Frozen strawberries work well in purees and can still give great flavor. They may change the texture slightly, but your cheesecake will still taste amazing. The best way to serve strawberry cheesecake is chilled. Once set, remove it from the springform pan. Top with fresh strawberries for a bright look. You can also add whipped cream or a drizzle of strawberry sauce. Slice into pieces and enjoy! This dessert is perfect for gatherings or a special treat. In this blog post, we explored the key ingredients for a perfect strawberry cheesecake, from the crust to fresh strawberries. I shared step-by-step instructions to make it easy for you. We looked at tips for a creamy texture and common mistakes to avoid. Plus, I offered tasty variations, storage tips, and answered frequently asked questions. Remember, practice makes perfect. Enjoy making this dessert, and share it with friends and family!
    Strawberry Cheesecake Delight Simple and Easy Recipe
  • - 1 pre-made graham cracker pie crust - 1 cup fresh lemon juice (about 4-5 lemons) - Zest of 2 lemons - 1 cup granulated sugar - 4 large eggs - 1/2 cup unsalted butter, melted - 1 cup heavy whipping cream - 1/4 cup powdered sugar (for the whipped cream) - Fresh mint leaves (for garnish) Having the right ingredients makes all the difference in making an easy lemon cream pie. I love using fresh lemon juice. It brings a bright, zesty flavor that makes the pie shine. The sweet and tart balance is key. The graham cracker crust adds a nice crunch, too. When selecting lemons, pick ones that feel heavy for their size. This usually means they have more juice inside. Don't forget the zest! It adds extra lemon flavor that makes this pie special. Melted butter helps bind the filling. Heavy cream is essential for the whipped topping. This creates a light and fluffy texture that complements the tangy filling. Lastly, fresh mint leaves add a pop of color and flavor. Garnishing with mint makes the pie look even more delightful. For the full recipe, check the detailed instructions above. To start, gather your ingredients. In a medium saucepan, you will whisk together: - 1 cup fresh lemon juice - Zest of 2 lemons - 1 cup granulated sugar - 4 large eggs - 1/2 cup unsalted butter, melted Cook this mixture over medium heat. Keep stirring until it thickens. This should take about 10 to 15 minutes. You want it thick enough to coat the back of a spoon. Be careful not to let it boil, as that can ruin the texture. Once your lemon filling thickens, remove it from the heat. Let it cool for about 15 to 20 minutes. Stir it occasionally so a skin does not form on top. After it cools, gently pour the lemon filling into the pre-made graham cracker pie crust. Use a spatula to smooth the top. Now, place the pie in the refrigerator. Let it chill for at least 3 hours. This helps the filling set properly. While the pie chills, you can whip the cream. In a mixing bowl, combine: - 1 cup heavy whipping cream - 1/4 cup powdered sugar Beat this mixture on medium-high speed. Stop when soft peaks form. Once the pie has set, spread the whipped cream evenly on top. Create swirls for an attractive finish. For a nice touch, add fresh mint leaves as garnish. You can also sprinkle some extra lemon zest on top if you like. For the full recipe, check out the entire guide. Enjoy making your Easy Lemon Cream Pie! To get the best flavor, always use fresh lemon juice. The taste brightens the pie. Fresh lemons make the filling zesty and vibrant. When cooking the filling, stir continuously. This keeps the mixture from boiling. Boiling can ruin the texture. If you see bubbles, lower the heat. The goal is to thicken it gently. You want it to coat the back of a spoon. Cold tools help create the best whipped cream. Chill your mixing bowl and beaters in the fridge. This makes your cream whip faster and fluffier. When you whip the cream, beat until soft peaks form. This gives you a light and airy texture. Don’t overbeat, or it will turn into butter. Just stop when it’s thick yet smooth. {{image_2}} You can easily change the flavor of your lemon cream pie. A splash of vanilla extract adds depth. Mix it into the lemon filling before cooking. It brings a lovely warmth that pairs well with the tartness. If you want to get creative, try other citrus fruits. Lime or orange zest can add a fun twist. Adjust the amount of lemon juice to keep the balance. This way, you can enjoy a whole new pie experience! For those who need a gluten-free option, don’t worry! You can switch the graham cracker crust. Use a gluten-free pie crust instead. Many brands now offer tasty options that work well. You won’t lose the great taste with this swap. This way, everyone can enjoy your easy lemon cream pie. It keeps the same creamy texture and zesty flavor. Everyone will love it, no matter their dietary needs! Store any leftover pie covered in the refrigerator. It stays fresh for up to 3 days. The cool air keeps the lemon cream firm and tasty. If you leave it out, it may spoil faster. To keep it safe, use plastic wrap or a pie dome. This way, you can enjoy the pie again without losing its flavor. Freezing the filled pie is not a good idea. The texture changes when you thaw it. The creamy filling may become watery or grainy. Instead, enjoy the pie fresh. If you have extra lemon filling, you can freeze that. Just remember to use it within a month. When you're ready, thaw it in the fridge overnight, then pour it into a fresh crust. This gives you a new pie without losing quality. Yes, you can prepare the lemon filling in advance. Just keep it in the fridge. Make sure it cools completely before covering it. This way, you save time on the big day. You can pour it into the crust just before serving. Bottled lemon juice is a good option. It works well in the recipe. Just use the same amount as fresh juice. You may miss some zest, but it still tastes great. Be sure to check the label for quality. This recipe makes about eight servings. You can slice the pie into even wedges. Use a sharp knife for clean cuts. Serve each piece on a plate with a mint leaf on top for a nice touch. Enjoy! You now have a simple and tasty lemon pie recipe. The fresh lemon juice and zest give it a bright flavor. Follow the steps to whip up this pie easily. Remember, freshness matters for the best taste. You can even make this pie your own by adding different flavors. Store leftovers properly for later enjoyment. Enjoy your time baking and sharing this delicious treat. Your friends and family will love it!
    Easy Lemon Cream Pie Delightful and Simple Recipe
  • To make an Easy Prawn Cutlet Burger, you need fresh and simple ingredients. Here’s the list: - 250g prawns, peeled and deveined - 1 small onion, finely chopped - 2 cloves garlic, minced - 1 green chili, finely chopped - 1/2 cup breadcrumbs - 1 egg - 2 tablespoons cornstarch - 1 tablespoon fresh coriander, chopped - 1 teaspoon cumin powder - 1/2 teaspoon salt - Black pepper to taste - 2 tablespoons oil (for frying) - Burger buns - Lettuce leaves - Sliced tomatoes - Mayonnaise or aioli (for serving) These ingredients come together to create a burger that is both tasty and easy to make. You can find the full recipe in the next section. Using fresh prawns will really enhance the flavor of your cutlet. Enjoy the process of gathering these ingredients. They are the foundation for your delightful meal! First, start by pulsing the prawns in a food processor. You want them coarsely chopped, not pureed. Next, take a large bowl and combine the chopped prawns with the finely chopped onion, minced garlic, green chili, and fresh coriander. This mix adds flavor and freshness to your patties. Now, it’s time to add the rest of the ingredients. Toss in the breadcrumbs, egg, cornstarch, cumin powder, salt, and black pepper. Mix everything well until you have a sticky mixture. This helps the patties hold together. Divide the mixture into four equal portions. Shape each portion into a patty. Make sure they are even for uniform cooking. Heat oil in a large skillet over medium heat. Once the oil is hot, carefully place your prawn patties in the skillet. Fry them for about three to four minutes on each side. Look for a golden brown color and a crispy texture. While they cook, you can toast the burger buns until they are lightly golden. This adds a nice crunch to your burger. Now, you have crispy prawn cutlet patties, ready to be assembled into your burger! For the full recipe, refer to the instructions above. To make great prawn patties, use fresh prawns. Fresh prawns give the best flavor. You want the mixture to be sticky. This helps the patties hold together well. When you mix the ingredients, don’t rush. Take your time to combine everything fully. This step is key for a good texture. Frying your patties at the right temperature is crucial. Heat your oil over medium heat. If the oil is too hot, the outside will burn. If it's too cool, the patties will soak up oil and become soggy. To keep your patties crispy, avoid crowding the pan. Fry them in batches if needed, and let them rest on a paper towel after cooking. This helps absorb extra oil. Now, let’s talk about toppings. Crisp lettuce and fresh tomato add nice crunch. For sauce, mayonnaise or aioli works great. You can add a slice of cheese if you like. Serve your burgers with fries or a simple salad. These sides complement the flavors and make a full meal. Enjoy your Easy Prawn Cutlet Burger! For the full recipe, check the section above. {{image_2}} You can easily switch the prawns for other seafood. Fish like cod or salmon works great. Crab meat also adds a sweet, rich flavor. Just chop the seafood into small pieces. Follow the same steps in the recipe. Your cutlet burger will taste amazing! For a veggie version, use mixed vegetables. You can blend carrots, peas, and corn for a colorful mix. Add mashed chickpeas for protein. Use the same spices from the original recipe. Shape the veggie mix into patties, and cook as described. A veggie burger can be just as delicious! Want more flavor? Add spices like paprika or cayenne pepper. Fresh herbs like dill or parsley can brighten the taste. You can also mix in zest from a lemon or lime. These small changes can make your prawn cutlet burger even tastier. Enjoy experimenting with different flavors! To keep your prawn cutlet burgers fresh, refrigerate any leftovers. Place them in an airtight container. They will last up to three days in the fridge. If you want to save them for later, freezing works well too. Wrap each burger in plastic wrap, then place them in a freezer bag. They can stay good for up to three months. When it’s time to eat your leftovers, reheating is key. The best way to warm them up is in a skillet. Heat a little oil over medium heat. Place the burgers in the pan, cooking for about 2-3 minutes on each side. This method keeps them crispy. You can also use an oven at 350°F. Bake for 10-15 minutes until hot. The shelf life of your prawn cutlet burgers is important for safety. If stored properly in the fridge, they are best eaten within three days. If frozen, aim to eat them within three months for the best taste. Always check for any signs of spoilage before consuming. To make your prawn cutlet burger crispy, use fresh breadcrumbs. The breadcrumbs create a nice crust when frying. Make sure the oil is hot before adding the patties. This helps seal the outside quickly. You can also double coat the patties by dipping them in egg, then breadcrumbs again. This adds extra crunch to each bite! Yes, you can prepare the patties in advance. Shape the patties and place them on a tray. Cover them with plastic wrap and refrigerate for up to 24 hours. This keeps the flavors fresh. When you're ready to cook, just heat the oil and fry them until golden. This saves you time and makes dinner easy! If you don’t have aioli, you can use mayonnaise as a simple substitute. You might also try garlic mayonnaise for extra flavor. For a spicy kick, mix some sriracha into the mayo. Other options include tartar sauce or even a yogurt-based dip. These choices keep your burger tasty and fun! Yes, you can freeze the prawn patties. After shaping them, place them on a baking tray. Freeze them for a few hours, then store in a freezer bag. They last for about three months. When ready to cook, just fry them straight from the freezer. This is a great way to have a quick meal on hand! Cook the patties for about 3-4 minutes on each side. This timing gives you a nice golden color and crispy texture. Keep an eye on them to avoid burning. If they brown too quickly, lower the heat a little. Perfectly cooked patties are key to a delicious prawn cutlet burger! Fresh toppings make your prawn cutlet burger even better! Try crisp lettuce and juicy tomato slices. You can also add pickles for a tangy crunch. Other great options are sliced avocado and shredded cabbage. These toppings add color and flavor to your meal, making it more exciting! In this post, we covered how to make tasty prawn patties. We looked at key ingredients and detailed steps for preparation, cooking, and serving. I shared tips for perfecting your patties and options for variations. Remember, fresh prawns make a big difference! Enjoy these patties with your favorite toppings to enhance the flavor. Whether you choose to fry them or try some fun substitutions, these burgers can fit any taste. Dive into this recipe and impress everyone at your next meal. Your culinary journey awaits!
    Easy Prawn Cutlet Burger Delightful and Tasty Meal
  • To make a great palak paneer, you need the following items: - 250g paneer, cubed - 500g fresh spinach leaves, washed and blanched - 1 large onion, finely chopped - 2 tomatoes, pureed - 2 green chilies, slit - 1 tablespoon ginger-garlic paste - 1 teaspoon cumin seeds - 1 teaspoon garam masala - ½ teaspoon turmeric powder - ½ teaspoon red chili powder - 2 tablespoons ghee or vegetable oil - Salt to taste These ingredients create a rich and flavorful dish. Each one plays an important role in the final taste. For instance, paneer adds a creamy texture, while spices bring warmth and depth. You can enhance your dish with these garnishes: - Fresh cream - Coriander leaves Fresh cream adds a rich finish. Coriander leaves give a fresh pop of color and flavor. They make your palak paneer look beautiful and taste even better. If you want to impress guests, use these garnishes. For the full recipe, check out the detailed cooking steps to create this delightful meal. Blanching the spinach: First, bring a pot of water to a boil. Add the fresh spinach leaves and let them boil for 2-3 minutes. This step helps keep the bright green color. Next, drain the spinach and quickly move it to a bowl of cold water. This stops the cooking process. Once cool, blend the spinach until it becomes a smooth paste. Set this aside for later. Preparing the spinach paste: The paste is key for our dish's flavor. When you blend the spinach, it should be silky and bright. This will make the Palak Paneer look and taste amazing. You can add a little water while blending if needed. Just don't add too much! Sautéing onions and spices: In a large pan, heat 2 tablespoons of ghee or vegetable oil over medium heat. Add 1 teaspoon of cumin seeds and wait for them to splutter. This releases their flavor. Next, toss in 1 large finely chopped onion and 2 slit green chilies. Cook them until the onions are golden brown. This usually takes around 5-7 minutes. Combining ingredients for optimal flavor: Now, stir in 1 tablespoon of ginger-garlic paste and cook for another minute. After that, add 2 pureed tomatoes, ½ teaspoon of turmeric powder, ½ teaspoon of red chili powder, and salt to taste. Cook this mix until it thickens and the oil separates from the mixture, about 5-7 minutes. Then, add the blanched spinach paste and mix it well. Let it simmer on low heat for about 4-5 minutes. Finally, gently fold in 250g of cubed paneer. Make sure the paneer is well-coated with the spinach sauce. Cook for another 3 minutes. Sprinkle in 1 teaspoon of garam masala and mix gently. You can adjust the salt if needed. If you like, drizzle fresh cream on top before garnishing with coriander leaves. Serve this dish warm for a delightful meal. For the full recipe, you can find it [here](#). To achieve the perfect spinach texture, start with fresh spinach. Wash it well and blanch it quickly for just 2-3 minutes. This keeps the vibrant green color and smooth texture. After blanching, cool it in cold water to stop the cooking process. Blend it into a fine paste for the best results. For the paneer, ensure it’s tender yet firm. Use fresh paneer, and cut it into cubes. You can fry the paneer lightly in ghee or oil before adding it to the dish. This gives a nice texture and flavor. Avoid overcooking the paneer, as it can become rubbery. For the best side dishes to pair with Palak Paneer, consider serving it with naan or basmati rice. Both absorb the delicious sauce well. You can also add a side of pickles or yogurt for extra flavor. When it comes to presentation, serve the Palak Paneer in a warm bowl. Drizzle a bit of cream on top for richness and color. Finish with a sprinkle of fresh coriander leaves. This makes the dish look inviting and appetizing. For more ideas, check the Full Recipe for detailed steps and variations. {{image_2}} You can easily adapt Palak Paneer to fit different diets. For a vegan option, replace paneer with tofu or a nut-based cheese. Tofu captures the flavors well and adds a nice texture. You can also use coconut cream instead of fresh cream for a creamy touch. If you need gluten-free options, don't worry. This dish is naturally gluten-free, so you can enjoy it without any changes. Just make sure to check any store-bought ingredients for hidden gluten. To change up the taste, consider adding spices. A pinch of fenugreek leaves gives a unique flavor. You can also add a touch of cardamom for warmth. Experimenting with spices adds depth and makes the dish your own. Incorporating extra vegetables is another fun way to play with flavors. Try adding peas for sweetness or bell peppers for crunch. These veggies blend well with the spinach and add color to your plate. You can explore these ideas in the Full Recipe for Palak Paneer. To store leftover Palak Paneer, let it cool first. Then, place it in an airtight container. This keeps it fresh for about 3-4 days in the fridge. When you’re ready to eat, just reheat it on the stove or in the microwave. Stir it often to heat it evenly. If you want to freeze Palak Paneer, use a freezer-safe container. Make sure to cool it fully before freezing. It can last up to 3 months in the freezer. When you want to enjoy it again, thaw it overnight in the fridge. Reheat in a pan on low heat to keep it tasty. If it seems thick, add a splash of water or cream. This keeps the dish creamy and delicious. How can I make Palak Paneer spicier? To add heat, you can include more green chilies. Chop them finely and add them to the dish early. You can also add a pinch of cayenne pepper or red chili powder. This will give your Palak Paneer a nice kick. Adjust spice to your taste as you cook. Can I use frozen spinach instead? Yes, frozen spinach works well in Palak Paneer. Just thaw it and squeeze out excess water. Then, blend it into a paste as you would with fresh spinach. It saves time and can still taste great. What are the health benefits of Palak Paneer? Palak Paneer is rich in iron, calcium, and vitamins A and C. Spinach offers antioxidants that help with health. Paneer adds protein, making this dish nutritious. It is a great option for a balanced meal. Is Palak Paneer high in calories? Palak Paneer can be moderate in calories. One serving has around 300-400 calories, depending on the amount of oil or cream. For a lighter version, use less ghee or skip the cream. Enjoy it with whole grains for a healthy meal. This article covered how to make Palak Paneer with ease. We explored the key ingredients needed and how to blend them for the best taste. I shared cooking tips to help you achieve the perfect texture. Don't forget to try the optional garnishes for added flair. Storage tips ensure you enjoy leftovers, while variations let you adapt to dietary needs. Cooking can be fun and satisfying. Experiment with flavors and enjoy your homemade Palak Paneer. Happy cooking!
    Palak Paneer Delightful Recipe for Flavorful Dish

Our Policies

  • Privacy Policy
  • GDPR Policy
  • Terms Of Use
  • Copyright Policy
  • Cookie Policy
  • Disclaimer

More Information

  • Home
  • Dinner
  • Appetizer
  • Desserts
  • Breakfast
  • Contact
  • About

  • Email: [email protected]
  • Address: 513 E Cuyahoga Falls Ave, Akron, OH 44310, United States
  • Phone: +1 (305) 275-4892
©2025 Themomdish All Rights Reserved