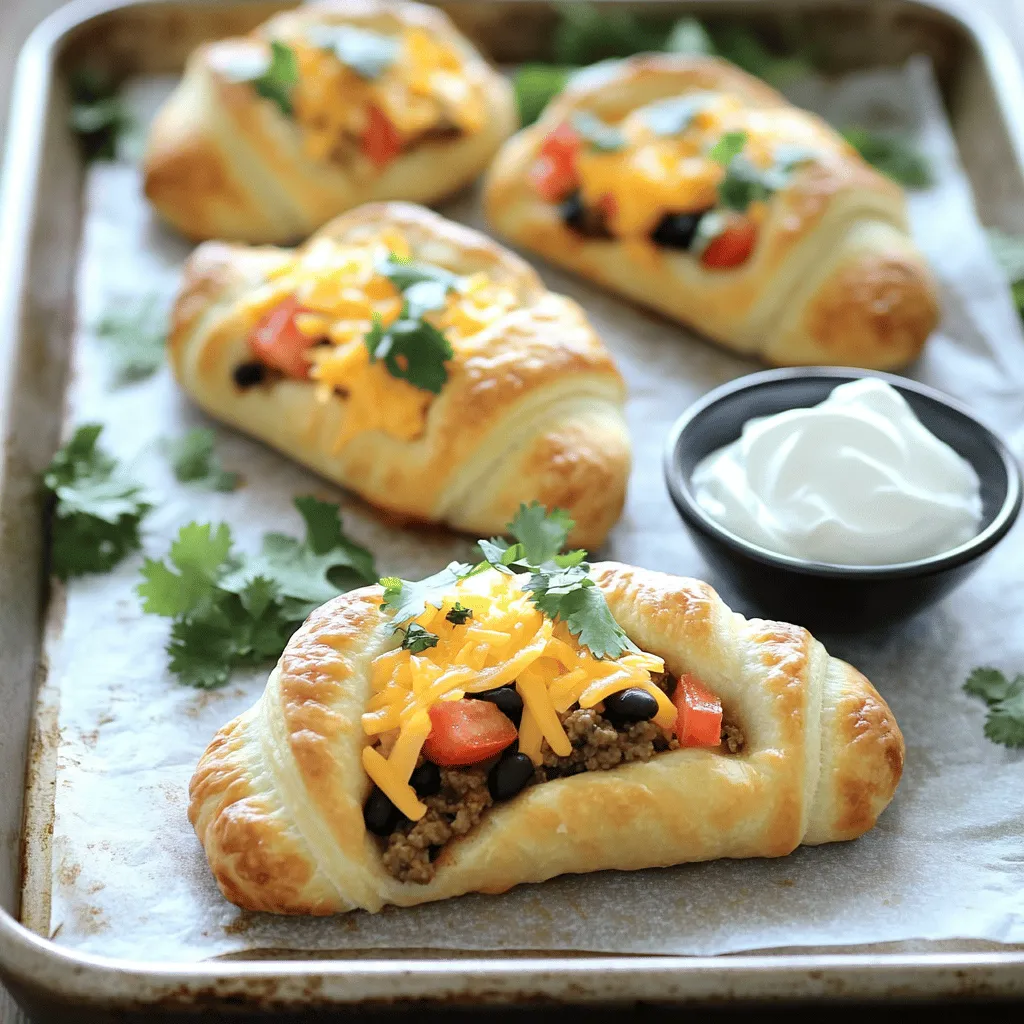
Cheesy Taco Bombs Recipe: The Ultimate Snack for Any Gathering
Cheesy Taco Bombs are the perfect fusion of flavors, combining the beloved elements of tacos …
Cheesy Taco Bombs are the perfect fusion of flavors, combining the beloved elements of tacos …

Introduction Comfort food holds a special place in our hearts and kitchens. It is the …
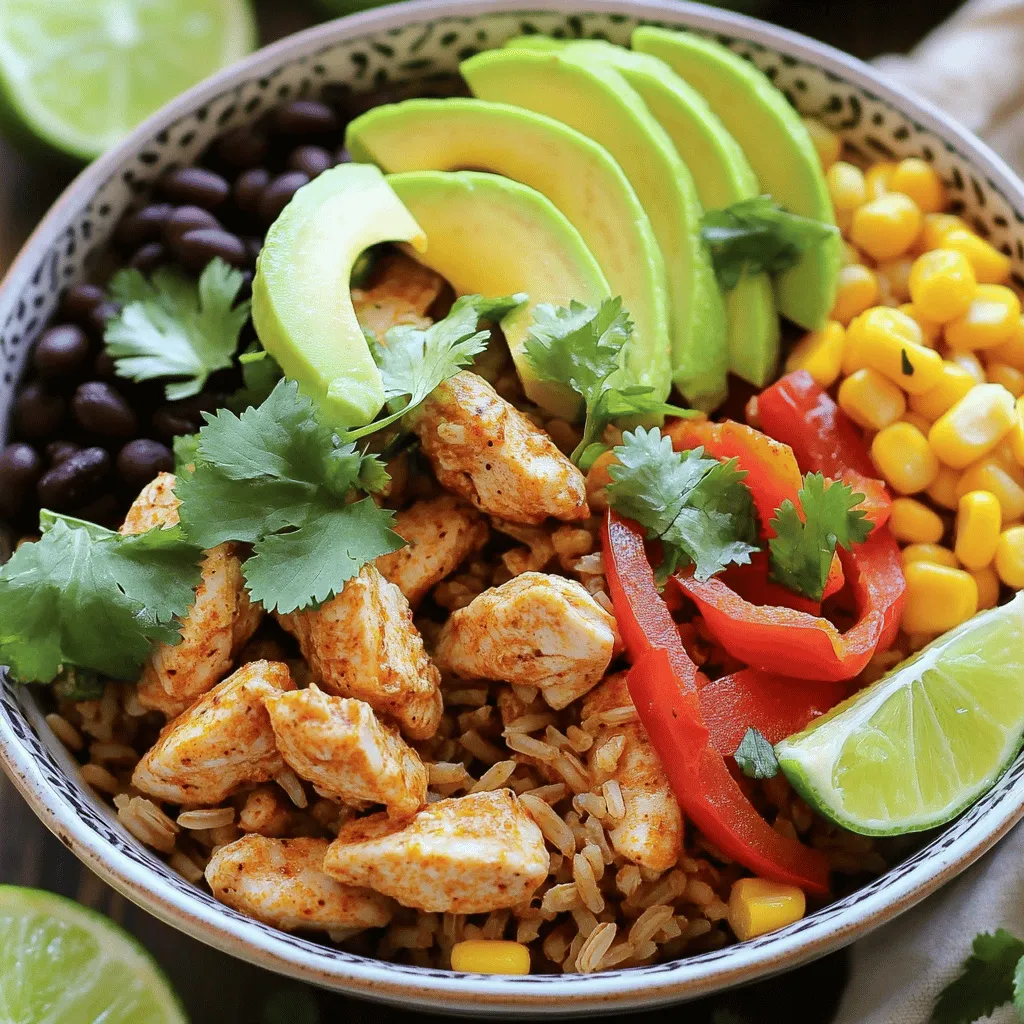
Introduction If you’re on the lookout for a dish that combines vibrant flavors, wholesome ingredients, …
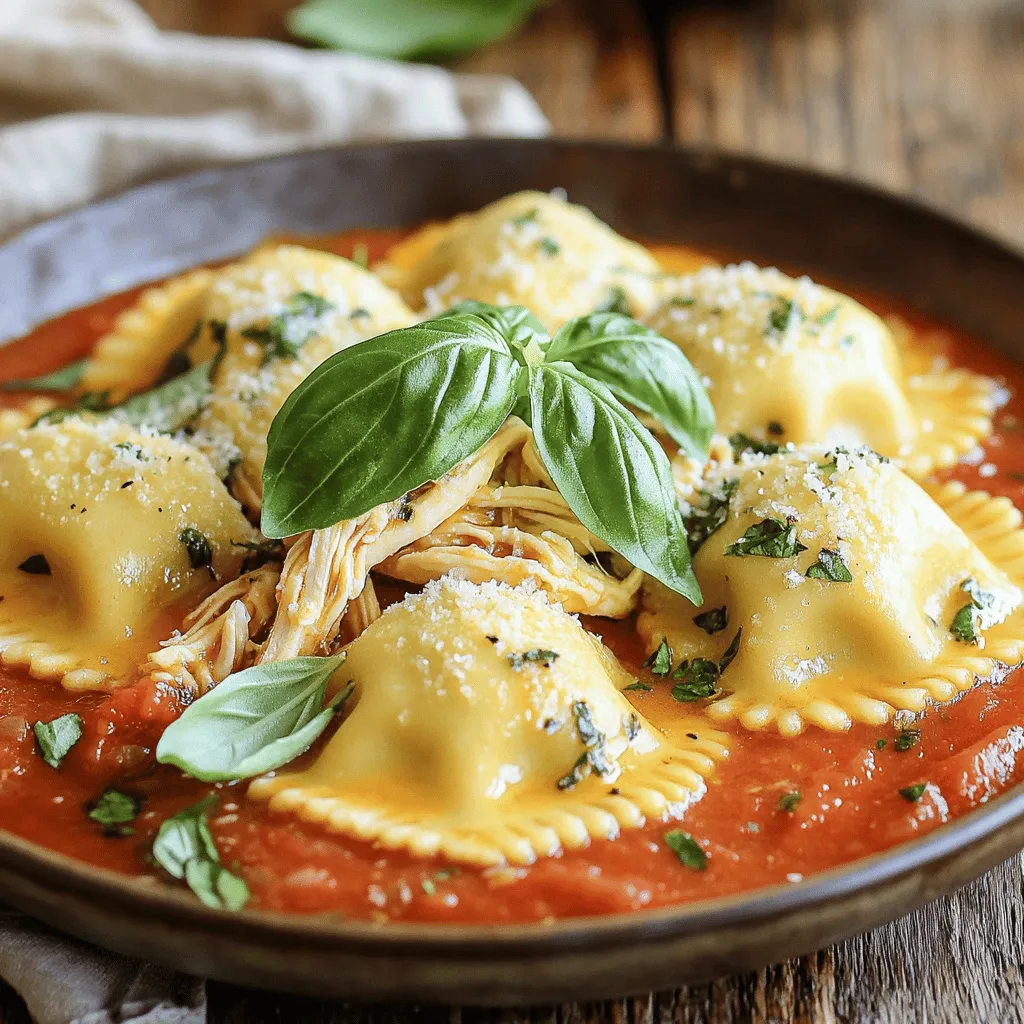
Introduction to Tuscan Chicken Ravioli Tuscan cuisine is a vibrant and hearty celebration of fresh …
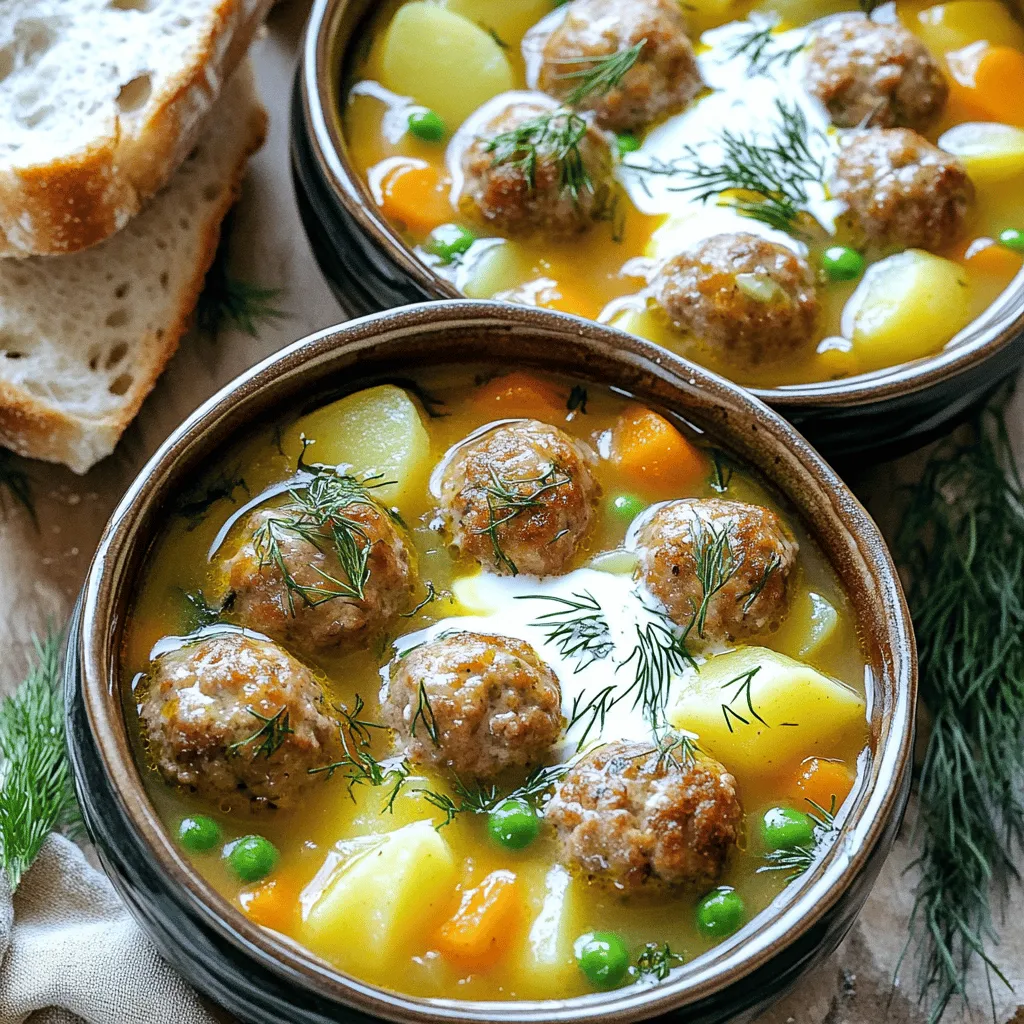
Introduction As the temperatures drop and the days grow shorter, there’s nothing quite like a …
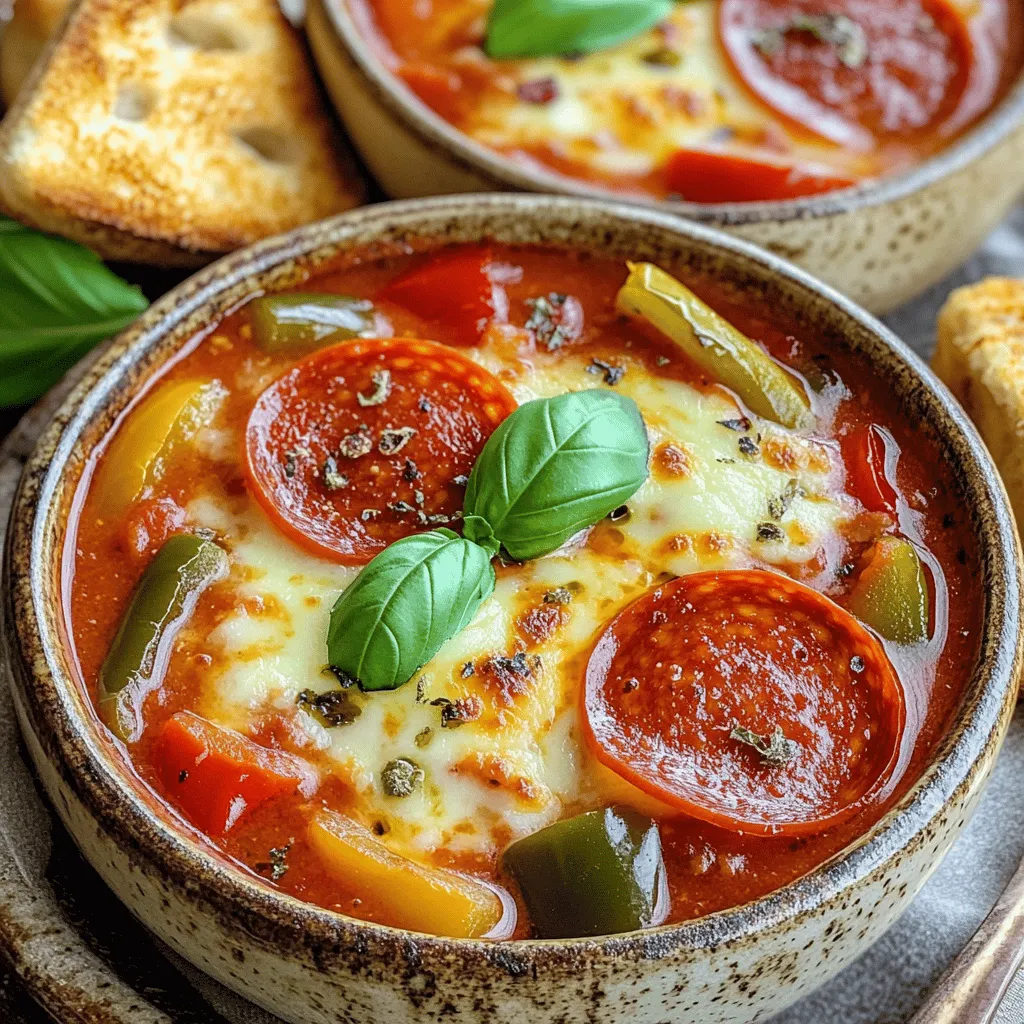
Introduction Discover the comforting and flavorful world of Pizza Soup, a delightful twist on the …

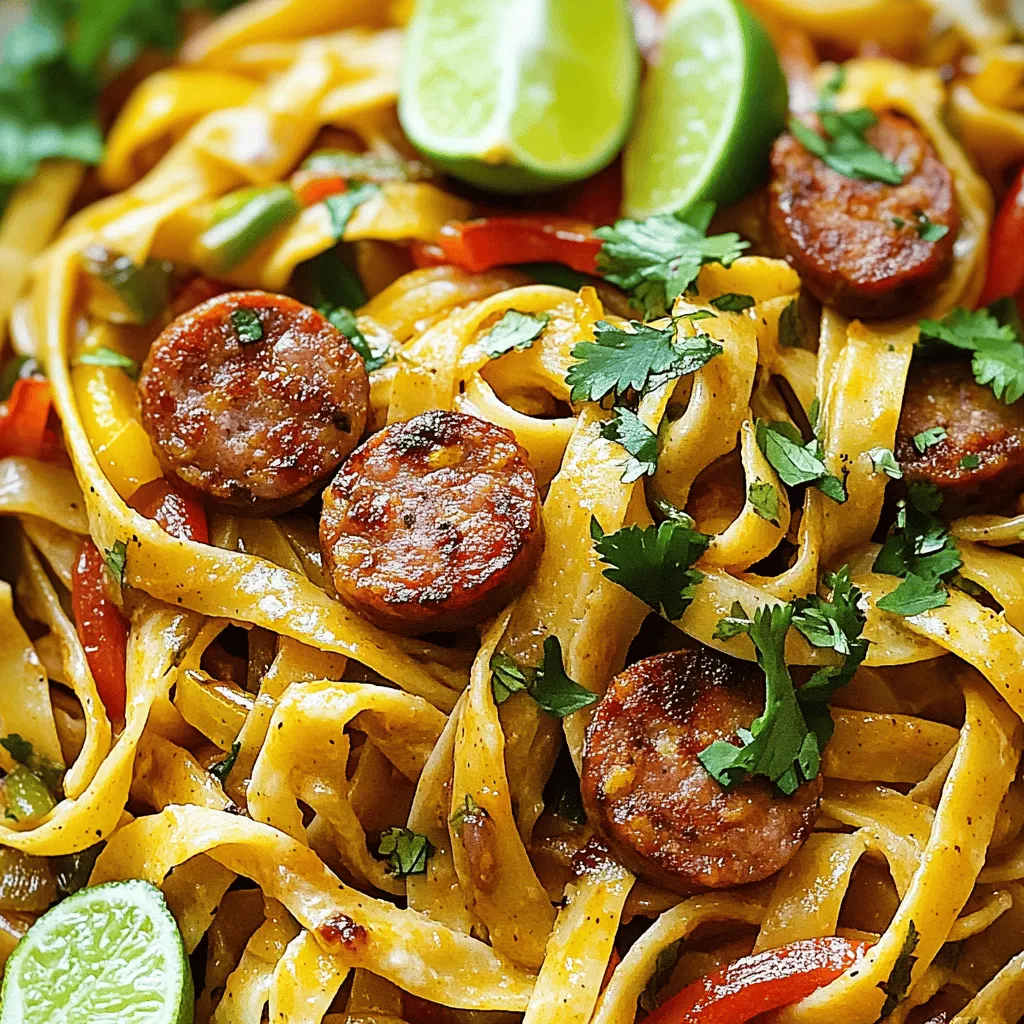
Introduction Cajun cuisine is a celebration of bold flavors, vibrant spices, and a rich cultural …
Introduction Fusion cuisine is a delightful culinary adventure that combines elements from different culinary traditions, …
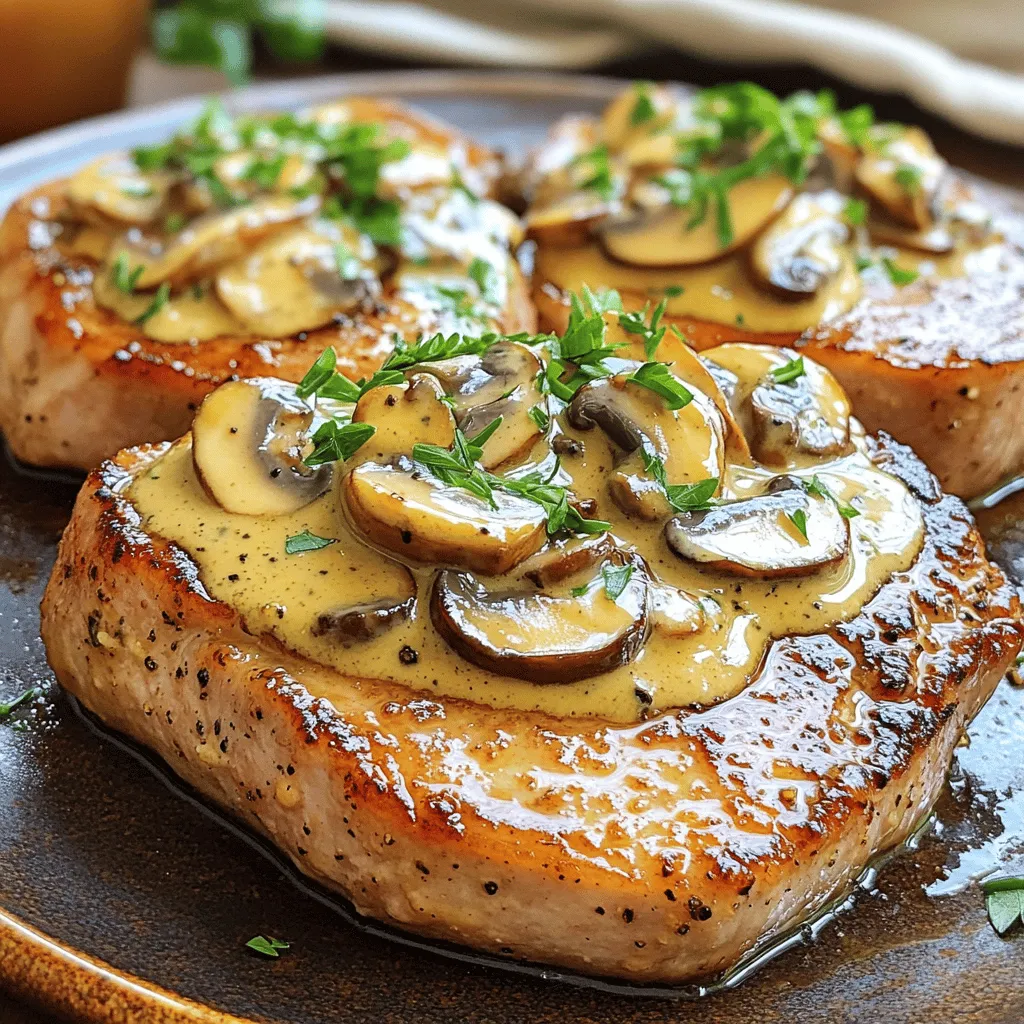
Introduction Discover the rich and savory flavors of Creamy Mushroom Pork Chops, a delightful dish …

Introduction In the culinary world, sauces can elevate a dish from ordinary to extraordinary. A …