Introduction to Cannoli Cheesecake Bars
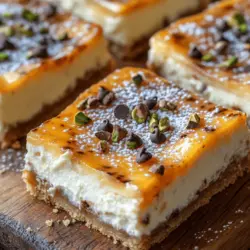
If you’re a fan of desserts, you’re likely familiar with the indulgent nature of cheesecake and the rich, satisfying flavors of Italian cannoli. Imagine combining these two beloved treats into one heavenly dessert—this is where Cannoli Cheesecake Bars come into play. This delightful recipe is a tribute to both classic Italian pastries and creamy cheesecakes, resulting in a dessert that is as visually stunning as it is delicious.
Cannoli Cheesecake Bars offer a unique spin on traditional recipes, making them perfect for a variety of occasions. Whether you’re hosting a dinner party, celebrating a special event, or simply treating yourself to something sweet, these bars are bound to impress your guests and satisfy your sweet tooth. The creamy texture of the cheesecake pairs beautifully with the flavors of cannoli, creating a delightful dessert that is rich yet balanced.
In this article, we will guide you through each step of making Cannoli Cheesecake Bars, from understanding the flavor profile to crafting the perfect crust and filling. Additionally, we’ll provide valuable tips and insights to ensure your baking experience is nothing short of successful. Let’s dive into the world of Cannoli Cheesecake Bars and explore the delightful flavors that make this dessert a true standout.
Understanding the Flavor Profile of Cannoli Cheesecake Bars
Exploring the Unique Taste Combinations
The flavor profile of Cannoli Cheesecake Bars is what sets them apart as an extraordinary dessert. This fusion brings together distinct flavors that complement each other beautifully, creating a harmonious blend of tastes that will tantalize your palate.
– The Classic Flavors of Italian Cannoli: At the heart of these cheesecake bars lies the classic cannoli flavor. Cannoli are traditionally filled with a sweet, creamy mixture of ricotta cheese, sugar, and sometimes mascarpone. The addition of vanilla extract and a hint of citrus, often orange zest, enhances the flavor and adds a refreshing touch. These ingredients work together to create a rich and creamy filling that is both sweet and subtly tangy, making it the perfect base for our cheesecake bars.
– The Creamy Richness of Cheesecake: Cheesecake is known for its rich and velvety texture, achieved through a combination of cream cheese and sour cream. These two ingredients create a luscious filling that is smooth and creamy while maintaining a balance with the sweetness of the sugar. When combined with the flavors of cannoli, the cheesecake becomes a decadent treat that is hard to resist.
– The Addition of Chocolate Chips and Pistachios: To elevate the flavor and texture of the Cannoli Cheesecake Bars, we incorporate chocolate chips and optional pistachios. The chocolate chips add a touch of sweetness and a delightful bite, while the pistachios introduce a nutty flavor and a crunchy texture that contrasts beautifully with the creamy filling. Together, these elements enhance the overall dessert experience, making each bite a celebration of flavors.
Gathering Your Ingredients for Cannoli Cheesecake Bars
Before embarking on your baking adventure, it’s essential to gather all the necessary ingredients for Cannoli Cheesecake Bars. Here’s a detailed breakdown of what you’ll need:
For the Crust:
– Graham Cracker Crumbs: This will serve as the base for your bars, providing a sweet and slightly crunchy texture.
– Butter: Melted butter will help bind the crumbs together and add richness to the crust.
– Sugar: A small amount of sugar sweetens the crust, balancing the flavors of the filling.
The Cheesecake Filling:
– Cream Cheese: This is the star ingredient that gives the cheesecake its creamy texture and rich flavor.
– Ricotta Cheese: Essential for achieving the classic cannoli taste, ricotta adds a unique creaminess and subtle sweetness.
– Granulated Sugar: This sweetens the cheesecake filling and enhances the overall flavor.
– Sour Cream: This adds a tangy flavor that balances the richness of the cream cheese.
– Eggs: Eggs provide structure to the cheesecake and help it set properly.
– Vanilla Extract: A dash of vanilla extract enhances the overall flavor profile and adds warmth.
Cannoli Topping Essentials:
– Powdered Sugar: This will be used to sweeten the cannoli topping, giving it a smooth texture.
– Vanilla Extract: Another layer of flavor that enhances the topping’s taste.
– Chocolate Chips: Essential for that classic cannoli flavor, the chocolate chips provide sweetness and texture.
– Optional Orange Zest: For those who enjoy a citrusy kick, a sprinkle of orange zest can elevate the flavor profile even further.
With all your ingredients assembled, you’re ready to start crafting these delectable Cannoli Cheesecake Bars.
Step-by-Step Instructions to Create Cannoli Cheesecake Bars
Preparing the Crust
The first step in creating Cannoli Cheesecake Bars is to prepare the crust. The crust sets the foundation for the bars and adds a pleasant crunch.
1. Preheat the Oven: Start by preheating your oven to 325°F (163°C). This ensures that your crust will bake evenly and achieve that perfect golden-brown color.
2. Mixing Ingredients: In a medium-sized bowl, combine the graham cracker crumbs, melted butter, and sugar. Use a fork or your hands to mix until the crumbs are evenly coated with butter and the mixture resembles wet sand. This step is crucial because it allows the crust to hold together when pressed into the baking pan.
3. Pressing the Crust Mixture into the Baking Pan: Line a 9×9-inch baking pan with parchment paper, allowing some overhang for easy removal later. Pour the crust mixture into the prepared pan and press it down firmly with the back of a measuring cup or your fingers. Aim for an even thickness throughout the base to ensure consistent baking. It’s important to press the crust firmly so that it holds together when cut into bars.
Crafting the Cheesecake Filling
Once the crust is prepared and in the oven, it’s time to turn your attention to the cheesecake filling. This step is where all the creamy goodness comes together.
1. Mixing Techniques for a Smooth Consistency: In a large mixing bowl, combine the cream cheese and ricotta cheese. Using an electric mixer, beat the cheeses on medium speed until they are smooth and creamy—about 2-3 minutes. Take your time with this step, as achieving a smooth consistency is key to a lump-free filling.
2. Important Notes on Ingredient Incorporation: Gradually add the granulated sugar, sour cream, and vanilla extract to the cheese mixture. Continue to mix on medium speed until well combined. It’s essential to scrape down the sides of the bowl with a spatula to ensure all ingredients are thoroughly incorporated.
3. Folding in Chocolate Chips: Once the mixture is smooth, add the eggs—one at a time—mixing on low speed after each addition. Be careful not to overmix at this stage, as this can introduce air bubbles into the filling, resulting in cracks during baking. Finally, gently fold in the chocolate chips with a spatula, ensuring they are evenly distributed without over-mixing the batter.
With your crust baked and your cheesecake filling prepared, you are ready to assemble your Cannoli Cheesecake Bars. The next steps will involve pouring that luscious filling over the crust and allowing it to bake. Stay tuned as we guide you through the final stages of creating this exquisite dessert!

Baking the Cheesecake Bars
Baking your Cannoli Cheesecake Bars to perfection is crucial for achieving that ideal creamy texture and preventing any unwanted cracks. The baking time and temperature play a significant role in this process. Set your oven to 325°F (160°C) and allow it to preheat thoroughly before placing your cheesecake bars inside. This moderate temperature ensures that the bars cook evenly, allowing the filling to set without overcooking the edges.
Typically, you should bake the cheesecake bars for about 25 to 30 minutes. Look for the edges to be firm while the center remains slightly jiggly. Remember, the cheesecake will continue to set as it cools, so it is essential not to overbake. Overcooked cheesecake can lead to a dry texture and cracks on the surface, which detracts from the visual appeal of your dessert.
Cooling Techniques
Once you remove the cheesecake bars from the oven, the next step is cooling them properly. Gradual cooling is essential to prevent cracks on the surface. Start by letting the bars cool in the pan on a wire rack for about 10 minutes. This initial cooling allows the temperature to drop slowly.
After that, run a knife around the edges to loosen the cheesecake from the sides of the pan. This step is crucial as it prevents the bars from sticking and cracking as they shrink slightly during cooling. Then, let the bars cool at room temperature for another hour.
Once they have reached room temperature, cover the pan with plastic wrap or aluminum foil and refrigerate the bars for at least 4 hours, preferably overnight. This chilling period not only helps to set the cheesecake but also allows the flavors to meld beautifully, enhancing the overall taste.
Creating the Cannoli Topping
As your cheesecake bars cool, you can begin preparing the luscious cannoli topping. Start by mixing your ricotta cheese and mascarpone cheese in a large bowl. Use a hand mixer or stand mixer to combine these ingredients until they are smooth and creamy. The key to a great topping is achieving the right consistency; it should be thick enough to hold its shape but still spreadable.
To enhance the flavor of your cannoli topping, consider adding a hint of citrus zest. Lemon or orange zest works exceptionally well, providing a fresh, vibrant kick that complements the rich creaminess of the cheese. Mix in a teaspoon of your chosen zest, along with a splash of vanilla extract and powdered sugar to taste. Adjust the sweetness according to your preference, remembering that the cheesecake bars themselves will add a degree of sweetness.
Once your mixture is smooth and well-combined, set it aside and allow it to chill in the refrigerator until you’re ready to spread it over the cooled cheesecake bars.
Chill and Serve: The Final Steps for Cannoli Cheesecake Bars
After the cheesecake bars have chilled adequately, it’s time for the final touches. The refrigeration period is essential for optimal flavor development. During this time, the flavors meld, and the texture of the bars transforms into a creamy delight.
Presentation Tips
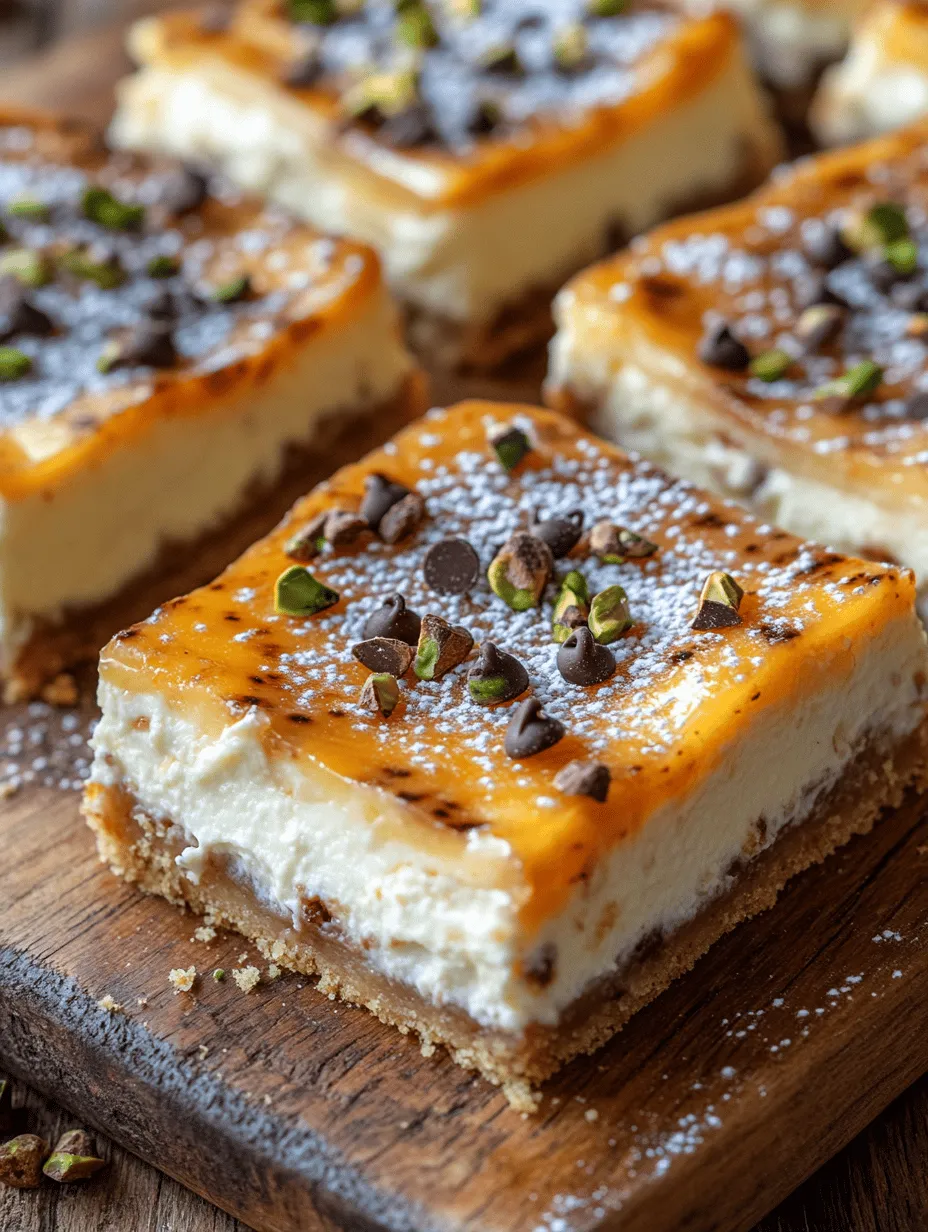
To serve your Cannoli Cheesecake Bars beautifully, start by spreading the prepared cannoli topping evenly across the surface of the bars. Use a spatula for a smooth finish, ensuring that each square will have an equally generous layer of topping. For an appealing presentation, consider garnishing with mini chocolate chips and chopped pistachios. These toppings not only add a delightful crunch but also enhance the visual appeal with their contrasting colors.
If you’re feeling adventurous, you might also drizzle some melted chocolate over the top or sprinkle some additional powdered sugar for a touch of elegance. Cut the bars into squares and serve them chilled, allowing each bite to showcase the flavors and textures of your labor.
Storage and Serving Suggestions for Cannoli Cheesecake Bars
Best Practices for Storage
Storing your Cannoli Cheesecake Bars properly is essential for maintaining their freshness and flavor. If you happen to have leftovers, keep them in an airtight container in the refrigerator. They will stay fresh for up to 5 days, but be aware that the longer they sit, the softer the topping may become. If you want to extend their life, you can freeze the cheesecake bars. Wrap them tightly in plastic wrap and then in aluminum foil before placing them in the freezer. They can be stored this way for up to 2 months. When you’re ready to enjoy them again, thaw them in the refrigerator overnight.
Ideal Serving Suggestions
These delightful bars pair wonderfully with a variety of beverages. Consider serving them alongside a strong cup of espresso or a creamy cappuccino to balance the sweetness of the dessert. They can also complement dessert wines like Vin Santo or a sweet Moscato, enhancing the Italian culinary experience.
For a more festive occasion, consider plating the bars with fresh berries or a side of whipped cream for added color and flavor. This not only enhances the presentation but also adds a refreshing contrast to the rich flavors of the cheesecake.
The Cultural Significance of Cannoli and Cheesecake
Exploring Italian Dessert Traditions
Both cannoli and cheesecake have rich histories rooted in Italian dessert traditions. Cannoli originated in Sicily and are said to date back to the Arab occupation of the island during the 9th century. Traditionally, they consist of a crisp pastry shell filled with a sweet ricotta filling, often adorned with chocolate chips or candied fruit. Cannoli are often associated with festive occasions and are a staple at Italian celebrations.
On the other hand, cheesecake has various interpretations across cultures. The ancient Greeks are believed to have created the first cheesecakes, which were served to athletes during the first Olympic Games. Over the years, cheesecake has evolved into numerous regional varieties, from the New York-style cheesecake to the lighter Italian ricotta cheesecake. Each version reflects the flavors and ingredients unique to its culture, making cheesecake a beloved dessert worldwide.
Conclusion: Enjoying Your Homemade Cannoli Cheesecake Bars
Reflecting on your Cannoli Cheesecake Bars, it’s easy to appreciate the joy of blending these two classic desserts into one delectable treat. Not only do these bars provide a delicious experience for your taste buds, but they also allow you to engage with culinary traditions that span generations.
From the creamy, rich filling to the delightful crunch of the cannoli topping, each bite is a reminder of the beauty of homemade desserts. Whether you share them with family and friends or indulge in them solo, these bars are sure to impress. Celebrate the satisfaction of creating something truly special, and enjoy the process of baking as much as the final product. Your Cannoli Cheesecake Bars are not just a dessert; they are a celebration of flavors and a testament to the joy of cooking.