Introduction
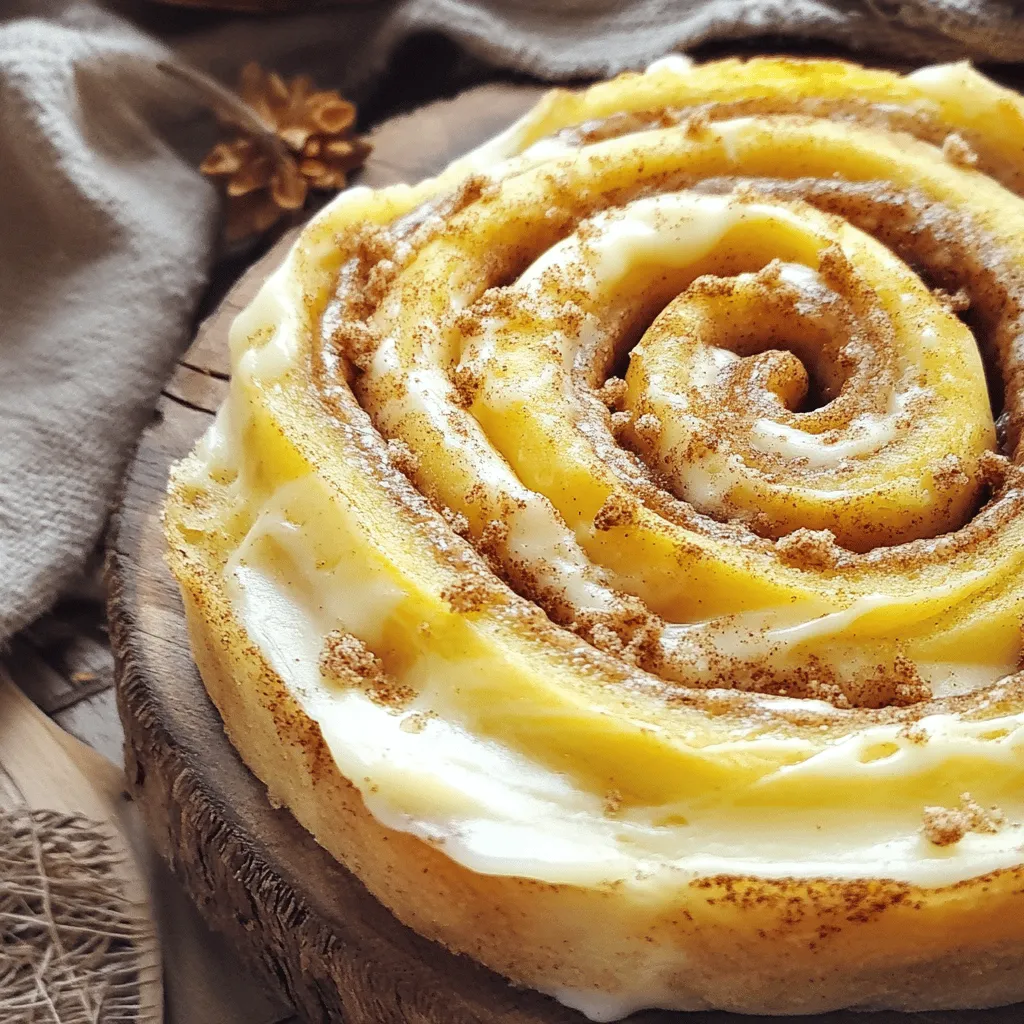
The irresistible aroma of fresh cinnamon rolls wafting through your kitchen can turn an ordinary day into a delightful experience. With their soft, fluffy texture and sweet, gooey filling, cinnamon rolls are a beloved treat for breakfast, brunch, or dessert. Their appeal transcends age and occasion, making them a cherished dish in many households. Whether enjoyed fresh out of the oven with a cup of coffee or as a sweet afternoon snack, cinnamon rolls have the power to evoke feelings of warmth and nostalgia.
This article will guide you through the process of making the best cinnamon rolls, ensuring they are light, airy, and bursting with flavor. From understanding the essential ingredients to mastering the techniques that elevate your rolls, we will cover everything you need to create this classic dish. By the end, you will be equipped with the skills to impress your family and friends with homemade cinnamon rolls that rival any bakery.
Understanding the Ingredients for Cinnamon Rolls
To create the perfect cinnamon rolls, understanding the role of each ingredient is crucial. Each component contributes to the overall texture, flavor, and appearance of the final product. Let’s take a closer look at the essential ingredients that make up these delightful treats:
All-Purpose Flour: The Foundation for a Soft Dough
All-purpose flour is the primary ingredient in cinnamon rolls, providing structure and stability to the dough. It contains a moderate level of protein, which is essential for gluten development. Gluten is what gives baked goods their elasticity and chew. When working with all-purpose flour, it is important to measure accurately to ensure the right balance is maintained. Too much flour can lead to dense rolls, while too little can result in a sticky dough.
Granulated Sugar: Sweetening the Dough and Enhancing the Filling
Sugar does more than just sweeten your rolls; it also affects the dough’s texture and color. Granulated sugar, used in the dough and filling, helps to create a tender crumb by preventing gluten from becoming too tight. Additionally, it contributes to the browning of the rolls during baking, giving them a beautiful golden hue. The sugar in the filling helps to create that gooey consistency that cinnamon roll lovers adore.
Yeast: The Magic Ingredient for Fluffiness
Yeast is what makes cinnamon rolls rise and become fluffy. This living organism ferments the sugars in the dough, producing carbon dioxide, which causes the dough to expand. For the best results, use fresh, active dry yeast or instant yeast. Make sure to check the expiration date, as expired yeast may not activate properly. The activation process is crucial, as it ensures that your rolls will rise adequately, resulting in a light and airy texture.
Whole Milk: Contributes to the Richness of the Dough
Whole milk adds moisture and richness to the dough, enhancing its flavor and contributing to a tender crumb. The fat content in whole milk helps to create a soft texture in the finished rolls. When warming the milk for the dough, ensure it is not too hot, as excessive heat can kill the yeast. Aim for a warm temperature, around 110°F (43°C), which is optimal for yeast activation.
Unsalted Butter: Adds Flavor and Moisture
Unsalted butter is essential for enriching the dough and providing a delicious buttery flavor. Using unsalted butter allows you to control the salt content in your recipe more effectively. The butter should be softened to room temperature before mixing into the dough, promoting even incorporation and a smooth texture. For an extra indulgent twist, consider using browned butter for a deeper, nutty flavor.
Eggs: Essential for Binding and Enriching the Dough
Eggs play a vital role in cinnamon rolls by acting as a binding agent, giving structure and stability to the dough. They also add richness and enhance the overall flavor. When using eggs in your dough, ensure they are at room temperature, as this allows them to blend more seamlessly with the other ingredients.
Cinnamon and Brown Sugar: The Flavorful Filling That Defines Cinnamon Rolls
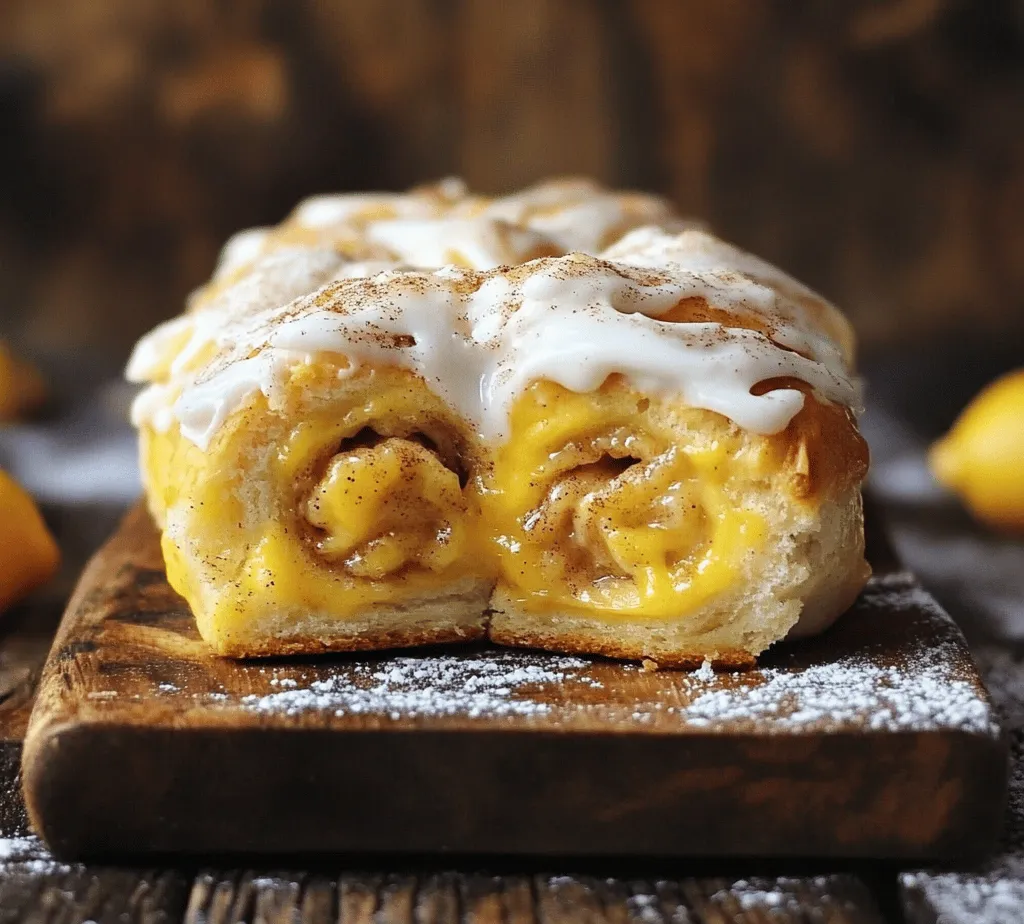
The combination of ground cinnamon and brown sugar is what gives cinnamon rolls their signature flavor. Cinnamon adds warmth and spice, while brown sugar contributes moisture and a hint of caramel flavor. The filling is typically spread generously over the dough before rolling it up, resulting in a sweet, spiraled delight that will tantalize your taste buds.
Powdered Sugar and Cream Cheese: The Perfect Frosting to Finish Off the Rolls
A classic cinnamon roll is often topped with a luscious cream cheese frosting. Made with powdered sugar, cream cheese, and a dash of vanilla extract, this frosting adds a rich, tangy sweetness that perfectly complements the warm rolls. The frosting can be drizzled over the top or generously spread, depending on your preference.
Step-by-Step Instructions for Making Cinnamon Rolls
Now that we’ve covered the essential ingredients, let’s dive into the step-by-step process of making the best cinnamon rolls. Following these detailed instructions will help you achieve that perfect balance of fluffiness and flavor in your rolls.
Activating the Yeast
The first step in making cinnamon rolls is activating the yeast. This process is essential to ensure your rolls rise properly. Start by warming the whole milk to approximately 110°F (43°C). Pour the warm milk into a mixing bowl and add a tablespoon of granulated sugar. Stir in the yeast and allow it to sit for about 5-10 minutes until it becomes frothy. This foamy appearance indicates that your yeast is active and ready to work its magic.
Creating the Dough
Once your yeast is activated, it’s time to create the dough. In a large mixing bowl, combine the all-purpose flour, remaining granulated sugar, and salt. Make a well in the center and add the activated yeast mixture, softened unsalted butter, and room temperature eggs. Using a wooden spoon or a dough hook attachment, mix the ingredients until they come together to form a shaggy dough.
The Texture to Look for When Forming the Dough
As you mix, pay attention to the texture of the dough. It should be slightly sticky but manageable. If the dough is too wet, gradually add more flour, a tablespoon at a time, until it reaches the desired consistency. Conversely, if the dough is too dry, you can add a little more warm milk. The goal is to achieve a dough that is smooth and elastic but not overly sticky.
Kneading Techniques
Kneading is a crucial step in developing the gluten in the dough, which gives your cinnamon rolls their structure and chew. Transfer the dough to a lightly floured surface and knead it for about 8-10 minutes. Use the heel of your hand to push the dough away from you, then fold it back over itself. Rotate the dough a quarter turn and repeat the process. You’ll know your dough is ready when it’s smooth, elastic, and springs back when pressed.
First Rise: Allowing the Dough to Rise
After kneading, it’s time for the dough to rise. Place the dough in a greased bowl, cover it with a clean kitchen towel or plastic wrap, and let it rise in a warm, draft-free area for about 1 to 1.5 hours, or until it has doubled in size. Ideal rising temperatures are between 75°F (24°C) and 85°F (29°C). To create a warm environment, you can place the bowl in an oven that has been turned off but is slightly warmed, or simply set it near a sunny window.
What to Expect During the First Rise
During the first rise, the yeast will work its magic, creating carbon dioxide bubbles that expand the dough. This process is essential for developing the light and airy texture of your cinnamon rolls. After the recommended rising time, check the dough; it should feel puffy and have visibly increased in size. To test if it’s ready, gently press your finger into the dough; if the indentation remains, it’s time to move on to the next step.
Preparing the Delicious Filling
While the dough is rising, you can prepare the delicious filling that will elevate your cinnamon rolls to the next level. This filling is what gives the rolls their signature taste and gooey texture, making them utterly irresistible.
The filling is quite simple to prepare. In a medium bowl, combine the brown sugar and ground cinnamon. The ratio of cinnamon to sugar can be adjusted based on your personal preference; if you love a strong cinnamon flavor, feel free to increase the amount of cinnamon. Mix the two ingredients until they are well combined and set aside.
Once your dough has risen and doubled in size, gently punch it down to release the air. Turn the dough out onto a floured surface and roll it out into a large rectangle, about 1/4 inch thick. Spread a generous amount of softened butter over the surface of the dough, ensuring it covers every corner. Then, sprinkle the cinnamon-sugar mixture evenly over the buttered dough, allowing it to stick.
Now that you have the filling prepared, you are one step closer to creating the best cinnamon rolls ever. The next steps will guide you through rolling, cutting, and baking these delightful treats, ensuring they turn out perfectly every time. Stay tuned for the continuation of this delicious journey!
Mixing Techniques for a Smooth Filling
Creating the perfect cinnamon roll filling is essential for achieving that mouthwatering taste and texture. The key to a smooth filling lies in the mixing technique. Start by combining softened butter, brown sugar, cinnamon, and a pinch of salt in a medium bowl. Use a hand mixer or a whisk to blend these ingredients until they form a creamy paste. The softened butter is crucial here; it allows the sugar and cinnamon to incorporate seamlessly, resulting in a spread that adheres well to the dough.
To ensure the filling is smooth, make sure your butter is at room temperature—this should be soft enough to create a spreadable consistency but not melted. If your butter is too cold, it won’t blend well with the sugar and spices. Conversely, if it’s too melted, the filling will become runny and may leak out of the rolls during baking. Aim for a texture that is creamy and thick enough to spread without dripping.
Rolling and Shaping the Cinnamon Rolls
Rolling Out the Dough
Once your dough has risen and doubled in size, it’s time to roll it out into the perfect rectangle. On a lightly floured surface, gently punch down the dough to release any air bubbles. Using a rolling pin, roll the dough into a rectangle approximately 16 inches by 12 inches.
To achieve the perfect rectangle, start from the center and work your way outwards, applying even pressure. If the dough resists rolling, let it rest for a few minutes; this allows the gluten to relax and makes it easier to shape.
When it comes to filling distribution, it’s important to spread the filling evenly across the rolled-out dough. Use a spatula to smear the cinnamon filling all the way to the edges, ensuring every bite is flavorful. This even distribution is crucial for a balanced taste in each roll.
Shaping the Rolls
With your dough rolled out and filled, it’s time to shape your cinnamon rolls. Starting at one long edge of the rectangle, carefully roll the dough away from you, keeping it as tight as possible without tearing. A tight roll helps maintain the shape and ensures that the filling stays put during baking.
Once you’ve reached the end, pinch the seam to seal it. For cutting the rolls evenly, a sharp serrated knife or dental floss works wonders. You can lightly score the dough into equal sections before cutting, which will help you maintain uniform size. Aim for about 1.5-inch slices for rolls that will bake beautifully.
The Second Rise: Ensuring Fluffiness
Covering and Waiting
After shaping the rolls, it’s time for the second rise, which is crucial for achieving that fluffy texture. Place the rolls in a greased baking dish, ensuring they’re spaced out slightly. Cover them with a clean kitchen towel or plastic wrap to prevent drying, and let them rise in a warm environment.
Creating a warm environment can be as simple as placing the dish in an oven that has been preheated to the lowest setting for just a few minutes, then turned off. The rolls should take about 30-45 minutes to rise, doubling in size.
Keep an eye on them; the rolls are ready to bake when they have puffed up and are touching each other, creating a soft, pillowy appearance.
Baking the Cinnamon Rolls to Perfection
Preheating the Oven
Before you place your rolls in the oven, ensure you preheat it to 350°F (175°C). Preheating is vital for even baking; starting in a cold oven can lead to uneven cooking and may affect the texture of your rolls.
Baking Time and Temperature
Once the oven is ready, place the cinnamon rolls on the middle rack. Bake for about 25-30 minutes, or until they are golden brown on top. You’ll know they’re done when they have risen beautifully, and the edges are lightly browned.
To avoid overbaking, keep a close watch on them during the last few minutes of baking. If your rolls start to become too brown but are not cooked through, you can cover them loosely with aluminum foil to prevent burning while they finish baking.
Creating the Creamy Frosting
Mixing the Frosting Ingredients
As your cinnamon rolls bake, it’s the perfect time to prepare the creamy frosting that will take them to the next level. In a medium bowl, combine softened cream cheese, unsalted butter, powdered sugar, and a splash of vanilla extract. Beat the mixture with a hand mixer until it reaches a smooth consistency.
For the perfect frosting consistency, you want it thick enough to hold its shape but spreadable. If it feels too thick, add a teaspoon of milk at a time until you reach the desired texture. The balance between cream cheese and powdered sugar is vital; too much sugar can overpower the frosting, while too little can make it too tangy.
Aim for a ratio of about 1 part cream cheese to 2 parts powdered sugar, adjusting to taste. This will give you that perfect sweet yet tangy flavor that complements the warmth of the cinnamon rolls.
Frosting the Cinnamon Rolls
Timing for Frosting
Once your cinnamon rolls have finished baking, allow them to cool in the pan for about 5 minutes. Frosting warm rolls is essential; the heat helps the frosting melt slightly, creating a delightful glaze that seeps into the rolls.
Using a spatula or the back of a spoon, drizzle the frosting over the rolls, allowing it to cascade down the sides. This method not only looks appealing but also ensures that every bite has a touch of that creamy goodness. Be generous with the frosting, letting it pool into the nooks and crannies of each roll.
Conclusion
Homemade cinnamon rolls are a labor of love that yield mouthwatering results, perfect for sharing with family and friends. By following this detailed guide, you can create a batch of cinnamon rolls that are not only delicious but also a comforting reminder of home baking. With their delightful flavor and texture, these cinnamon rolls are sure to become a favorite recipe in your kitchen. Enjoy the process, and savor each warm, sweet bite.
Whether you’re enjoying them at brunch, serving them as a delightful dessert, or simply treating yourself on a lazy morning, these cinnamon rolls will bring joy to any occasion. So roll up your sleeves and get ready to bake!


