Introduction to Sweet Strawberry Bliss Syrup
The art of crafting homemade syrups is a delightful journey that transforms simple ingredients into something truly special. Among the myriad of syrup options available, Sweet Strawberry Bliss Syrup stands out as a versatile and delicious addition to any kitchen. Whether drizzled over pancakes, mixed into yogurt, or used as a topping for ice cream, this syrup is a celebration of fresh strawberries bursting with flavor.
The allure of homemade syrups lies not only in their taste but also in the ability to customize them to suit your personal preferences. The Sweet Strawberry Bliss Syrup is a perfect example of this; it combines the natural sweetness of strawberries with a touch of acidity and warmth from additional ingredients, creating a balance that enhances the flavor of your dishes. As we explore the process of making this syrup, you’ll discover the essential steps and tips that will help you achieve the perfect consistency and flavor profile.
In this article, we will guide you through the entire process of creating your own Sweet Strawberry Bliss Syrup, starting from selecting the freshest strawberries and understanding the role of each ingredient, to mastering the cooking technique that will result in syrup perfection. Let’s dive into the world of homemade strawberry syrup and unlock the secrets to creating this sweet indulgence.
Choosing the Right Ingredients for Strawberry Syrup
To create an exceptional Sweet Strawberry Bliss Syrup, it’s crucial to start with the right ingredients. Each component plays a significant role in developing the final flavor and texture of the syrup. Here’s what you need to know about the essential ingredients:
Importance of Fresh Strawberries
The key to any strawberry syrup is, unsurprisingly, the strawberries themselves. When selecting strawberries, look for those that are ripe, fragrant, and free from bruises. Fresh, in-season strawberries will yield the best flavor, while overripe or underripe berries can lead to a syrup that lacks depth and sweetness. Local farmers’ markets are often the best places to find high-quality strawberries, especially during peak strawberry season.
Selecting the Right Granulated Sugar
Granulated sugar is typically used in syrup recipes to balance the tartness of the strawberries and enhance their sweetness. While white sugar is the most common choice, you can also experiment with alternatives like brown sugar or coconut sugar for a more complex flavor. Keep in mind that different sugars can impart various notes to your syrup, so choose one that complements the strawberries and aligns with your taste preferences.
The Role of Water in Syrup Consistency
Water is a vital component in any syrup recipe, as it helps dissolve the sugar and extract the juices from the strawberries. The right balance of water is essential to achieve the desired syrup consistency. Too much water can lead to a thin syrup, while too little may result in a syrup that is overly thick and sticky. Generally, a good starting point is a 1:1 ratio of water to strawberries, but this can be adjusted based on the juiciness of the berries used.
How Lemon Juice Enhances Flavor
Adding lemon juice to your strawberry syrup not only introduces a bright, tangy flavor that complements the sweetness of the strawberries but also acts as a natural preservative. The acidity in lemon juice helps balance the flavors and prevents the syrup from becoming overly sweet. A splash of lemon juice can make a significant difference in elevating the overall taste of your syrup, making it a must-have ingredient.
Benefits of Adding Vanilla Extract
Vanilla extract is another wonderful addition that can enhance the flavor profile of your Sweet Strawberry Bliss Syrup. Its warm, sweet notes pair beautifully with the fresh strawberries, adding depth and richness to the syrup. When choosing vanilla extract, opt for pure vanilla extract rather than imitation for the best flavor. A little goes a long way, so just a teaspoon is often enough to elevate the syrup without overpowering the strawberry flavor.
Understanding the Purpose of Salt in Recipes
While it may seem counterintuitive to add salt to a sweet syrup, a pinch of salt can actually enhance the overall flavor. Salt helps to balance sweetness and can bring out the natural flavors of the strawberries, making them taste even more vibrant. When preparing your syrup, don’t skip the salt; just a small amount will make a noticeable difference in the final product.
Step-by-Step Guide to Making Sweet Strawberry Bliss Syrup
Now that we’ve covered the essential ingredients for your Sweet Strawberry Bliss Syrup, let’s move on to the step-by-step process of making it. Each step is crucial for achieving the best results, so follow along closely for a successful syrup creation.
Preparing the Strawberries: Hulling and Slicing
The first step in making your Sweet Strawberry Bliss Syrup is to prepare the strawberries. Begin by hulling the strawberries, which involves removing the green leafy tops and the white core. This can be done easily with a paring knife or a dedicated strawberry huller. Once hulled, slice the strawberries into halves or quarters, depending on your preference. Slicing the strawberries increases the surface area, allowing them to release their juices more effectively during the cooking process.
Combining Ingredients: The Initial Mixing Process
After preparing the strawberries, it’s time to combine them with the other ingredients. In a medium saucepan, add the sliced strawberries, granulated sugar, and water. The sugar will draw out the juices from the strawberries, creating a flavorful base for your syrup. If you’re using lemon juice, vanilla extract, and a pinch of salt, add those to the mixture as well. Stir gently to combine all the ingredients, ensuring that the sugar is evenly distributed among the strawberries.
The Importance of Letting the Mixture Sit
Once you’ve combined the ingredients, it’s beneficial to let the mixture sit for about 10-15 minutes. This resting period allows the strawberries to macerate, releasing their juices and infusing the sugar with the sweet strawberry flavor. You’ll notice that the strawberries will begin to break down slightly, creating a syrupy base even before cooking.
Bringing the Mixture to a Gentle Boil: Key Tips for Success
After letting the mixture sit, place the saucepan over medium heat and bring it to a gentle boil. It’s essential to keep an eye on the heat level during this stage; a rapid boil can cause the syrup to cook unevenly and may lead to burning. Stir occasionally to prevent sticking and ensure that the sugar dissolves completely. As the mixture heats, the strawberries will continue to break down, and you’ll start to see a beautiful, vibrant red color emerge.
Simmering to Perfection: Monitoring the Syrup Consistency
Once the mixture reaches a boil, reduce the heat to low and allow it to simmer gently. This simmering process is where the magic happens, as the flavors meld together and the syrup thickens. Depending on the heat level and the juiciness of the strawberries, this can take anywhere from 15 to 30 minutes. Keep a close eye on the consistency; you want the syrup to coat the back of a spoon without being overly thick. If you prefer a thicker syrup, continue to simmer for a few more minutes, but be cautious not to overcook it.
Enhancing Flavor: Adding Lemon Juice, Vanilla, and Salt
As the syrup nears its desired consistency, it’s the perfect time to enhance the flavor further. If you haven’t already added lemon juice, vanilla extract, and salt, now is the moment to do so. A splash of lemon juice brightens the syrup, while the vanilla adds a warm note that complements the strawberries. The pinch of salt will elevate the overall flavor, making it a well-rounded and delightful syrup. Stir gently to incorporate these final ingredients, allowing the syrup to simmer for an additional minute to meld the flavors together.
With these detailed steps, you are well on your way to creating your very own Sweet Strawberry Bliss Syrup. As you embark on this culinary adventure, remember to savor each moment and enjoy the sweet aroma that fills your kitchen. The joy of crafting homemade syrups is not just in the final result but in the process itself—so roll up your sleeves and let the strawberry bliss begin!
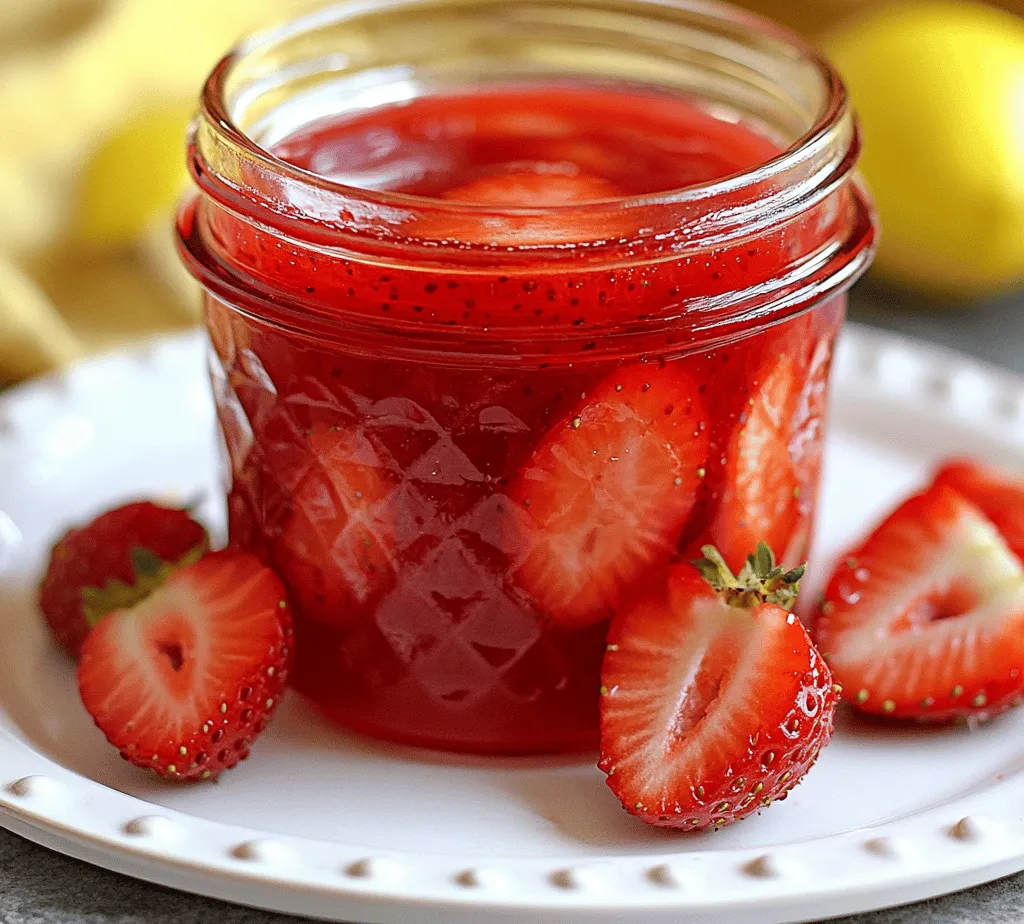
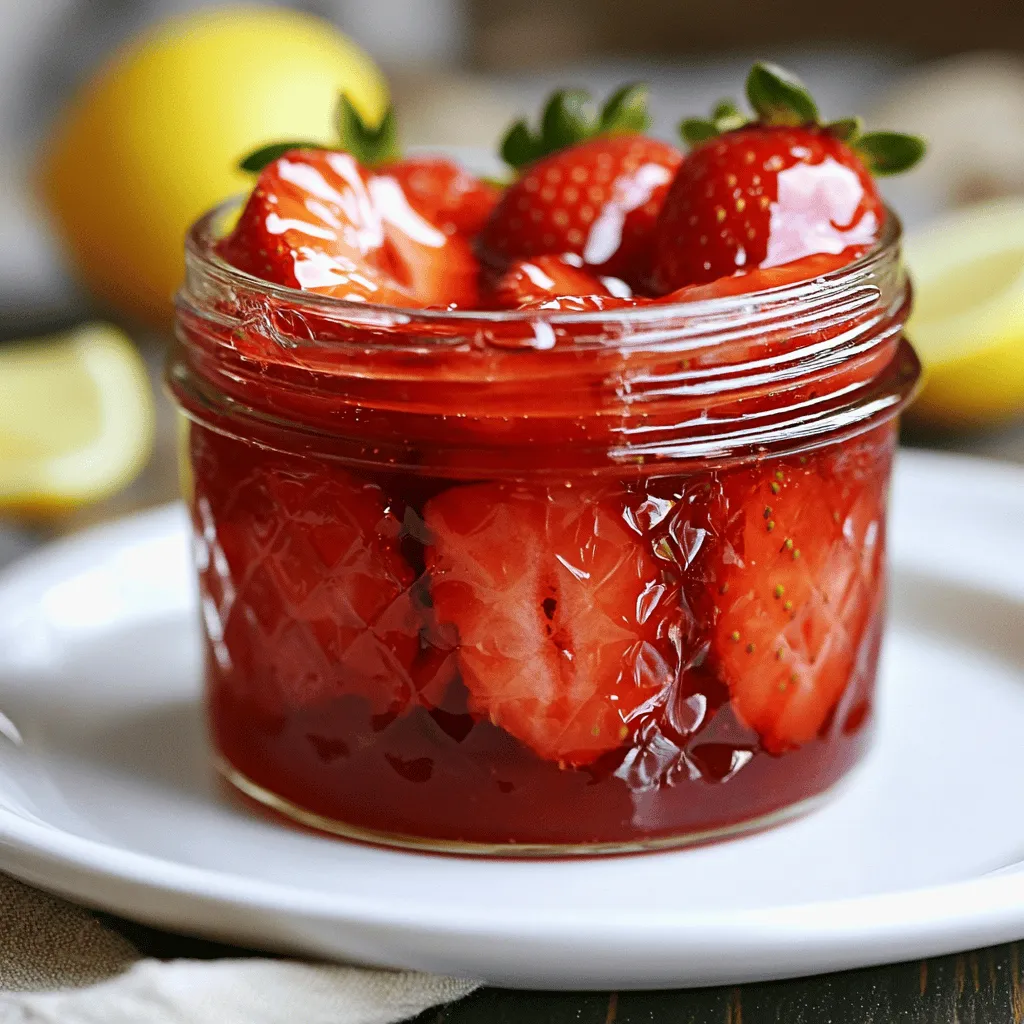
Straining the Syrup: Techniques for Maximum Yield
Once your strawberry mixture has simmered and transformed into a fragrant syrup, the next crucial step is straining it effectively. Straining not only enhances the texture but also maximizes the yield of your Sweet Strawberry Bliss Syrup. Here are some techniques to consider:
1. Use a Fine Mesh Strainer: Place a fine mesh strainer over a clean bowl or jar. Pour the syrup through the strainer to remove any solid bits of strawberries. For an even clearer syrup, you can line the strainer with cheesecloth or a coffee filter. This step may take a little longer, but it will ensure a silky-smooth consistency.
2. Pressing the Fruit: After pouring the syrup through the strainer, use the back of a spoon to press down on the strawberry pulp. This will help extract the remaining liquid and increase your yield. Just be careful not to press too hard, as you don’t want to introduce too much pulp into the final syrup.
3. Letting It Drip: Allow the syrup to sit in the strainer for a few minutes to let gravity do its work. Patience is key here, as rushing this step can result in a thinner syrup than desired.
Cooling and Storage: Best Practices for Preservation
Once you’ve strained your syrup, it’s time to cool and store it properly to maintain its freshness and flavor. Here are best practices for cooling and storage:
1. Cooling the Syrup: Let the strained syrup cool at room temperature for about 30 minutes. Stir occasionally to help release heat. Once it’s no longer hot, transfer it to a storage container.
2. Choosing the Right Container: Glass jars or bottles are ideal for storing syrup. They are non-reactive and help preserve the flavor. Ensure that the container you choose has an airtight seal to prevent contamination and spoilage.
3. Refrigeration: Store your Sweet Strawberry Bliss Syrup in the refrigerator, where it will keep for up to two weeks. For longer storage, consider freezing the syrup in ice cube trays. Once frozen, transfer the cubes to a zip-top bag for easy portioning.
4. Labeling and Dating: Don’t forget to label your containers with the date you made the syrup. This will help you keep track of its freshness and ensure you use it within the recommended timeframe.
Exploring the Versatility of Strawberry Syrup
One of the most delightful aspects of homemade Sweet Strawberry Bliss Syrup is its versatility. Here are some creative ways to use your syrup beyond just topping pancakes:
Drizzling Over Pancakes and Waffles
There’s nothing quite like a stack of warm pancakes or waffles drizzled with your homemade strawberry syrup. The sweet, fruity flavor complements the fluffy texture perfectly, enhancing your breakfast experience. For an extra touch, add whipped cream or fresh strawberries on top.
Enhancing Yogurt and Oatmeal Dishes
Transform your breakfast routine by swirling the syrup into your morning yogurt or oatmeal. It adds a burst of flavor and sweetness, making healthy meals feel indulgent. Consider pairing it with granola and nuts for added texture and nutrition.
Crafting Refreshing Beverages: Lemonades and Cocktails
Strawberry syrup can elevate your drink game significantly. Mix it into homemade lemonades for a refreshing summer beverage, or use it as a base for cocktails. Combine it with vodka, soda, and lime juice for a delightful strawberry spritzer that’s perfect for gatherings.
Incorporating into Desserts: Ice Creams and Cakes
Your Sweet Strawberry Bliss Syrup is a perfect addition to desserts. Drizzle it over vanilla ice cream for a quick treat, or incorporate it into cake batters or frostings for a unique flavor twist. Imagine a strawberry-flavored cake layered with cream cheese frosting—your syrup can make it happen!
Using as a Topping for Savory Dishes: Meats and Cheeses
Don’t limit your strawberry syrup to sweet dishes alone. It can also enhance savory meals. Try drizzling it over grilled chicken or pork for a sweet and tangy glaze. Pair it with cheese, such as goat cheese or brie, on a charcuterie board for a sophisticated touch.
Nutritional Insights of Strawberry Bliss Syrup
Understanding the nutritional aspects of your Sweet Strawberry Bliss Syrup can help you enjoy it mindfully. Here’s a closer look:
Caloric Content and Portion Control
While strawberry syrup is undoubtedly delicious, it is important to be aware of its caloric content, especially if you’re watching your sugar intake. A tablespoon of homemade strawberry syrup contains approximately 50 calories, primarily from sugars. Keeping portion control in mind is key to enjoying the syrup without overindulging.
Benefits of Strawberries: Vitamins and Antioxidants
Strawberries are not just a sweet treat; they are packed with nutrients. They are rich in vitamin C, manganese, folate, and antioxidants, which can promote heart health and improve skin. Incorporating strawberries into your diet can offer a range of health benefits, making your homemade syrup a slightly healthier addition when used in moderation.
Balancing Sweetness: Considerations for Sugar Intake
When making your syrup, you have control over the amount of sugar you add. If you’re looking to reduce sugar intake, consider using alternatives like honey, agave nectar, or even stevia. Each option will impart a different flavor profile, so feel free to experiment until you find what works best for you.
Variations for Health-Conscious Individuals
For those who are health-conscious, there are numerous variations you can explore. You can create a lower-sugar version by reducing the sugar content or substituting some of it with natural fruit purees. Additionally, consider adding spices like cinnamon or vanilla extract to enhance flavor without adding calories.
Conclusion: The Joy of Homemade Sweet Strawberry Bliss Syrup
Reflecting on the process of making your Sweet Strawberry Bliss Syrup, it’s clear this delightful concoction is more than just a sweet addition to your meals. It encapsulates the joy of cooking at home—crafting something delicious from scratch, controlling your ingredients, and creating a product that can elevate a wide array of dishes.
From breakfast delights to innovative culinary applications, the versatility of strawberry syrup knows no bounds. Whether you’re drizzling it over pancakes or incorporating it into cocktails, each use highlights the fresh, vibrant flavors of strawberries. Moreover, being aware of the nutritional aspects empowers you to enjoy your syrup responsibly.
So, gather your ingredients, follow the steps, and embrace the delightful experience of creating your own Sweet Strawberry Bliss Syrup. It’s not just about savoring the end product; it’s about enjoying the journey in your kitchen, filled with creativity and flavors that bring joy to every meal.


