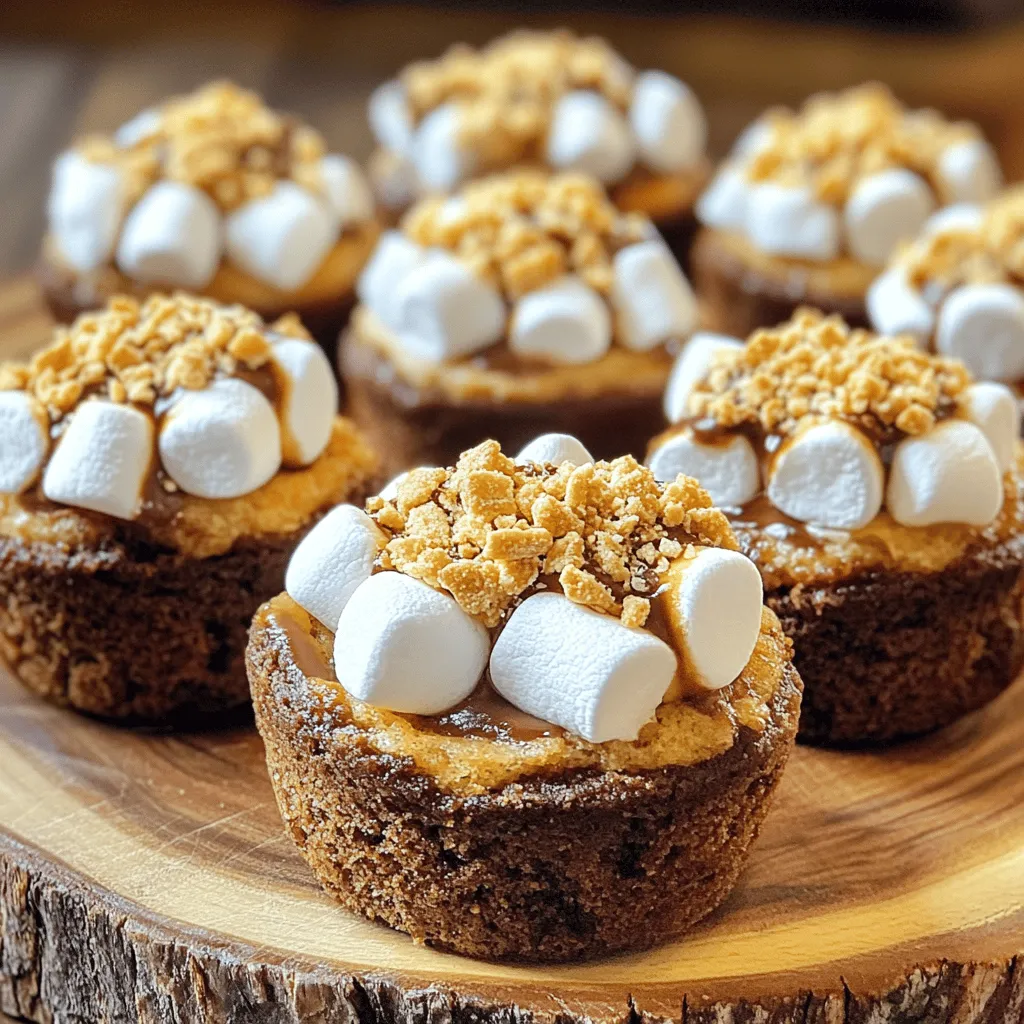
S’mores—a quintessential American treat that brings to mind the warmth of campfires, the laughter of friends, and those unforgettable summer nights spent under a blanket of stars. The traditional combination of graham crackers, chocolate, and toasted marshmallows has been enjoyed for generations, weaving itself into the fabric of our culinary culture. But what if you could capture that nostalgic flavor in a completely new form? Enter S’mores Cookie Cups, a delightful twist that allows you to savor this beloved treat in a cookie cup format. These mini desserts are not only visually appealing but also perfect for any occasion, whether it be a family gathering, a birthday party, or simply a sweet indulgence after a long day.
S’mores Cookie Cups encapsulate the essence of the classic treat by marrying the crunchy texture of graham crackers with the creamy richness of chocolate and the irresistible gooeyness of marshmallows. These edible vessels are a fun and creative way to enjoy the beloved combination of flavors, making them a popular choice for bakers and dessert enthusiasts alike. The beauty of S’mores Cookie Cups lies in their versatility; they can be made ahead of time, stored for later enjoyment, or served warm right out of the oven. In this article, we will provide a comprehensive guide to creating these scrumptious cookie cups, complete with tips, insights, and everything you need to ensure your baking experience is both enjoyable and successful.
Understanding the Components of S’mores Cookie Cups
To truly appreciate the magic of S’mores Cookie Cups, it’s essential to delve into the flavor profile and key ingredients that come together to create this delectable dessert.
Exploring the Flavor Profile of S’mores
The classic S’mores flavor profile is a harmonious blend of sweetness, creaminess, and a hint of smoky char. The graham cracker base delivers a subtle crunch and a hint of honeyed sweetness, while the chocolate brings a rich, decadent quality that melts beautifully when paired with the warmth of toasted marshmallows. The marshmallows themselves offer a delightful gooeyness that ties everything together, creating a mouthwatering experience that is both nostalgic and indulgent.
In cookie cup form, this flavor combination is enhanced by the addition of buttery cookie dough, which adds a new dimension of texture and richness. The cookie cups provide a satisfying bite that complements the soft and chewy marshmallows and the melty chocolate within.
Identifying the Key Ingredients in S’mores Cookie Cups
Every great recipe starts with quality ingredients, and S’mores Cookie Cups are no exception. Here’s a rundown of the essential components that will make your cookie cups a success:
– Graham Cracker Crumbs: These form the base of the cookie cups and are responsible for that signature S’mores flavor.
– All-Purpose Flour: This ingredient provides the structure necessary for the cookie cups to hold their shape.
– Sugars: A combination of granulated sugar and brown sugar balances sweetness and contributes to the texture of the cookie dough.
– Baking Soda and Salt: These elements enhance the flavor and help the cookie cups rise properly during baking.
– Butter: This creamy foundation adds richness and helps create a tender crumb.
– Egg and Vanilla Extract: These bind the ingredients together and infuse the cookie cups with warm, inviting flavors.
– Chocolate Chips: The heart of the cookie cup, providing that rich and gooey chocolate experience.
– Mini Marshmallows: These are the crowning glory of the cookie cups, offering a delightful gooey topping that captures the essence of S’mores.
The Role of Each Ingredient in the Recipe
Understanding the role of each ingredient is crucial for achieving the perfect S’mores Cookie Cups. Here’s how each component contributes to the overall success of the recipe:
1. Graham Cracker Crumbs: The graham cracker crumbs serve as the foundational flavor component, providing sweetness, crunch, and a hint of nuttiness that defines S’mores. Using finely crushed crumbs ensures a smooth texture in the cookie cup.
2. All-Purpose Flour: Flour is the backbone of the cookie dough, providing structure and stability. It helps the cookie cups maintain their shape while baking, ensuring that they are sturdy enough to hold the filling.
3. Sugars: A blend of granulated and brown sugars not only sweetens the cookie dough but also contributes to its texture. Brown sugar adds moisture and a slight chewiness, while granulated sugar helps create a crisp outer edge.
4. Baking Soda and Salt: Baking soda acts as a leavening agent, allowing the cookie cups to rise slightly during baking. A pinch of salt enhances the overall flavor profile, balancing the sweetness of the sugars.
5. Butter: Butter is essential for flavor and texture. It adds richness and moisture, helping to create a tender cookie that melts in your mouth. For the best results, use unsalted butter to control the saltiness of the finished product.
6. Egg and Vanilla Extract: The egg acts as a binder, holding the ingredients together and contributing to the overall moisture of the dough. Vanilla extract enhances the flavor, adding a warm and comforting note to the cookie cups.
7. Chocolate Chips: Chocolate chips are the heart of the cookie cup, providing a rich and gooey filling that is impossible to resist. Choose high-quality chocolate chips for a decadent experience.
8. Mini Marshmallows: Mini marshmallows are the star topping, providing that quintessential S’mores experience. They melt beautifully, creating a gooey layer on top of the cookie cups that is both delicious and visually appealing.
Detailed Recipe Breakdown
Now that we’ve explored the components that make up S’mores Cookie Cups, let’s dive into the essential ingredients and preparation steps required to create these delightful treats.
Essential Ingredients Overview
Before you begin baking, it’s crucial to gather all the necessary ingredients. Here’s a comprehensive list of what you’ll need:
– 1 ½ cups graham cracker crumbs
– 1 cup all-purpose flour
– ½ cup granulated sugar
– ½ cup brown sugar, packed
– ½ teaspoon baking soda
– ¼ teaspoon salt
– ¾ cup unsalted butter, softened
– 1 large egg
– 1 teaspoon vanilla extract
– 1 cup chocolate chips
– 1 ½ cups mini marshmallows (or more for topping)
Graham Cracker Crumbs: The Base of the Flavor
Graham cracker crumbs are the foundation of your S’mores Cookie Cups. You can either purchase pre-made crumbs or make your own by crushing whole graham crackers in a food processor or by placing them in a zip-top bag and using a rolling pin to crush them into fine crumbs. Aim for a consistency similar to that of flour—this will ensure an even distribution throughout the dough.
All-Purpose Flour: Providing Structure
Using all-purpose flour is essential in creating the structure of the cookie cups. It provides the necessary backbone to the dough, allowing it to hold its shape while baking. Be sure to measure the flour accurately to avoid overly dense or dry cookie cups.
Sugars: Balancing Sweetness and Texture
The combination of granulated and brown sugars not only sweetens the cookie cups but also affects their texture. Granulated sugar will help create a slight crispness, while brown sugar will contribute moisture and a chewy texture. Mixing the two in equal parts allows for a well-balanced sweetness that complements the other flavors beautifully.
Baking Soda and Salt: Enhancing Flavor and Texture
Baking soda is a key ingredient in this recipe, as it helps the cookie cups rise and achieve a light texture. The addition of salt plays an important role in enhancing the overall flavor, cutting through the sweetness and balancing the taste of the cookie cups.
Butter: The Creamy Foundation
Softened unsalted butter is vital for achieving a rich and creamy cookie dough. The butter should be at room temperature, allowing it to cream easily with the sugars. This step is crucial for incorporating air into the dough, resulting in tender cookie cups that are fluffy yet sturdy.
Egg and Vanilla Extract: Binding Ingredients and Adding Flavor
Adding one large egg to the cookie dough will help bind all the ingredients together, ensuring a cohesive mixture. Vanilla extract is another essential flavor enhancer, providing a warm and comforting aroma that elevates the overall experience of the cookie cups.
Chocolate Chips: The Heart of the Cookie Cup
Chocolate chips bring a rich and indulgent quality to the S’mores Cookie Cups. Choose high-quality chocolate chips, whether semi-sweet, dark, or milk chocolate, depending on your preference. You can also mix and match for a more complex flavor profile.
Mini Marshmallows: The Gooey Topping
To truly capture the essence of S’mores, mini marshmallows are a must. They will melt beautifully atop the warm cookie cups, creating that signature gooey layer that defines this delightful treat. You can use more or less depending on how marshmallowy you want your cookie cups to be.
Step-by-Step Preparation Guide
Now that you are familiar with the essential ingredients, let’s move on to the preparation steps that will guide you through creating these delicious S’mores Cookie Cups.
Preparing Your Kitchen for Baking
Before you begin, it’s important to prepare your kitchen and gather all necessary equipment. A clean and organized workspace will make the baking process more efficient and enjoyable. Be sure to have the following items on hand:
– Mixing bowls
– Measuring cups and spoons
– A whisk or electric mixer
– A spatula or wooden spoon
– A muffin tin (preferably non-stick or lined with cupcake liners)
– A food processor (if crushing graham crackers)
– An oven
Gathering Equipment and Ingredients
Once your kitchen is prepped, gather all your ingredients and equipment. Having everything within reach will streamline the baking process and help ensure you don’t miss any steps.
Preheating the Oven: Why It’s Important
Preheating your oven is a crucial step in baking. It ensures that the cookie cups bake evenly and achieve the desired texture. Set your oven to 350°F (175°C) and allow it to preheat fully before placing your cookie cups inside. This step is vital for achieving that perfect golden-brown exterior.
Mixing the Dry Ingredients: Achieving the Right Consistency
In a medium-sized mixing bowl, combine the graham cracker crumbs, all-purpose flour, baking soda, and salt. Use a whisk to mix these dry ingredients thoroughly. This step will ensure that the leavening agent (baking soda) is evenly distributed throughout the mixture, leading to uniform baking.
Creaming Butter and Sugars: Tips for Success
In a separate large mixing bowl, use an electric mixer to cream the softened butter, granulated sugar, and brown sugar together. Beat the mixture on medium speed until it becomes light and fluffy, which should take about 2-3 minutes. This step is essential, as it incorporates air into the batter, resulting in a tender and airy cookie cup. Scrape down the sides of the bowl as needed to ensure all ingredients are fully combined.
As you embark on this culinary adventure, keep in mind that baking is both an art and a science. The combination of precise measurements, quality ingredients, and proper techniques will lead to the creation of irresistible S’mores Cookie Cups that will delight your friends and family. In the next part of our recipe guide, we will continue exploring the remaining steps required to bring these delightful treats to life, ensuring that each bite is as scrumptious as the last.
Incorporating Egg and Vanilla: Ensuring a Smooth Mixture
The next step in creating your S’mores Cookie Cups is to incorporate the egg and vanilla into your mixture. This step is crucial as it helps to bind the ingredients together, adding moisture and enhancing the flavor. Begin by cracking one large egg into your mixing bowl. Make sure the egg is at room temperature; this ensures better emulsification and a smoother batter. Next, add in one teaspoon of pure vanilla extract. Vanilla not only complements the chocolate and graham cracker flavors but also adds depth to your cookie cups.
Using a whisk or an electric mixer on low speed, beat the egg and vanilla into the butter and sugar mixture until it is well combined and creamy. Avoid overmixing at this stage, as doing so can lead to a tougher texture in your final product.
Combining Wet and Dry Ingredients: Avoiding Overmixing
Once your egg and vanilla are thoroughly mixed into the wet ingredients, it’s time to combine them with the dry ingredients. In a separate bowl, whisk together your dry ingredients, which typically consist of all-purpose flour, baking soda, and a pinch of salt. The salt is essential as it enhances the sweetness of your cookie cups and balances the flavors.
Gradually add the dry ingredients to the wet mixture. It’s best to do this in increments to avoid flour flying everywhere and to ensure even incorporation. Use a spatula or wooden spoon to gently fold the ingredients together. Be careful not to overmix; it’s okay if some floury bits remain visible. Overmixing can lead to a denser cookie, which is not the texture you want for your S’mores Cookie Cups.
Forming the Cookie Cups: Techniques for Perfect Shapes
Now that you have a well-combined mixture, it’s time to form the cookie cups. Preheat your oven to 350°F (175°C) if you haven’t done so already. Prepare a muffin tin by greasing it lightly or using parchment liners to ensure easy removal.
Using a cookie scoop or your hands, take about 1.5 tablespoons of cookie dough and roll it into a ball. Place the ball into each muffin cup and gently press down to form a cup shape. To create the perfect cup, use your fingers or the back of a rounded measuring spoon to press the dough down and up the sides. This helps to create a well-defined shape that will hold the marshmallow and chocolate filling later on.
Baking the Cups: Observing the Right Doneness
With your cookie cups formed, place the muffin tin in the preheated oven. Bake the cookie cups for approximately 10-12 minutes, but keep an eye on them. You’ll want to watch for slight golden edges and a soft center. The centers will look a bit undercooked, but that’s okay—the residual heat will carry over and firm them up, creating that desired chewy texture.
Once they’re done, remove the muffin tin from the oven and let the cookie cups cool in the tin for about 5 minutes. This cooling period allows them to set slightly before you remove them, ensuring they maintain their shape when you take them out.
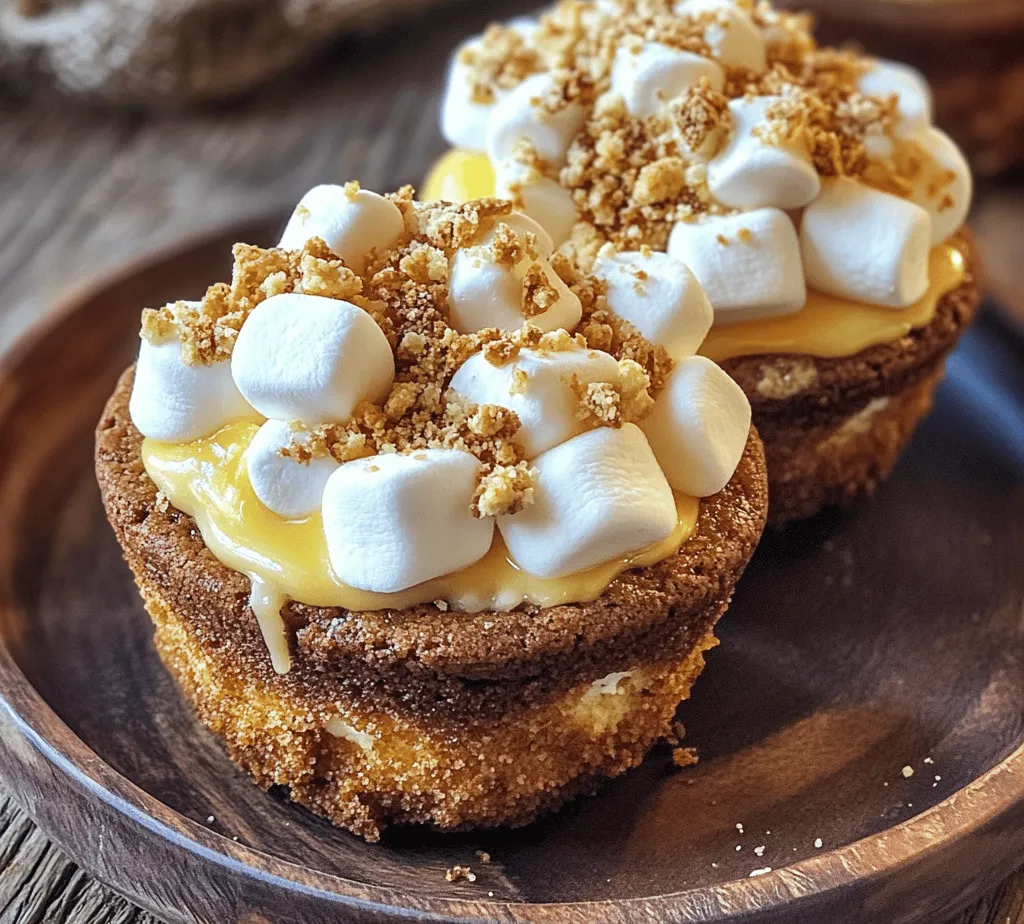
Adding Marshmallows: Timing for Optimal Puffiness
After your cookie cups have cooled slightly, it’s time to add the marshmallows. For the classic S’mores experience, you’ll want to use mini marshmallows. They fit perfectly in the cups and melt beautifully. Take a few mini marshmallows and place them directly into the center of each cookie cup. For an even more decadent treat, you can layer a piece of chocolate on top of the marshmallows.
Once the marshmallows are in place, return the muffin tin to the oven for an additional 2-3 minutes. This short baking time will allow the marshmallows to puff up and become a delightful gooey topping. Keep a close watch to ensure they don’t overbrown; you want them perfectly puffy and soft.
Cooling and Serving: Ensuring Ideal Texture
After the marshmallows have puffed up, carefully remove the muffin tin from the oven. Allow the S’mores Cookie Cups to cool in the tin for about 10 minutes before transferring them to a wire rack to cool completely. This cooling process is vital as it allows the cookies to firm up, making them easier to handle and eat.
Once cooled, you can serve them immediately or store them for later. To serve, you might consider drizzling a bit of melted chocolate over the top or sprinkling some crushed graham crackers for added texture and flavor. These cookie cups are best enjoyed while still warm, as the chocolate and marshmallow will be delightfully gooey.
Baking Tips for Perfect S’mores Cookie Cups
Adjusting Ingredients for Dietary Preferences
If you or your guests have dietary restrictions, adjusting the ingredients can help you enjoy these delicious cookie cups without compromising on flavor. For a dairy-free version, you can substitute the butter with coconut oil or a dairy-free butter alternative.
Using Alternative Sweeteners
For those watching their sugar intake, consider using alternative sweeteners such as coconut sugar or a sugar substitute like erythritol. Just keep in mind that some sweeteners behave differently in baking, so it may take a bit of experimentation to find the right balance.
Making the Recipe Gluten-Free
To make S’mores Cookie Cups gluten-free, simply replace the all-purpose flour with a gluten-free flour blend. Ensure that the blend you choose has a good balance of starches and fibers to mimic the texture of traditional flour.
Incorporating Flavor Variations
Get creative with flavors by adding a pinch of cinnamon or even a splash of almond extract to the dough for an unexpected twist. You could also fold in some chocolate chips or crushed nuts for added texture.
Experimenting with Different Types of Chocolate
While traditional milk chocolate is a popular choice, don’t hesitate to experiment with dark chocolate, white chocolate, or even flavored chocolate bars. Each variation will bring a unique taste and depth to your S’mores Cookie Cups.
Choosing the Right Size for Cookie Cups
The size of your cookie cups can also be altered according to your preference. If you want mini versions for a bite-sized treat, simply reduce the amount of dough used and adjust the baking time accordingly. Likewise, for larger cups, use a larger scoop and increase the baking time slightly.
Storage and Serving Suggestions
Storing S’mores Cookie Cups for Freshness
To keep your S’mores Cookie Cups fresh, store them in an airtight container at room temperature for up to three days. If you want to extend their lifespan, consider refrigerating them, but do note that the texture may change slightly.
Best Ways to Reheat for Enjoyment
If you want to enjoy them warm again, reheat your cookie cups in the microwave for about 10-15 seconds. Alternatively, you can pop them back in the oven at a low temperature (around 300°F) for 5-10 minutes. This will revive the gooey chocolate and marshmallow filling perfectly.
Pairing Suggestions: Beverages to Accompany S’mores Cookie Cups
When serving S’mores Cookie Cups, consider pairing them with a glass of cold milk, hot chocolate, or even a scoop of vanilla ice cream. These beverages complement the sweet, rich flavors of the cookie cups, making for a delightful dessert experience.
The Joy of S’mores Cookie Cups in Various Occasions
Creating Memorable Moments: Ideal for Parties and Gatherings
S’mores Cookie Cups are not just delicious; they’re a delightful treat that can elevate any gathering or celebration. Their unique presentation and nostalgic flavors make them a conversation starter, perfect for parties, family gatherings, or even casual get-togethers with friends.
S’mores Cookie Cups for Celebrations: Birthdays, Holidays, and More
Consider serving these cookie cups at special occasions such as birthdays or holiday parties. Their festive look and rich taste are sure to please guests of all ages. Plus, they can be easily customized with themed toppings or decorations to match the occasion.
Introducing Kids to Baking: A Fun Family Activity
Baking S’mores Cookie Cups can also be a fantastic way to introduce kids to the kitchen. The process is simple and engaging, allowing children to help with measuring, mixing, and forming the cookie cups. It’s a fun activity that fosters creativity and creates lasting memories in the kitchen.
Conclusion: Relishing the Delight of S’mores Cookie Cups
S’mores Cookie Cups are not just a dessert; they are an experience that brings people together and creates lasting memories. With their delightful combination of textures and flavors, these cookie cups are sure to impress friends, family, and even yourself! By following this detailed guide, you can create the perfect S’mores Cookie Cups that capture the essence of the classic treat while offering a unique twist. Whether enjoyed fresh out of the oven or stored for later, these cookie cups will surely become a favorite in your baking repertoire. So gather your ingredients and start baking; a delicious adventure awaits!


