Craving a warm, cheesy treat? You’re in the right place! In this post, I’ll share the best recipe for Pillsbury Biscuit Garlic Butter Cheese Bombs. These bite-sized delights are easy to make and packed with flavor. I’ll walk you through the must-have ingredients, simple steps for prep, and the perfect baking method. Whether for a party or a snack, these cheese bombs will impress everyone. Let’s dive in!
What Ingredients Do You Need for the Best Pillsbury Biscuit Garlic Butter Cheese Bombs?
To make the best Pillsbury biscuit recipe, you need simple yet tasty ingredients. Here’s what you will need:
– Pillsbury Original Biscuit Dough: This is the base of your cheese-filled biscuit recipe. It is easy to work with and quick to bake.
– Shredded Mozzarella Cheese: You want about one cup for that gooey, melty goodness.
– Cream Cheese: A half cup of softened cream cheese adds richness and creaminess to each bite.
– Unsalted Butter: Four tablespoons of melted butter will help create that delicious garlic butter sauce.
– Garlic: Use three cloves of minced garlic for a great flavor boost.
– Dried Oregano and Italian Seasoning: One teaspoon of each adds depth to your garlic butter biscuit bombs.
– Salt and Black Pepper: Half a teaspoon of salt and a quarter teaspoon of pepper will enhance all the flavors.
– Fresh Parsley: Chopped parsley is perfect for garnishing and adds a pop of color.
What Are the Essential Ingredients?
Each ingredient plays a key role in the final dish. The biscuit dough provides a soft and flaky shell. The mozzarella and cream cheese create a rich and cheesy center. The melted butter and garlic make a savory coating that takes these biscuit bombs to another level.
How Can You Customize the Cheese Filling?
You can easily customize the cheese filling to suit your taste. Try adding cheddar cheese for a sharp flavor. You can also mix in some crumbled feta or goat cheese for a tangy twist. If you love spice, add some jalapeños or pepper jack cheese.
What Seasonings Enhance the Flavor?
Seasonings are a must for great flavor. Dried herbs, like oregano and Italian seasoning, add warmth. You can also use garlic powder or onion powder for an extra kick. Other spices, like red pepper flakes, can give your garlic butter biscuit bombs a fun heat. Don’t forget to taste and adjust the seasonings as you go!
How Do You Prepare the Dough and Filling for Cheese Bombs?
To make cheese bombs, start with Pillsbury biscuit dough. This dough is easy to work with and perfect for this recipe. Open the can carefully. Each biscuit is pre-measured for you, which makes preparation quick. Place the biscuits on a clean surface.
Next, flatten each biscuit with your fingers. Make sure they are about the size of your palm. This gives you enough room for the filling. Now, let’s make the cheese filling. In a bowl, mix the softened cream cheese with shredded mozzarella cheese. You want a creamy texture that melts well.
Add in your favorite spices. I like to use garlic, oregano, and Italian seasoning. These flavors blend well with cheese. Mix it all together until smooth. Now, it’s time to stuff the biscuits. Place about one tablespoon of the cheese filling in the center of each flattened biscuit.
To seal the bombs, fold the edges over the filling. Pinch the seams tightly. This step is key. A good seal prevents the cheese from leaking out during baking.
After sealing, dip each bomb into melted garlic butter, coating them well. This step adds flavor and a nice golden color. Place the bombs seam-side down on a baking sheet lined with parchment paper. Follow these steps, and you’ll have perfect cheese bombs ready for baking.
What is the Method for Baking Garlic Butter Cheese Bombs?
To bake garlic butter cheese bombs, follow these simple steps. First, you need to preheat your oven to 375°F (190°C). This temperature ensures the biscuits bake evenly and become golden brown.
Next, the baking time is crucial. You should bake the cheese bombs for about 12 to 15 minutes. Keep an eye on them during the last few minutes to prevent burning.
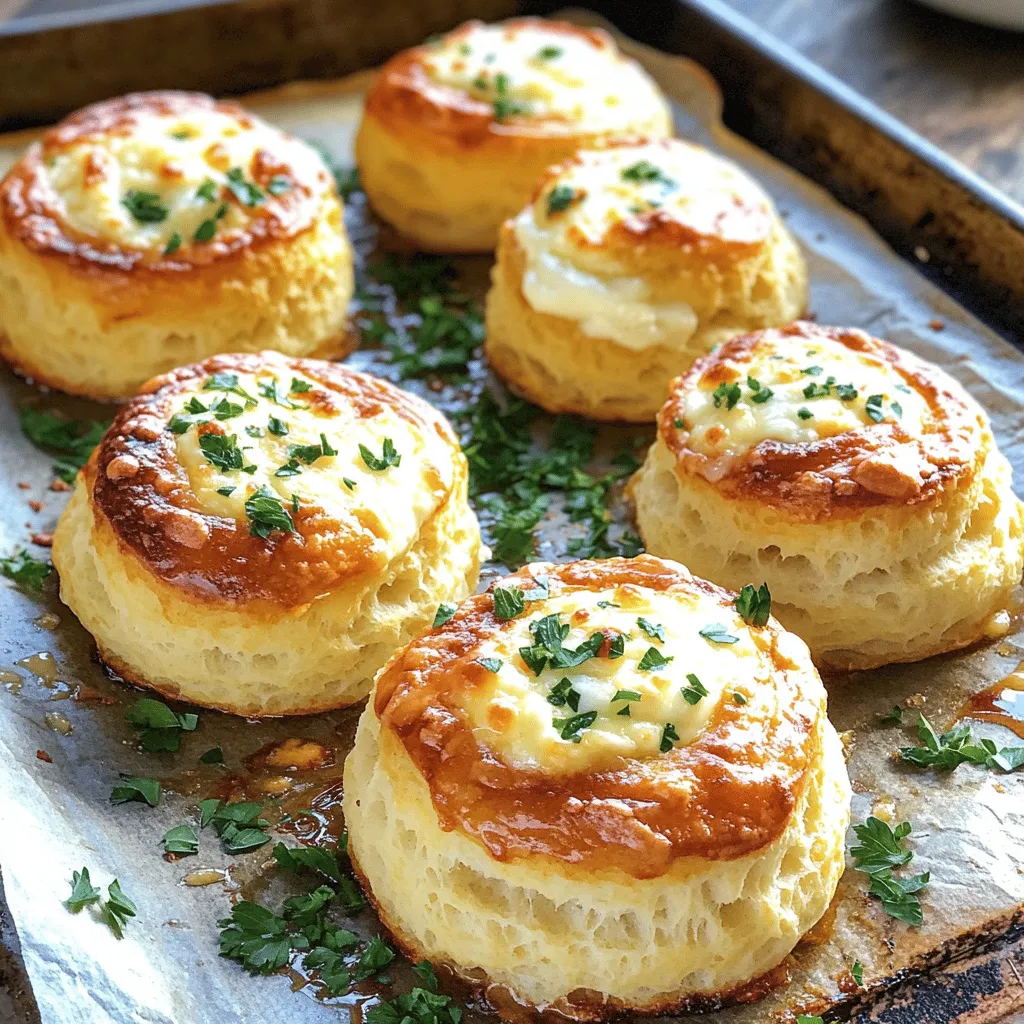
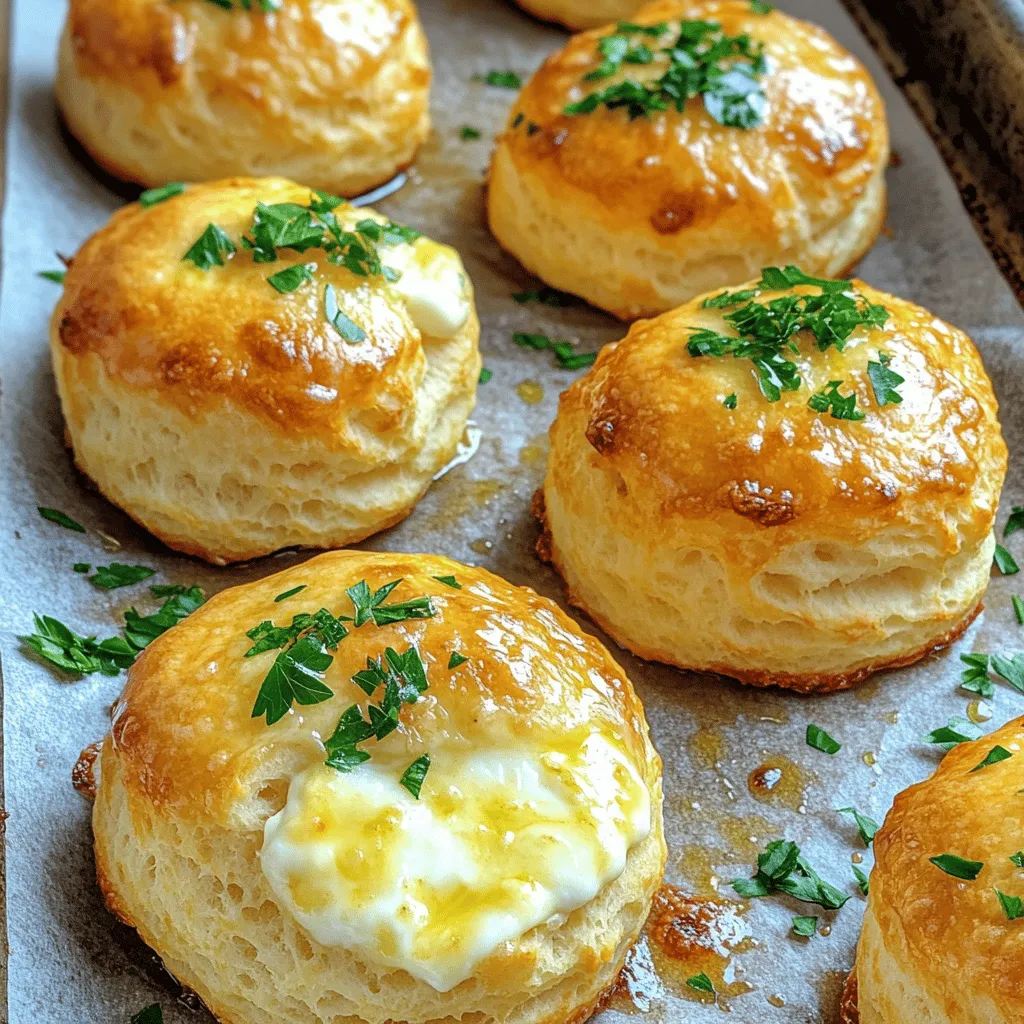
How can you tell when they’re done? Look for a golden-brown color and a puffed-up appearance. You can also insert a toothpick into the center. If it comes out clean, your bombs are ready!Enjoy the warm, cheesy goodness!
What Serving Suggestions Can Elevate Your Biscuit Bombs Experience?
When serving your garlic butter cheese bombs, think about pairing them with tasty sauces. A classic marinara sauce adds a nice tang. Ranch dressing brings a cool, creamy touch. You can even try a spicy sriracha mayo for a kick. These dips make your biscuit bombs even more fun to eat!
For a party, how you present the biscuit bombs matters. Arrange them on a large platter. You can use a fun shape like a circle or a star. Adding small bowls of dipping sauces around the platter looks great. A sprinkle of fresh parsley on top adds color and freshness.
To make the meal complete, consider adding side dishes. A light salad with mixed greens and a zesty vinaigrette works well. Veggies with hummus can also add a healthy touch. For a heartier option, serve garlic bread on the side. These sides enhance the overall experience and make for a full meal.
These serving ideas will ensure your garlic butter cheese bombs shine at any gathering. Enjoy the fun of sharing these delicious biscuit appetizers!
What Variations of the Garlic Butter Cheese Bombs Can You Try?
You can have fun with cheese bomb variations. Start by adding different cheeses for unique flavors. Try cheddar for a sharp kick or pepper jack for some heat. You can mix cheeses too! Combining mozzarella with gouda can bring a creamy texture to your bites.
What other fillings work well with biscuit bombs? Think outside the box! Cooked bacon adds a savory crunch. Chopped spinach gives a fresh twist. You could even try small bits of pepperoni for a pizza-style treat. The options are endless and delicious.
Herbs and spices can make a big difference. You can easily incorporate fresh herbs like basil or thyme. They pair well with the garlic butter. For a zesty touch, add a pinch of red pepper flakes. This will give your bombs a bit of heat.
Experimenting with flavors is part of the fun. Each variation can make your biscuit bombs unique. You can create savory biscuit dishes that surprise and delight. With these tips, your garlic butter cheese bombs will shine at any gathering!
What Tips and Tricks Are Essential for Making Perfect Biscuit Bombs?
To create the best biscuit bombs, focus on a few key tips.
What common mistakes should you avoid when making cheese bombs?
One major mistake is overfilling the biscuits. This can lead to messy explosions in the oven. Another pitfall is not sealing the edges well. If they are not sealed, the cheese will ooze out. Also, don’t skip the preheating step. If the oven isn’t hot enough, the bombs won’t puff up nicely.
How can you make the perfect garlic butter mixture?
Start with melted butter. Mix in minced garlic, salt, and spices like oregano and Italian seasoning. This mixture adds a rich flavor. Let it sit for a few minutes. This helps the garlic flavor spread throughout the butter. When you dip the bombs, make sure they are fully coated. This adds a crispy, flavorful crust.
What storage tips keep leftover bombs fresh?
To store leftover biscuit bombs, let them cool completely. Place them in an airtight container. They can stay fresh in the fridge for up to three days. To reheat, place them in an oven. This keeps them crispy. You can also use a microwave, but they may lose some crunch. For freezing, wrap each bomb in plastic wrap. Then put them in a freezer bag for up to a month. When ready to eat, bake them straight from frozen. This way, you can enjoy warm, cheesy goodness anytime!
In this article, I shared how to make the best Pillsbury biscuit garlic butter cheese bombs. We covered essential ingredients, cheese filling ideas, and seasonings. You learned key steps for prepping the dough and filling. I explained baking tips and serving ideas to improve your experience. Finally, we explored variations and essential tricks for success.
With these tips, you can create tasty snacks for any gathering. Enjoy your cooking adventure!


