Are you ready to whip up a classic dessert that never fails to impress? Pineapple Upside Down Cake is a delightful treat that’s both easy to make and stunning to serve. In this guide, I’ll walk you through each step with clear photos, ensuring your cake turns out perfectly every time. Get ready to enjoy a sweet, tropical twist on a traditional favorite that will charm your friends and family!
Ingredients
Key Ingredients for Pineapple Upside Down Cake
– 1 cup all-purpose flour
– 1 cup granulated sugar
– 1/2 cup unsalted butter (softened)
– 2 large eggs
– 1/2 cup milk
– 1 teaspoon vanilla extract
– 1 teaspoon baking powder
– 1/2 teaspoon baking soda
– 1/4 teaspoon salt
– 1 can (20 oz) sliced pineapple in juice (drained, juice reserved)
– 1/2 cup brown sugar
– 1/4 cup maraschino cherries
Substitutions for key ingredients:
– You can swap all-purpose flour for gluten-free flour.
– Use coconut oil instead of butter for a dairy-free option.
– Almond milk can replace regular milk for a nut-free choice.
Importance of ingredient quality:
Using high-quality ingredients makes a big difference. Fresh eggs, real vanilla, and good butter add rich flavor. Choose ripe, sweet pineapples if you use fresh ones. Quality ingredients ensure your cake is moist and tasty. Always check the expiration dates on your baking powder and soda. This will help your cake rise well. For the best results, use ingredients at room temperature. This helps them mix better and create a fluffy batter.
Step-by-Step Instructions
Preparing the Pineapple Topping
First, preheat your oven to 350°F (175°C). Grab a 9-inch round cake pan. Place 1/4 cup of unsalted butter in the pan. Put it in the oven until it melts. Watch carefully! Once melted, take the pan out of the oven. Sprinkle 1/2 cup of brown sugar evenly over the melted butter.

Arranging Pineapple and Cherries
Now, it’s time to add the pineapple. Take a can of sliced pineapple and drain it. Place the pineapple rings on top of the brown sugar. Make sure they cover it well. For a fun touch, fill the centers of the rings with maraschino cherries. This looks great and adds flavor!

Mixing the Cake Batter
In a large bowl, cream 1/2 cup of softened butter with 1 cup of granulated sugar. Mix until light and fluffy. Add 2 large eggs one at a time. Beat well after each egg. Next, pour in 1/2 cup of milk and 1 teaspoon of vanilla extract. Stir until smooth.

Combining Dry Ingredients
In another bowl, whisk together 1 cup of all-purpose flour, 1 teaspoon of baking powder, 1/2 teaspoon of baking soda, and 1/4 teaspoon of salt. Gradually add this to the wet mixture. Mix until just combined. Do not overmix! This keeps the cake light and fluffy.

Pouring and Baking
Carefully pour the cake batter over the arranged pineapple and cherries. Spread it out evenly with a spatula. Bake in the preheated oven for 35-40 minutes. Check for doneness by inserting a toothpick in the center. If it comes out clean, the cake is done!


Cooling and Serving
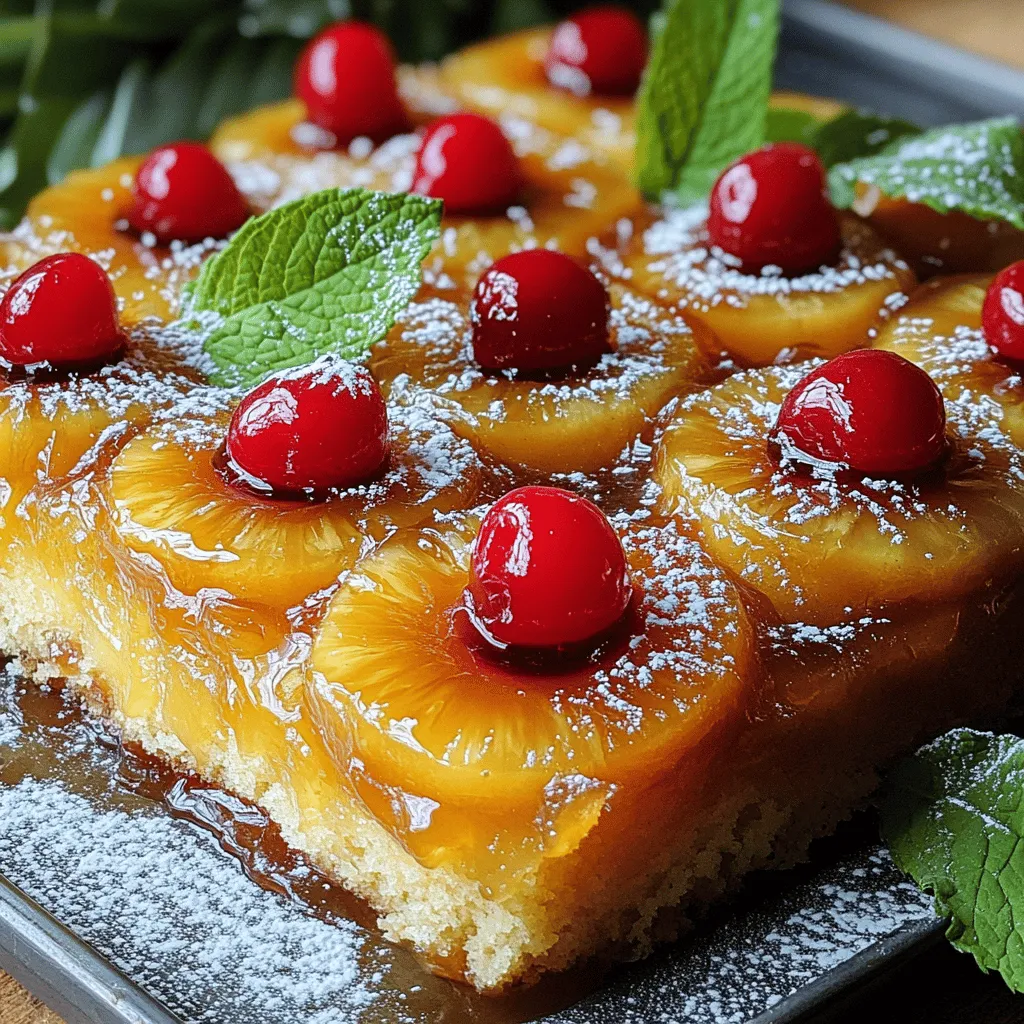
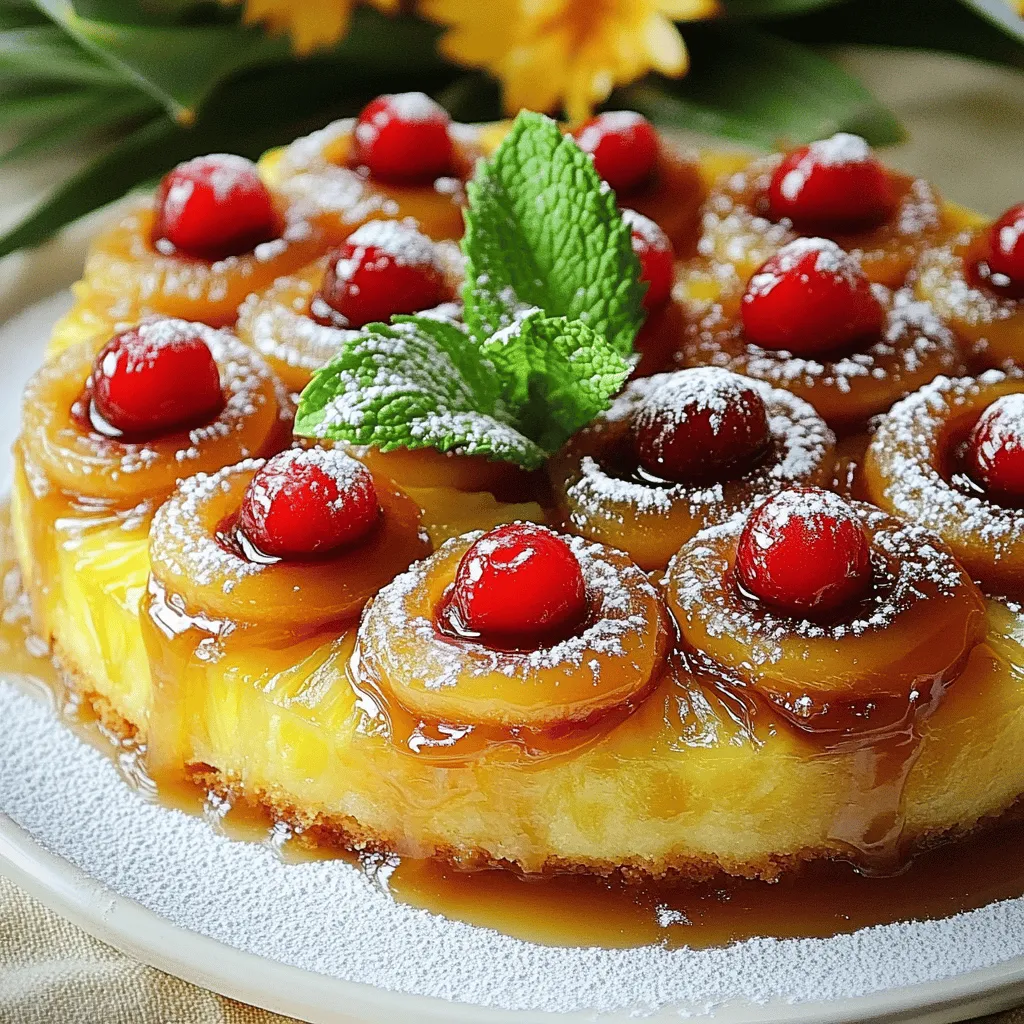
After baking, let the cake cool in the pan for about 10 minutes. Then, place a serving plate on top of the pan. Carefully invert the pan, so the cake flips onto the plate. For a stunning finish, dust it lightly with powdered sugar and garnish with fresh mint leaves. Serve warm or at room temperature.

!
Tips & Tricks
Common Baking Mistakes to Avoid
Baking can be tricky. Here are some common mistakes and how to fix them:
– Not measuring ingredients correctly: Always use a kitchen scale or measuring cups. Too much flour can make the cake dry.
– Overmixing the batter: Mix until just combined. Overmixing can make the cake tough.
– Not preheating the oven: Always preheat your oven. This helps the cake rise evenly.
– Opening the oven too soon: Avoid opening the door during baking. It can cause the cake to sink.
To perfect your cake, make sure to follow these tips closely. Each step matters.
Enhancements for Flavor
Want to make your cake more exciting? Here are some ideas:
– Add cinnamon or nutmeg: A dash of these spices can warm up the flavor.
– Use coconut milk instead of regular milk: This gives the cake a tropical twist.
– Mix in crushed nuts: Walnuts or pecans add a nice crunch and depth.
You can also personalize the recipe. Try using different fruits or extracts. Almond extract can add a lovely hint of flavor. Don’t be afraid to experiment! Each change can lead to a new favorite.
Variations
Alternative Fruit Toppings
You can mix things up with different fruits. Try peaches, cherries, or berries. Each fruit gives a unique flavor and look. You could even use apples for a fall twist. Here are some fun combinations:
– Peach and Cherry: Sweet and tart blend.
– Berry Medley: Strawberries, blueberries, and raspberries for a fresh taste.
– Apple Cinnamon: Add cinnamon for a cozy dessert.
These options can brighten up your cake and make it special.
Dietary Adjustments
If you want a healthier cake, there are easy swaps. To make it gluten-free, use almond or coconut flour. This keeps the flavor while changing the texture.
For dairy-free, replace butter with coconut oil. Use almond or soy milk instead of regular milk. You can also reduce sugar by using applesauce or a sugar substitute.
These simple swaps help everyone enjoy this cake without worry!
Storage Info
Proper Cake Storage
To store leftover cake, wrap it well in plastic wrap. This protects the cake from air and keeps it fresh. Store it in the fridge if you plan to eat it in a few days. Keeping it cold helps retain moisture.
To keep the cake moist, you can place a slice of bread in the container. The bread will absorb excess air and help maintain the cake’s softness. Make sure to keep it covered to avoid drying out.
Freezing Instructions
If you want to save the cake for later, freezing is a great option. First, let the cake cool completely. Then, wrap each slice in plastic wrap. This prevents freezer burn and keeps the flavor intact.
Next, place the wrapped slices in an airtight container or a freezer bag. Label the bag with the date. When you’re ready to enjoy your cake, take it out and thaw it in the fridge overnight.
For the best taste, enjoy the cake within three months of freezing. This way, you’ll savor the deliciousness of your pineapple upside down cake just like the day you made it.
FAQs
How can I tell when the cake is done baking?
You can check if the cake is done by looking for some key signs. First, the edges will pull away from the pan slightly. The top will also look golden brown. The best way is to use a toothpick. Insert it in the center of the cake. If it comes out clean, the cake is ready. If it has wet batter on it, give it a few more minutes to bake.
Can I make the cake ahead of time?
Yes, you can prepare this cake in advance. You can bake it a day before serving. Just let it cool completely, then cover it well. Store it at room temperature for up to two days. For longer storage, keep it in the fridge. Make sure to wrap it tightly to keep it fresh.
What is the history of Pineapple Upside Down Cake?
Pineapple upside down cake dates back to the 1920s. It became popular after canned pineapple was introduced. Home cooks loved the easy use of canned fruit. The cake was a hit during the 1930s, especially in the United States. It is a fun, retro dessert that still delights today.
Can I use fresh pineapple instead of canned?
You can use fresh pineapple for this cake. Just peel, core, and slice it into rings. Fresh pineapple gives a bright flavor. It may also make the cake a bit juicier. If you choose fresh, be sure to adjust the baking time. The fresh fruit may need a few more minutes to bake through than canned.
You now know how to make a delicious Pineapple Upside Down Cake. We covered the key ingredients, how to prepare the topping, and essential baking steps. I shared tips to avoid common mistakes and how to personalize your cake. You can even explore variations with different fruits or dietary needs. Remember, proper storage keeps your cake fresh. Enjoy your baking journey and impress your guests with this delightful treat. It’s simple, fun, and truly rewarding!


