If you crave a tasty snack that’s easy to make, look no further! This Garlic Knots recipe combines simple ingredients with bold flavors. With just a few steps, you can whip up soft, buttery knots infused with garlic goodness. Perfect for dipping or sharing, they will impress your friends and family. Read on to discover how to create this simple and flavorful delight in your own kitchen!
Ingredients
List of Essential Ingredients
– 3 cups all-purpose flour
– 1 tablespoon sugar
– 2 teaspoons instant yeast
– 1 teaspoon salt
– 2 tablespoons olive oil
– 1 cup warm water
– 6 cloves garlic, minced
– 1/4 cup unsalted butter, melted
– 1 teaspoon dried oregano
– 1/2 teaspoon red pepper flakes (optional)
– Fresh parsley (for garnish)
When I make garlic knots, I always gather my ingredients first. You need three cups of all-purpose flour for a solid base. The sugar helps the yeast work well. I use two teaspoons of instant yeast to make the dough rise quickly. A teaspoon of salt adds flavor to the knots.
Olive oil gives the knots a nice richness, so I add two tablespoons. For the best texture, one cup of warm water is key. I use six cloves of minced garlic for that punchy flavor. I melt a quarter cup of unsalted butter to brush over the knots later. Dried oregano adds a subtle touch, and if you like spice, add red pepper flakes. Finally, chop some fresh parsley for a beautiful finish.
Recommended Tools
– Mixing bowls
– Stand mixer (optional)
– Baking sheet
– Parchment paper
– Kitchen towel
To make these knots, I grab a few tools. Mixing bowls are a must for combining ingredients. If you have a stand mixer, it can save time when mixing the dough. I always line my baking sheet with parchment paper for easy cleanup. A kitchen towel helps keep the dough warm while it rises.
Step-by-Step Instructions
Preparing the Dough
1. Activating the yeast: Start by mixing warm water, sugar, and instant yeast in a bowl. Let it sit for 5-10 minutes. You want it to get frothy. This shows the yeast is alive.
2. Mixing wet and dry ingredients: In another bowl, whisk together the flour and salt. Then, pour the yeast mixture into this bowl. Add in the olive oil. Stir until it forms a shaggy dough.
3. Kneading the dough: Transfer the dough onto a floured surface. Knead it for about 8-10 minutes. You want it smooth and elastic. If your dough sticks, sprinkle a bit of flour as needed.
Rising Process
1. First rise duration and optimal conditions: Place your kneaded dough in a greased bowl. Cover it with a damp cloth. Let it rise in a warm area for about 1 hour. It should double in size.
2. Punching down the dough: After the first rise, punch the dough down gently. This helps to expel the air and prepares it for shaping.
Shaping the Garlic Knots
1. Dividing the dough: Turn the dough onto a floured surface. Divide it into equal pieces, about 10-12. Each piece will become a knot.
2. Tying the knots and preparing for the second rise: Roll each piece into a rope, about 8-10 inches long. Tie each rope into a knot. Tuck the ends underneath each knot. Place them on a baking sheet lined with parchment paper.
Baking the Knots
1. Preheating the oven: While the knots rise, preheat your oven to 375°F (190°C). This ensures they bake evenly.
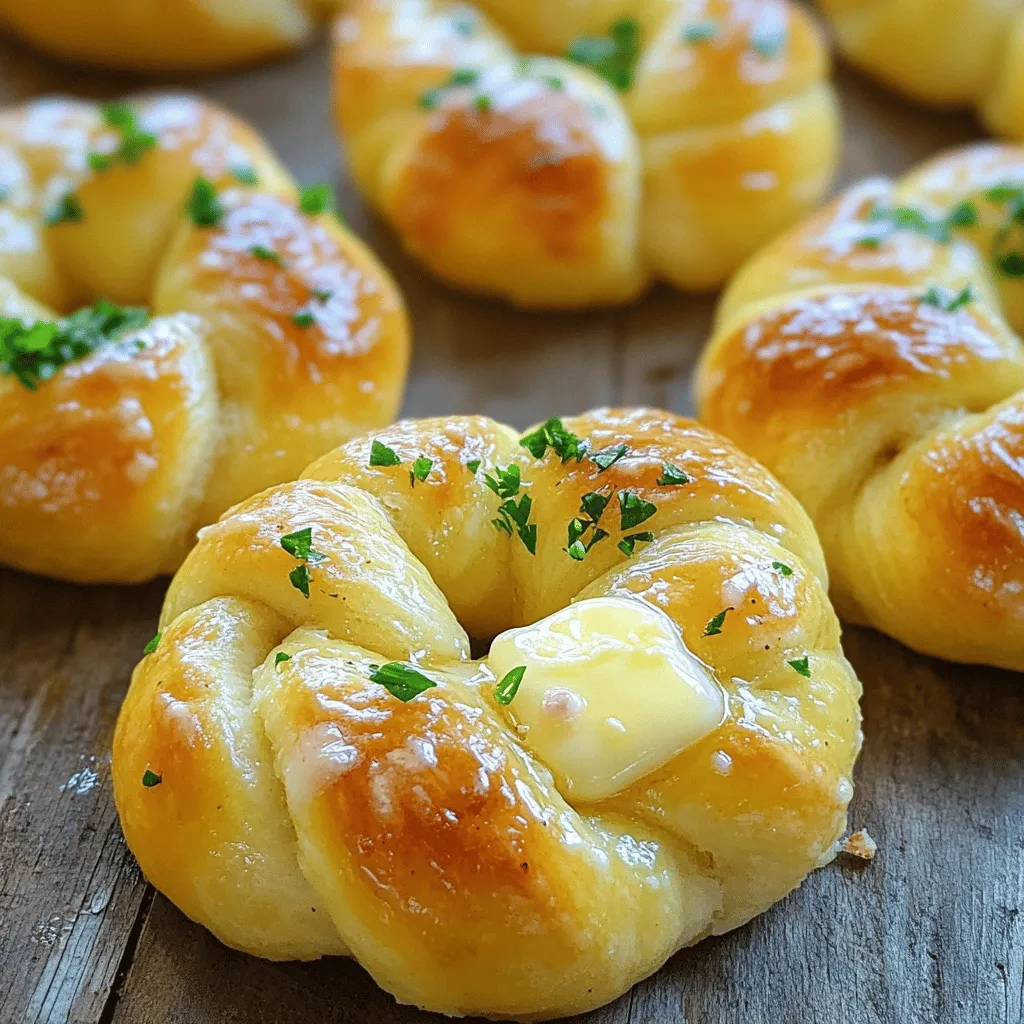
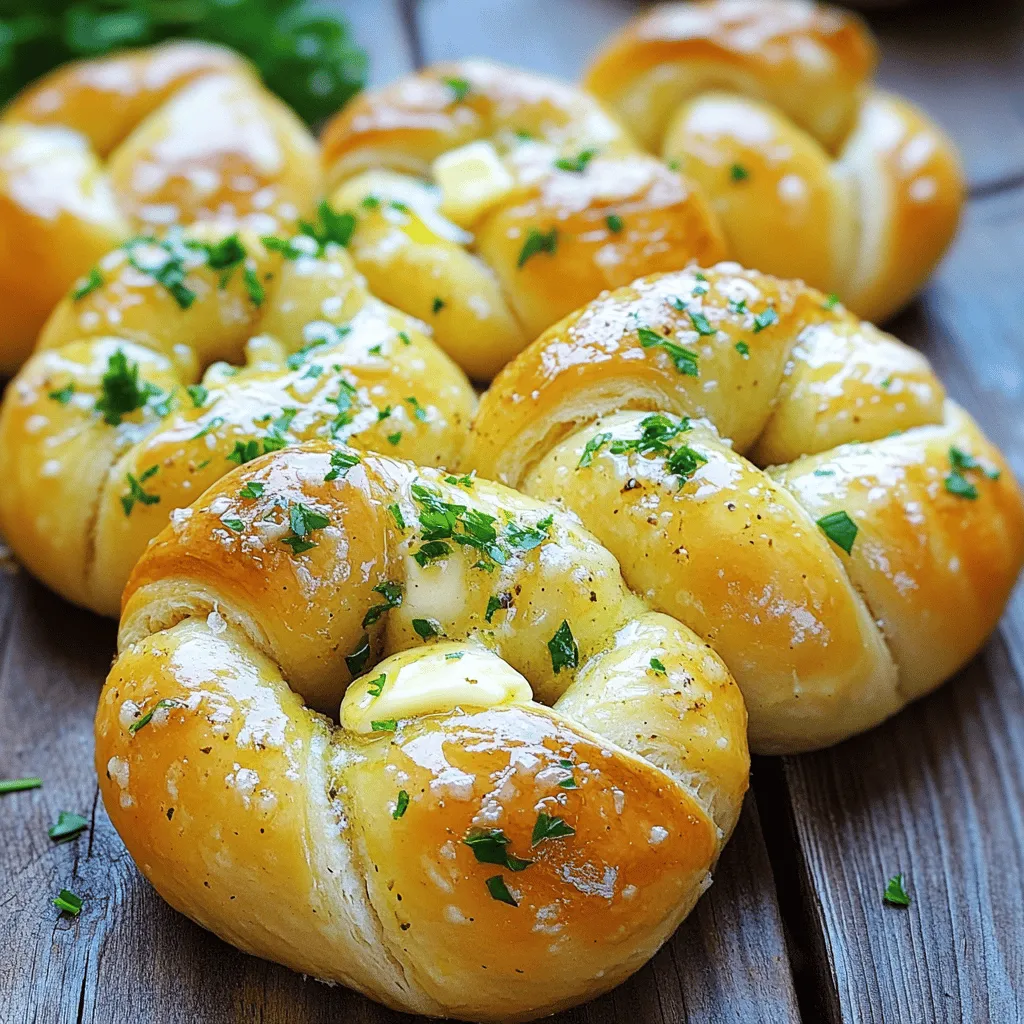
2. Baking time and golden brown indication: Bake the knots for 15-20 minutes. They should be golden brown when done. Brush them with garlic butter before serving. Enjoy your delicious garlic knots!
Tips & Tricks
Achieving the Perfect Texture
To get the best texture, kneading is key. Knead the dough for about 8-10 minutes until it feels smooth. This helps the gluten develop, making the knots soft and chewy. Rising conditions also matter. Find a warm spot in your kitchen for the dough to rise. Cover it with a damp cloth to keep it moist.
Enhancing Flavor
You can boost the flavor of your garlic knots with herbs and spices. Fresh herbs like basil or thyme add great depth. Dried herbs, such as rosemary or parsley, work well too. For that garlic goodness, use garlic butter. Mix melted butter with minced garlic and brush it on the knots before baking. This step is crucial for a rich, savory taste.
Common Mistakes to Avoid
Watch out for over-kneading the dough. If you knead too long, it can become tough. Also, do not skip the rising step. Letting the dough rise properly gives it volume and airiness. If you rush this, you will end up with dense knots. Follow these tips for perfect garlic knots every time.
Variations
Cheese-Stuffed Garlic Knots
For a tasty twist, you can make cheese-stuffed garlic knots. They add a fun surprise inside.
– Ingredients for cheese filling
– 1 cup shredded mozzarella cheese
– 1/2 cup ricotta cheese
– Salt and pepper to taste
– Instructions for incorporating cheese
1. Mix the mozzarella and ricotta in a bowl.
2. Before you tie each knot, take a small piece of dough.
3. Flatten it and add a spoonful of cheese mixture.
4. Fold the dough around the cheese and seal tightly.
5. Shape it into a knot and follow the rest of the recipe.
Herb Garlic Knots
Herbs can change the flavor and make your knots unique. You can use many herbs. Fresh or dried work well.
– Using different herbs
– Try basil, thyme, or rosemary.
– Mix in chopped fresh herbs in the garlic butter.
– Flavor adjustments
– Use less oregano if you add stronger herbs.
– Taste the garlic butter and adjust as needed.
Red Pepper Flake Garlic Knots
If you like heat, red pepper flakes add a nice kick. You can make them as spicy as you want.
– Adjusting spice levels
– Start with 1/2 teaspoon for a mild heat.
– Add more if you prefer a spicier bite.
– Flavor profile changes
– The heat adds depth to the garlic flavor.
– Pair them with creamy dips to balance the spice.
These variations let you enjoy garlic knots in new ways.
Storage Info
How to Store Garlic Knots
To keep your garlic knots fresh, I recommend a few simple methods. For short-term storage, place them in a paper bag at room temperature. This keeps them soft and tasty for up to two days. If you want to keep them longer, wrap them in plastic wrap and store them in the fridge. They can last up to a week this way. For long-term storage, freeze them. Place the knots in a freezer bag, removing as much air as possible, and they can stay fresh for up to three months.
Reheating Guidelines
Reheating is easy and can keep your knots soft. The best way is to use an oven. Preheat it to 350°F (175°C). Place the knots on a baking sheet and cover them with foil. Heat for about 10 minutes. This keeps them warm and soft. If you use a microwave, set it to medium power. Heat for 15-20 seconds at a time. Be careful not to overheat, or they might become tough.
Freezing Garlic Knots
Freezing garlic knots is a great way to save them for later. First, let them cool completely after baking. Then, place them on a baking sheet in a single layer. Freeze for about an hour until firm. Once frozen, move them to a freezer bag. To thaw, simply leave them in the fridge overnight or let them sit at room temperature for a few hours. They can also be reheated straight from the freezer. Just add a few extra minutes to your oven time. Enjoy your homemade garlic knots anytime!
FAQs
How to make soft garlic knots?
To achieve soft garlic knots, focus on kneading the dough well. Knead for about 8-10 minutes until the dough feels smooth and elastic. Let it rise in a warm spot until it doubles in size. This process helps the gluten develop, creating a soft texture. Consider using warm water, around 110°F, to activate the yeast better.
Can I use whole wheat flour instead?
Yes, you can use whole wheat flour. It adds a nutty flavor and more fiber. However, whole wheat flour may make the knots denser. For a lighter texture, mix half whole wheat and half all-purpose flour. This way, you still enjoy the benefits of whole grains while keeping some softness.
What to serve with garlic knots?
Garlic knots pair well with many dishes. Serve them with marinara sauce, garlic butter, or pesto for dipping. They are great with pasta, salads, or soups. You can even enjoy them on their own as a tasty snack.
How long do garlic knots last?
Garlic knots last about 2-3 days at room temperature. Store them in a sealed bag or container to keep them fresh. For longer storage, place them in the fridge for up to a week. You can also freeze them for up to three months. Reheat them in the oven for the best texture.
In this blog post, we explored how to make delicious garlic knots. We discussed essential ingredients, recommended tools, and provided step-by-step instructions. You learned tips and tricks to achieve the perfect texture and flavor, along with variations to try. We also covered storage options and answered frequently asked questions.
Now, you have the skills to create amazing garlic knots. Enjoy experimenting and sharing them with friends and family!


