Introduction
Rice Krispie treats have long been a beloved snack, known for their delightful crunch and gooey sweetness. Originating in the 1930s, this classic dessert has become a staple in home kitchens, cherished for its simplicity and versatility. Over the years, innovative bakers have taken the basic Rice Krispie treat recipe and transformed it into an array of delicious concoctions, making it a canvas for creativity. Among these variations is the Crunchy Delight Rice Krispie Cookies—a unique twist that merges the nostalgic flavors of Rice Krispies with the comforting charm of cookies.
These cookies not only encapsulate the essence of the original treat but also elevate it into a delightful cookie form that’s perfect for any occasion. Whether you’re hosting a gathering, celebrating a birthday, or simply satisfying a sweet tooth, these crunchy cookies are sure to impress. What makes this recipe particularly appealing is its accessibility; it requires no advanced baking skills and is easy to follow for home bakers of all levels. With just a few simple ingredients and straightforward steps, you can whip up a batch of these delectable treats in no time.
Understanding the Ingredients
To create the perfect Crunchy Delight Rice Krispie Cookies, it’s essential to understand the role of each ingredient in the recipe. This knowledge not only enhances your baking skills but also allows you to make informed substitutions if needed.
Rice Krispies Cereal
The star of the show in this recipe is undoubtedly the Rice Krispies cereal. This iconic cereal provides the signature crunch that sets these cookies apart. The light, airy texture of Rice Krispies allows the cookies to maintain a delightful crispness even after baking, preventing them from becoming dense or chewy. Additionally, the cereal’s neutral flavor serves as a perfect backdrop for the other ingredients, allowing the sweet and buttery notes to shine through.
All-Purpose Flour
All-purpose flour serves as the foundation for the cookie structure. It provides the necessary strength and stability to hold the cookies together. When combined with the wet ingredients, the flour helps create a cohesive dough. Using all-purpose flour ensures that the cookies have a tender crumb while still being sturdy enough to retain their shape during baking.
Unsalted Butter
Unsalted butter plays a crucial role in adding richness and flavor to the cookies. The fat content in butter contributes to the overall texture, making the cookies tender and moist. Unsalted butter is preferred in baking because it allows for better control over the salt content in the recipe. If you do use salted butter, it’s advisable to reduce the added salt in the recipe for balance.
Brown Sugar vs. Granulated Sugar
In this recipe, both brown sugar and granulated sugar are utilized, each contributing uniquely to the final product. Brown sugar is rich in molasses, which imparts a deeper flavor and moisture to the cookies. This results in a chewier texture and a subtle caramel-like taste. On the other hand, granulated sugar helps to create a crisp exterior. The combination of both sugars results in cookies that are simultaneously chewy and crunchy, striking the perfect balance.
The Importance of a Large Egg
A large egg is essential for binding the ingredients together, providing moisture, and adding structure to the cookies. The proteins in the egg coagulate during baking, helping the cookies to rise and hold their shape. If you’re in a pinch, you can substitute one large egg with two medium eggs or one extra-large egg, but be mindful that this may slightly alter the cookie’s texture.
Vanilla Extract
Vanilla extract is a key ingredient that enhances the flavor profile of the cookies. It adds a warm, aromatic quality that elevates the overall taste, making the cookies more inviting and delicious. While pure vanilla extract is preferred for its rich flavor, imitation vanilla can be used in a pinch, although the taste may not be as robust.
Baking Soda and Salt
Both baking soda and salt are vital for achieving the right balance of flavors and texture in your cookies. Baking soda acts as a leavening agent, helping the cookies to rise slightly and create a light texture. Salt, on the other hand, enhances the sweetness of the cookies, making the flavors more pronounced. It’s important to use the correct measurements of both to ensure the cookies are well-flavored without being overly salty.
Optional Ingredients
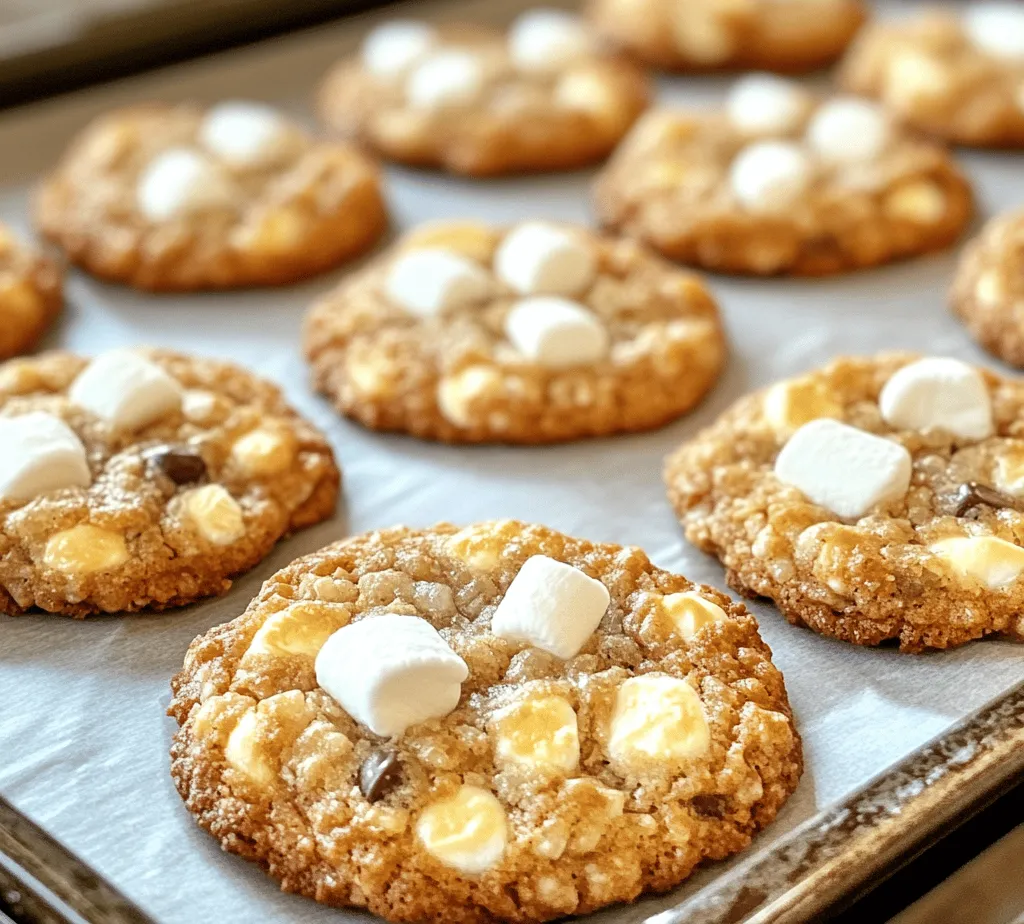
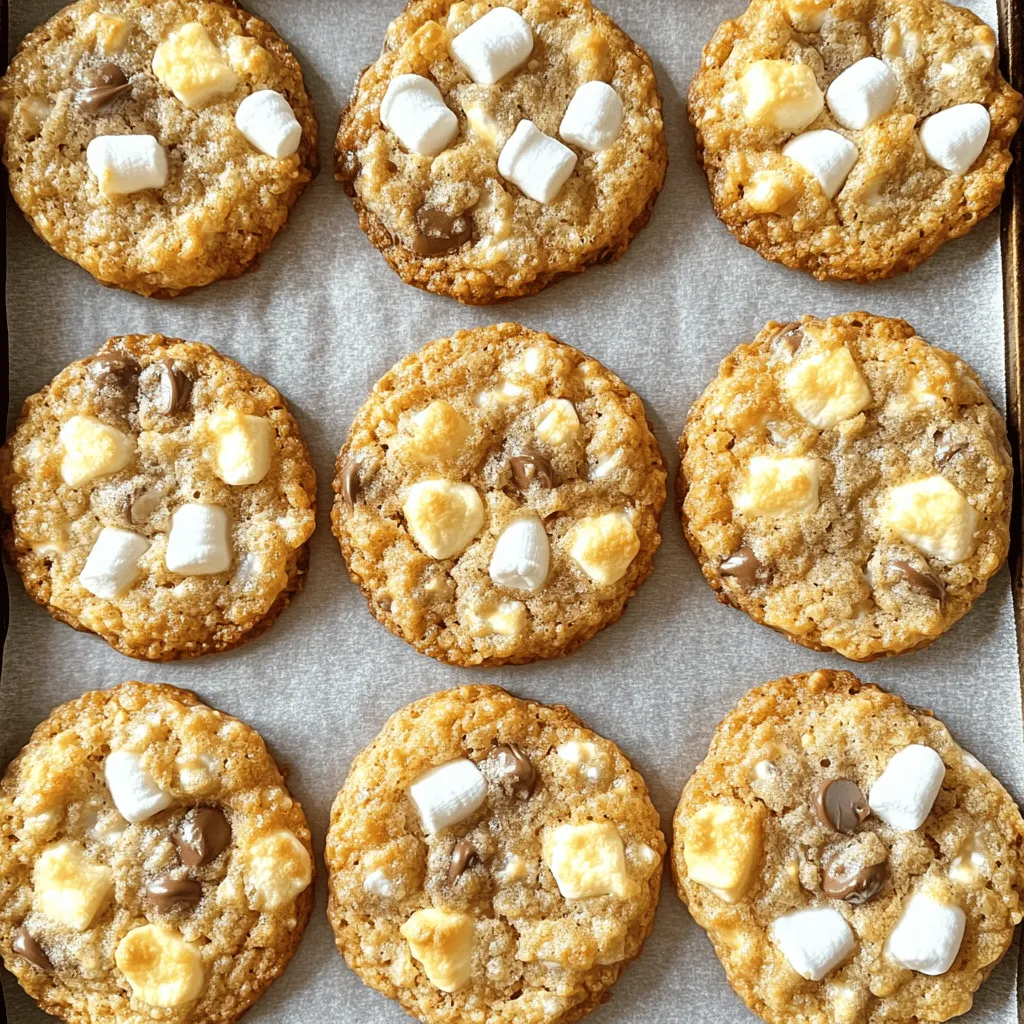
For those looking to take their Crunchy Delight Rice Krispie Cookies to the next level, consider adding semi-sweet chocolate chips and mini marshmallows. Semi-sweet chocolate chips introduce a rich, chocolaty flavor that contrasts beautifully with the sweetness of the cookie. Mini marshmallows can add an extra layer of gooeyness, reminiscent of traditional Rice Krispie treats. These optional ingredients can be mixed in for added texture and flavor, making each bite even more delightful.
Step-by-Step Instructions
Now that we have a good understanding of the ingredients, let’s get into the step-by-step instructions for making Crunchy Delight Rice Krispie Cookies. Follow these guidelines closely to ensure perfect results every time.
Preheating the Oven
Before you begin mixing your ingredients, it’s important to preheat your oven to 350°F (175°C). Preheating is a critical step in baking, as it ensures that your cookies bake evenly and develop the right texture. An oven thermometer can help verify the temperature, as ovens can sometimes be inaccurate.
Mixing Wet Ingredients
Start by creaming together the unsalted butter, brown sugar, and granulated sugar in a large mixing bowl. Use a hand mixer or a stand mixer fitted with the paddle attachment to achieve a smooth, fluffy mixture. This process should take about 2-3 minutes. Properly creaming the butter and sugars incorporates air into the mixture, which is essential for creating a light and tender cookie.
Once the butter and sugars are well combined, add the large egg and vanilla extract. Mix until fully incorporated, scraping down the sides of the bowl as necessary. This step ensures that all the ingredients are evenly distributed, providing a consistent flavor throughout the cookies.
Combining Dry Ingredients
In a separate bowl, whisk together the all-purpose flour, baking soda, and salt. This step is crucial, as it helps to evenly distribute the leavening agent and salt throughout the flour. Gradually add the dry ingredients to the wet mixture, mixing on low speed until just combined. Be careful not to overmix at this stage, as overworking the dough can lead to tough cookies.
Adding Rice Krispies
Now comes the fun part—adding the Rice Krispies! Gently fold in the cereal using a spatula or wooden spoon. The key here is to be gentle to preserve the crunch of the Rice Krispies. Over-mixing can lead to broken pieces, which may alter the texture of the cookies. If you’re using optional ingredients like chocolate chips or mini marshmallows, fold them in at this stage as well.
By following these steps, you will create a delicious dough that’s ready to be shaped into cookies. The next phases of the recipe will involve portioning the dough and baking the cookies to golden perfection. Stay tuned for the continuation of this delightful baking adventure!

Incorporating Chocolate Chips and Marshmallows
To elevate your Crunchy Delight Rice Krispie Cookies, the addition of chocolate chips and marshmallows is essential. The key to evenly distributing these add-ins is simple: mix them in at the right moment. After combining the butter, sugars, and wet ingredients, gradually fold in the dry ingredients, ensuring that the cookie dough remains cohesive. Once the dry ingredients are just combined, gently fold in the chocolate chips and marshmallows. This technique helps prevent them from sinking to the bottom of the cookies as they bake.
To ensure an even distribution, consider using a spatula or your hands to gently knead the dough in the bowl. The goal is to achieve a uniform mixture where chocolate chips and marshmallows are scattered throughout without overworking the dough. This way, every bite of your cookie will be a delightful surprise filled with chewy marshmallows and rich chocolate.
Scooping Dough
Uniform cookie size is crucial for even baking and presentation. For this, using the right tools can make all the difference. A standard cookie scoop (also known as a disher) is your best friend here. This tool will help you portion out equal amounts of dough, ensuring that all cookies bake at the same rate. If you don’t have a cookie scoop, a tablespoon can also work; just make sure to level it off for consistency.
When scooping the dough, aim for approximately 1.5 tablespoons per cookie. Place the scooped dough onto a prepared baking sheet lined with parchment paper, leaving enough space between each ball (about 2 inches) to allow for spreading during baking. If you want to make the cookies even more visually appealing, you can press a few extra chocolate chips or mini marshmallows on top of each dough ball before baking.
Baking Process
Understanding the baking process is essential for achieving the perfect cookie. Preheat your oven to 350°F (175°C) and keep a close eye on your cookies as they bake. Generally, the cookies will need about 10-12 minutes in the oven. However, every oven is different.
When baking, look for specific signs to determine when the cookies are done. The edges should appear golden brown while the centers remain slightly soft. If the cookies seem too undercooked in the center, allow them to bake for an additional minute or two, but be cautious not to overbake, as this will lead to a dry texture.
Once they’re out of the oven, the cookies will continue to cook on the baking sheet due to residual heat, so it’s perfectly fine if they look a tad underbaked when you first take them out.
Cooling the Cookies
The cooling process plays a significant role in the final texture of your cookies. After removing the cookies from the oven, let them cool on the baking sheet for about 5 minutes. This allows them to set, making them easier to transfer without falling apart.
Once they’ve cooled slightly, move them to a wire rack to cool completely. This step is crucial for achieving the desired crunchy exterior while keeping the center chewy. If you skip this step and allow them to cool on the baking sheet, the cookies might become soggy due to steam trapped beneath them.
Baking Tips and Techniques
Essential Baking Tools for Cookie-Making
Baking cookies can be a straightforward task if you have the right tools. Here are some essential baking tools you should have on hand:
– Mixing Bowls: A set of mixing bowls in various sizes will help you combine your ingredients without mess.
– Measuring Cups and Spoons: Accurate measurements are key in baking; invest in a good set of measuring tools.
– Silicone Baking Mat or Parchment Paper: These will prevent sticking and promote even baking.
– Cookie Scoop: As mentioned earlier, a scoop ensures uniform cookie sizes.
– Cooling Rack: Essential for proper cooling and achieving the right texture.
Achieving the Perfect Cookie Texture
To achieve cookies with crunchy edges and chewy centers, the ingredients and baking technique must be balanced. Here are tips:
– Butter Temperature: Use room temperature butter for a creamy texture that helps incorporate air for fluffiness.
– Baking Time: Keep a close eye on your cookies; underbaking slightly will yield a soft center, while baking them until golden will give you crunchier edges.
– Oven Temperature: Make sure your oven is properly calibrated. An oven thermometer can help ensure the accuracy of your baking temperature.
Adjusting Baking Time for Different Oven Types
Different ovens can affect baking times and results. If you’re using a conventional oven, follow the suggested baking time. However, if you have a convection oven, you may need to reduce the baking time by 2-3 minutes, as convection ovens cook food more evenly and efficiently. Always check for doneness a couple of minutes early to avoid overbaking.
Storing Cookies for Freshness and Longevity
To keep your Crunchy Delight Rice Krispie Cookies fresh, store them in an airtight container at room temperature. They typically stay fresh for about a week. For longer storage, consider freezing the cookies. Place them in a freezer-safe container or bag, separating layers with parchment paper to prevent sticking. They can be frozen for up to three months. When ready to enjoy, simply thaw them at room temperature or warm them in the oven for a few minutes to regain their delightful texture.
Nutritional Analysis
When indulging in homemade cookies, it’s important to be aware of their nutritional content. On average, each Crunchy Delight Rice Krispie Cookie contains approximately 150 calories, with 7 grams of fat, 20 grams of carbohydrates, and 2 grams of protein. The cookies also provide a small amount of vitamins and minerals, thanks to the oats and chocolate.
For those with dietary restrictions, there are several ways to adapt this recipe:
– Gluten-Free Option: Substitute regular flour with a gluten-free flour blend. Ensure that all other ingredients (like oats and chocolate) are certified gluten-free.
– Vegan Alternative: Replace butter with a plant-based alternative and use flax eggs (1 tablespoon of ground flaxseed mixed with 2.5 tablespoons of water) instead of eggs.
By making these adjustments, you can enjoy the deliciousness of these cookies while accommodating various dietary needs.
Creative Variations
The beauty of the Crunchy Delight Rice Krispie Cookies is their versatility. Here are some suggestions to customize your cookie recipe further:
– Different Add-Ins: Experiment with different types of chocolate (dark, milk, or white) or mix in nuts, dried fruits, or even crushed candies for seasonal flair.
– Seasonal Variations: Incorporate spices like cinnamon or nutmeg during the fall, or add peppermint extract for a winter twist. You can also try incorporating pumpkin puree for a unique flavor during the autumn months.
– Dessert Bar or Ice Cream Sandwich Base: These cookies can also serve as a base for dessert bars or ice cream sandwiches. Simply bake in a 9×13-inch pan to create a cookie bar; slice into squares after cooling. Alternatively, sandwich a scoop of your favorite ice cream between two cookies for a delightful treat.
Conclusion
The Crunchy Delight Rice Krispie Cookies are not only a delightful addition to any dessert table but also a testament to the joy of baking and sharing homemade treats with family and friends. The combination of the crunchy rice cereal, chewy marshmallows, and rich chocolate makes for an irresistible cookie that everyone will love.
As you experiment with this recipe, remember that the kitchen is a place for creativity. Don’t hesitate to customize the ingredients to suit your taste or dietary needs. Whether you’re baking for a special occasion or just to satisfy a sweet craving, these cookies are sure to bring happiness to your home. So gather your ingredients, preheat your oven, and let the baking adventure begin!


